


4
INSTALLATION REQUIREMENTS
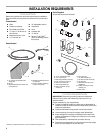
Tools and Parts
Gather the required tools and parts before starting installation.
Read and follow the instructions provided with any tools listed
here.
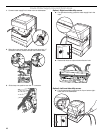
Tools Needed
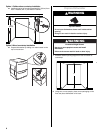
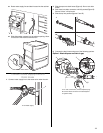
Parts Needed
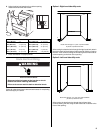
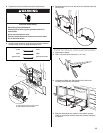
Parts Supplied
Check that all parts are included.
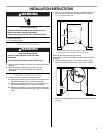
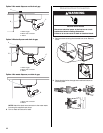
Location Requirements
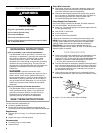
IMPORTANT: Observe all governing codes and ordinances.
Failure to meet codes and ordinances could lead to fire or
electrical shock.
Proper installation is your responsibility.
■ Contact a qualified installer to ensure that the dishwasher is
installed to meet all electrical and plumbing national and local
codes and ordinances.
■ Install the dishwasher as specified in these instructions.
■ Have everything you need to properly install dishwasher.
■ Avoid damage from freezing to dishwasher and water lines
leading to dishwasher. Damage from freezing is not covered
by the warranty.
■ This dishwasher is manufactured for indoor use only.
■ Install and level dishwasher on a floor that will hold the weight,
and in an area suitable for its size and use.
■ Pliers
■ Phillips screwdriver
■ Flat-blade screwdriver
■ ³⁄₁₆" and ¼" nut drivers or
hex sockets
■ Measuring tape or ruler
■ 1½" hole saw bit
■ 10" adjustable wrench
■ Utility knife
■ Level
■ Cordless drill
■ ¹⁄₈" drill bit
■ Security T-20 TORX
®†
driver (if installing custom
front panel)
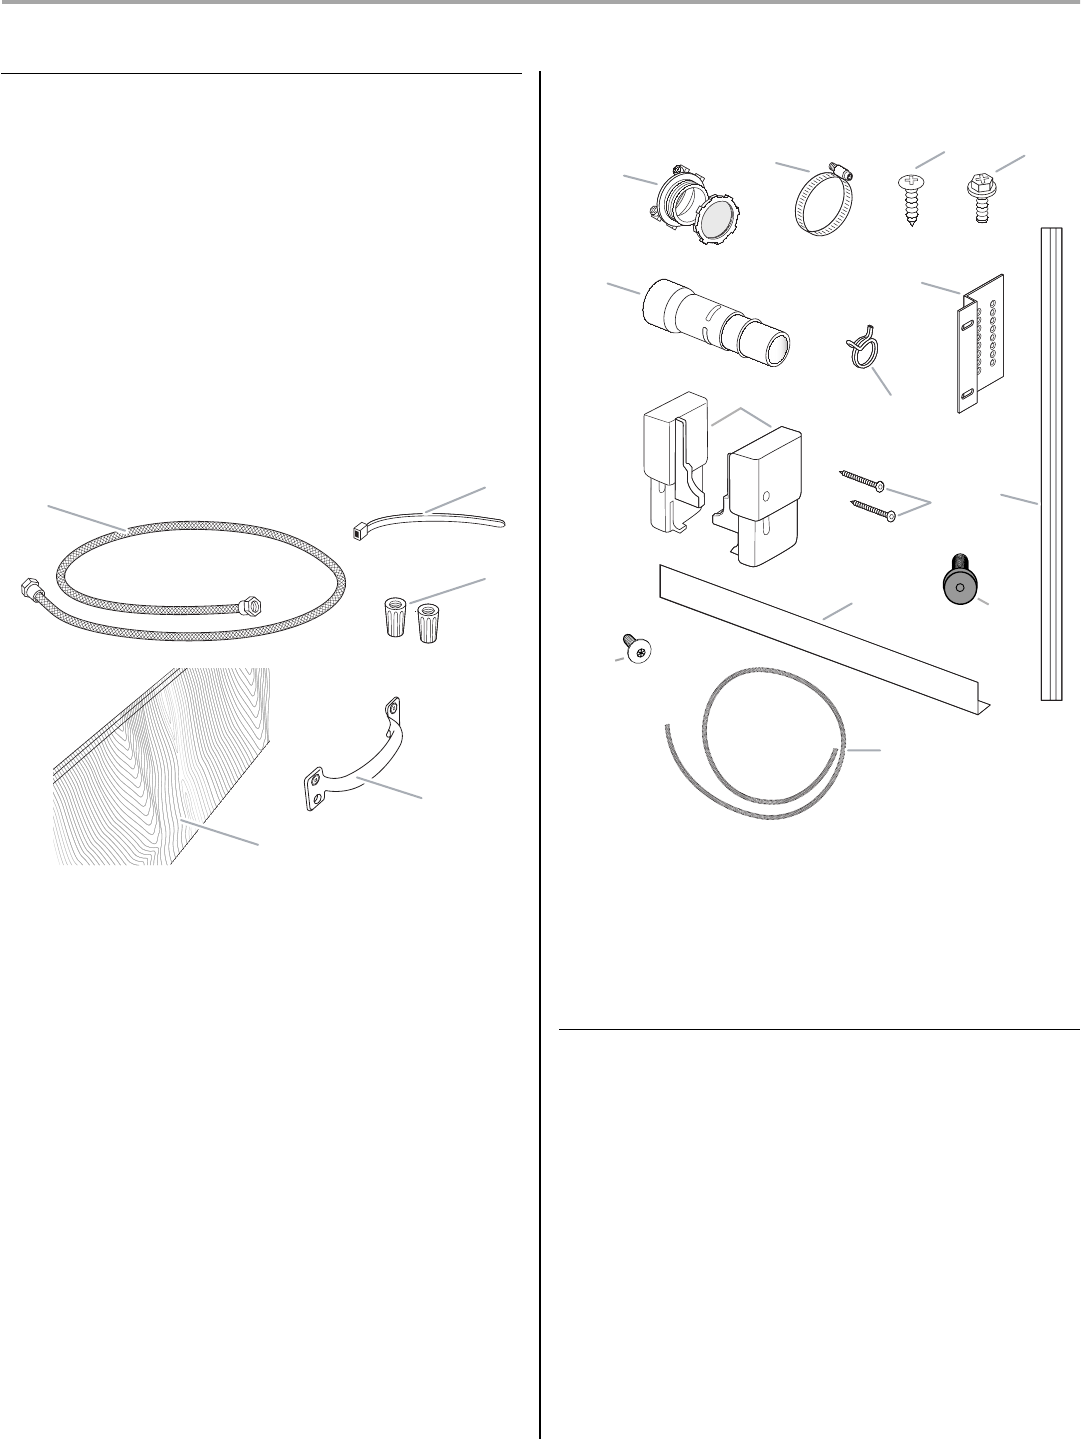
A. 72" (182.9 cm) flexible water
supply line
B.Zip tie
C. Appropriate sized UL-listed wire
connectors (2)
D.Handle (if installing custom
front panel)
E.Custom panel (if installing
custom front panel)
A
B
C
D
E
†®TORX is a registered trademark of Acument Intellectual Properties, LLC
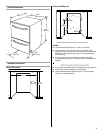
A.
³⁄₄
" UL-listed strain relief
B.1.25" hose clamp
C.Mounting bracket screws (8)
D.Unit mounting screws (4)
E.Drain hose connector
F. Mounting brackets (4)
G.Drain connector spring
clamps (2)
H. Trim strips (2)
I.Toe kick brackets (2)
J. Toe kick bracket screws (2)
K. Toe kick trim
L. Panel fasteners (on some
models) (2)
M.TORX
®†
screws (on some
models) (10)
N. Drain hose
A
B
C
D
E
F
H
G
I
J
K
L
M
N