


23
Replacing the Oven LightReplacing the Oven Light
Replacing the Oven LightReplacing the Oven Light
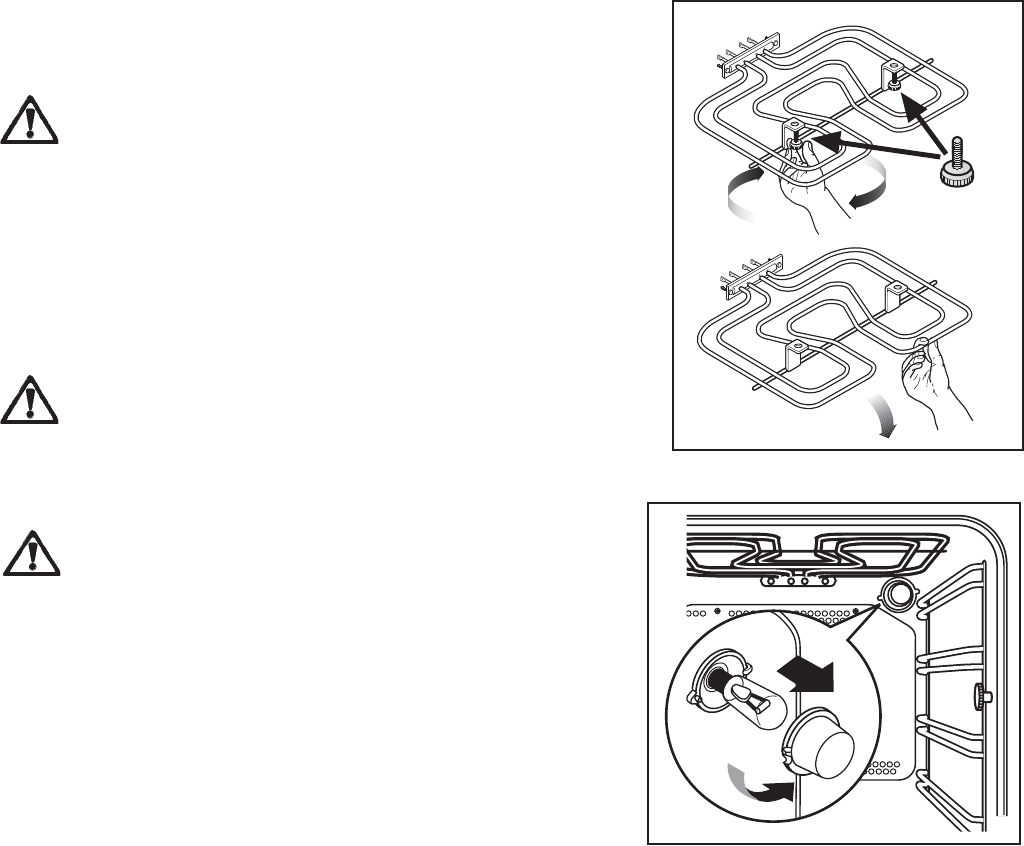
Replacing the Oven Light
Disconnect the appliance from the powerDisconnect the appliance from the power
Disconnect the appliance from the powerDisconnect the appliance from the power
Disconnect the appliance from the power
supplsuppl
supplsuppl
suppl
yy
yy
y
..
..
.
If the oven bulb needs replacing, it must comply with the
following specifications:
- Wattage power: 15/25 W,
- Voltage: 230 V (50 Hz),
- Resistant to temperatures of 300°C,
- Connection type: E14.
These bulbs are available from your local Service Force
Centre.
To replace the faulty bulb:
1.
Ensure the oven is disconnected from theEnsure the oven is disconnected from the
Ensure the oven is disconnected from theEnsure the oven is disconnected from the
Ensure the oven is disconnected from the
electrical supplelectrical suppl
electrical supplelectrical suppl
electrical suppl
yy
yy
y
..
..
.
2. Turn the glass cover anticlockwise.
3. Remove the faulty bulb and replace with the new one.
4. Refit the glass cover.
5. Reconnect to the electrical supply.
)
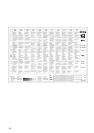
The Hinged GrillThe Hinged Grill
The Hinged GrillThe Hinged Grill
The Hinged Grill
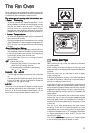
This model is fitted with a hinged grill element, to enable
you to clean the roof of the oven easily.
Before proceeding ensure the oven is coolBefore proceeding ensure the oven is cool
Before proceeding ensure the oven is coolBefore proceeding ensure the oven is cool
Before proceeding ensure the oven is cool
and is isolated frand is isolated fr
and is isolated frand is isolated fr
and is isolated fr
om the electricity supplom the electricity suppl
om the electricity supplom the electricity suppl
om the electricity suppl
yy
yy
y
..
..
.
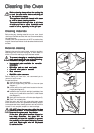
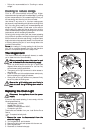
1 Undo the screws which hold the grill in place (see
diagram). When doing this operation for the first time,
we recommend using a screwdriver.
2 Then gently pull the grill downward to allow access to
the oven roof.
3 Clean the oven roof with a suitable cleaner and wipe dry
before replacing the hinged grill element.
4 Gently push up the grill element into place and firmly
screw into place the holding nuts.
Ensure the grill holding nuts are firmly inEnsure the grill holding nuts are firmly in
Ensure the grill holding nuts are firmly inEnsure the grill holding nuts are firmly in
Ensure the grill holding nuts are firmly in
place to avoid the grill falling down when inplace to avoid the grill falling down when in
place to avoid the grill falling down when inplace to avoid the grill falling down when in
place to avoid the grill falling down when in
use.use.
use.use.
use.
• Follow the recommendations in “Cooking to reduce
soilage”.
Cooking to reduce soilageCooking to reduce soilage
Cooking to reduce soilageCooking to reduce soilage
Cooking to reduce soilage
Cook at the recommended temperatures. Higher
temperatures during roasting will increase soilage. Try cooking
at lower temperatures for an increased length of time, you
will save energy and often the joint is more tender.
Use minimal, if any, extra oil or fat when roasting meat;
potatoes only require brushing with fat before cooking. Extra
fat in the oven during roasting will increase splashing and
soilage. It is NOT necessary to add water to the meat tin
when roasting. The water and the fat juices from the joint
create excessive splattering during cooking, even at normal
temperatures, as well as causing condensation.
Covering joints during cooking will also prevent splashing
onto the interior surfaces; removing the covering for the last
20-30 minutes will allow extra browning, if required. Some
large joints and turkeys especially benefit from this method
of cooking, allowing the joint to cook through before the
outside is overbrowned.
Do useDo use
Do useDo use
Do use the roasting tin. During roasting, the fat from the
joint will be contained beneath the trivet and therefore
prevent it from splattering onto the 'Catalytic' liner.