


7
2.3 Fill water tank
Only use fresh, cold water. Never fill in milk, mineral water
or other liquids.
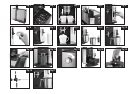
Ⅲ Remove the water tank and rinse it with cold tap water
thoroughly (Fig. 4).
Ⅲ Then fill the water tank and reinstall it. Make sure to install the
tank properly, it must engage audibly.
2.4 Fill coffee beans
To ensure that your machine will work perfectly for a long
time and to avoid damage, please note that the grinding gear
of your JURA coffee machine is not suitable for coffee beans
which were treated, during or after roasting, with additives
(e.g. sugar). Such coffee blends may damage the grinding
gear. Any repair costs resulting from the use of such blends
are not covered by warranty.
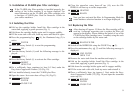
Ⅲ Open the bean tank cover (12) and remove the aroma preser-
vation cover (13).
Ⅲ Remove any dirt or foreign matter from the bean tank.
Ⅲ Fill coffee beans in the bean tank and close the cover.
2.5 Adjusting the grinding gear
You can adjust the grinding gear to the roast of your coffee. We
recommend
a fine grinding degree Ǟ for bright roasts (the smaller the dots,
the finer the grinding)
a coarse degree Ǟ for dark roasts (the larger the dots, the
coarser the grinding)
The grinding degree may only be adjusted while the grinding
gear is running.
Ⅲ Open the bean tank cover (12) and remove the aroma preser-
vation cover (13).
Ⅲ To adjust the grinding degree, turn the Rotary Switch (Fig. 2) to
the required position.
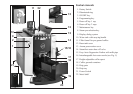
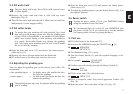
2.6 Power switch
Actuate the power switch (21) on your IMPRESSA before
using the machine for the first time.
We recommend that you switch off your IMPRESSA with
the power switch (21) if you intend not to use the machine
for longer periods of time (e.g.during holidays)
3. First use
Ⅲ Fill coffee beans in the bean tank (12).
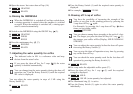
Ⅲ Switch on the IMPRESSA using the ON/OFF key (3).
Ⅲ SPRACHE
DEUTSCH
Ⅲ The illuminated ring (2) is active.
Ⅲ Turn the Rotary Switch (1) until the required language is dis-
played.
Ⅲ For example LANGUAGE
ENGLISH
Ⅲ Confirm your selection by pressing the Rotary Switch (1).
Ⅲ FILL
WATER
Ⅲ Fill the water tank (10) with fresh water.
Ⅲ OPEN TAP
Ⅲ Place a receptacle under Easy-Auto-Cappuccino Frother (15)
(Fig. 10).
Ⅲ Open the steam / hot water draw-off tap (14) (Fig. 13).
E