8
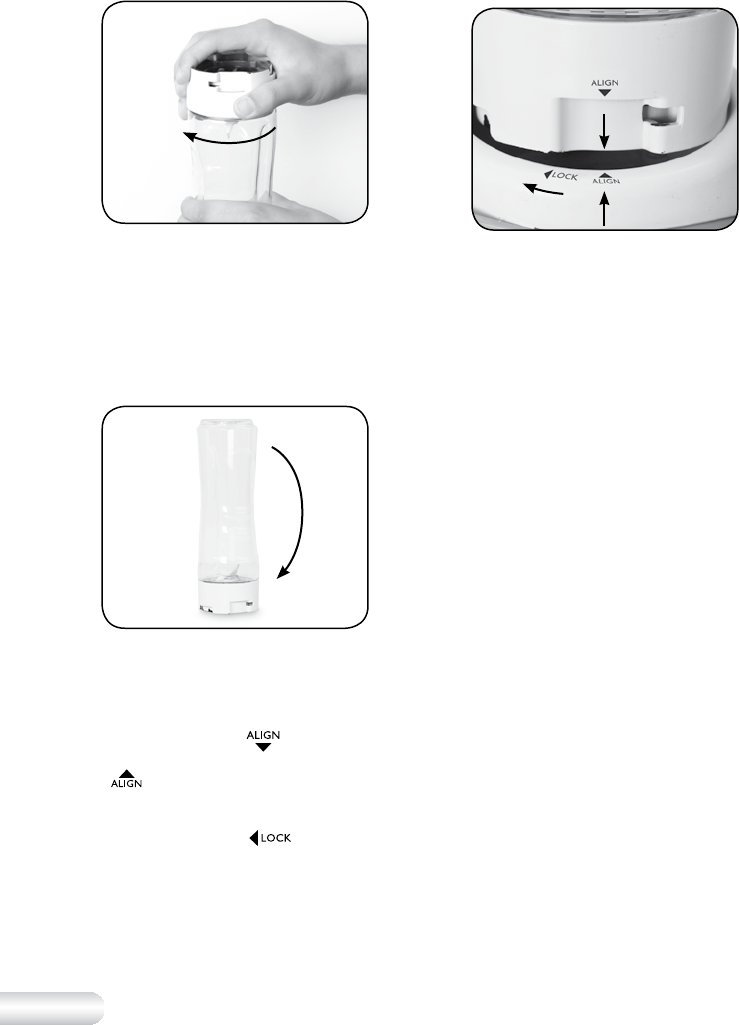
Fig. 2
5. With the ingredients inside and the
removable blade holder screwed
on, flip the bottle so that the
removable blade holder is facing
down (See Fig. 3). The blender is
now ready to be assembled onto
the motor base.
Fig. 3
6. With one hand on the motor
base and the other hand holding
the assembled bottle, place the
assembled bottle inside the motor
base. Align the “
” symbol on
the removable blade holder with
“
” symbol on the motor base
(See Fig. 4). Once aligned, push
down and turn the bottle in the
direction of the “
” symbol on
the motor base. Make sure that
the bottle is securely locked inside
the motor base.
Fig. 4
7. Plug the power cord into a 230V
or 240V power outlet and switch
on at the power point.
8. Press down onto the
‘PULSE’/‘BLITZ’ button to start
blending. Do not blend for more
than 30 seconds at a time.
To stop blending at any time,
discontinue pressing down on the
‘PULSE’/‘BLITZ’ button.
9. To remove the assembled bottle
from the motor base, turn the
assembled bottle anti-clockwise
and pull it away from the
motor base.
10. With the ingredients now blended
and the removable blade holder
screwed on, flip the bottle so that
the removable blade holder is
facing up (See Fig. 5).
Using Your Kambrook Blender continued


