


important Safety instructions
GROUNDING INSTRUCTIONS
See the INSTALLATION INSTRUCTIONS packaged with this range for complete installation and grounding instructions.
For personal safety, the range must be properly grounded. For maximum safety, the power cord must be plugged into an electrical
outlet that is correctly polarized and properly grounded.
Important Safety Notice
The California Safe Drinking Water and Toxic Enforcement Act requires the Governor of California to publish a list of substances
known to the state to cause cancer, birth defects or other reproductive harm, and requires businesses to warn customers of
potential exposure to such substances.
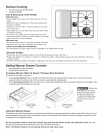
Conversion to Liquefied Petroleum Gas (or L.P. Gas)
The natural gas range is designed to allow for conversion to
Liquefied Petroleum (L.P.) Gas.
If L.P. conversion is needed, contact 1-800-4-MY-HOME® for
assistance. The L.P. Conversion Kit is provided with this range
and is located on the left lower REAR (back side) panel of the
range. Before installing the kit be sure to follow the L.P.
installation Instructions carefully.
Personal injury or death from electrical
shock may occur if the range is not installed by a
qualified installer or electrician.
Any additions, changes or conversions
required in order for this appliance to satisfactorily meet
the application needs must be made by Sears Service.
Before Using Your Range
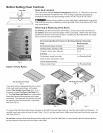
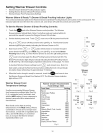
Assembly of Burner Heads, Caps & Grates
Your range is shipped with the Burner Heads and Burner Caps in the correct locations. Packing material is located between .....
the Burner Heads and the cooktop.
1. Be sure to follow the installation instructions before
installing and using your new range.
2. Remove all packing tape from cooktop area. Remove all
Burner Caps and Burner Heads.
3. Discard all packing material located under Burner Heads.
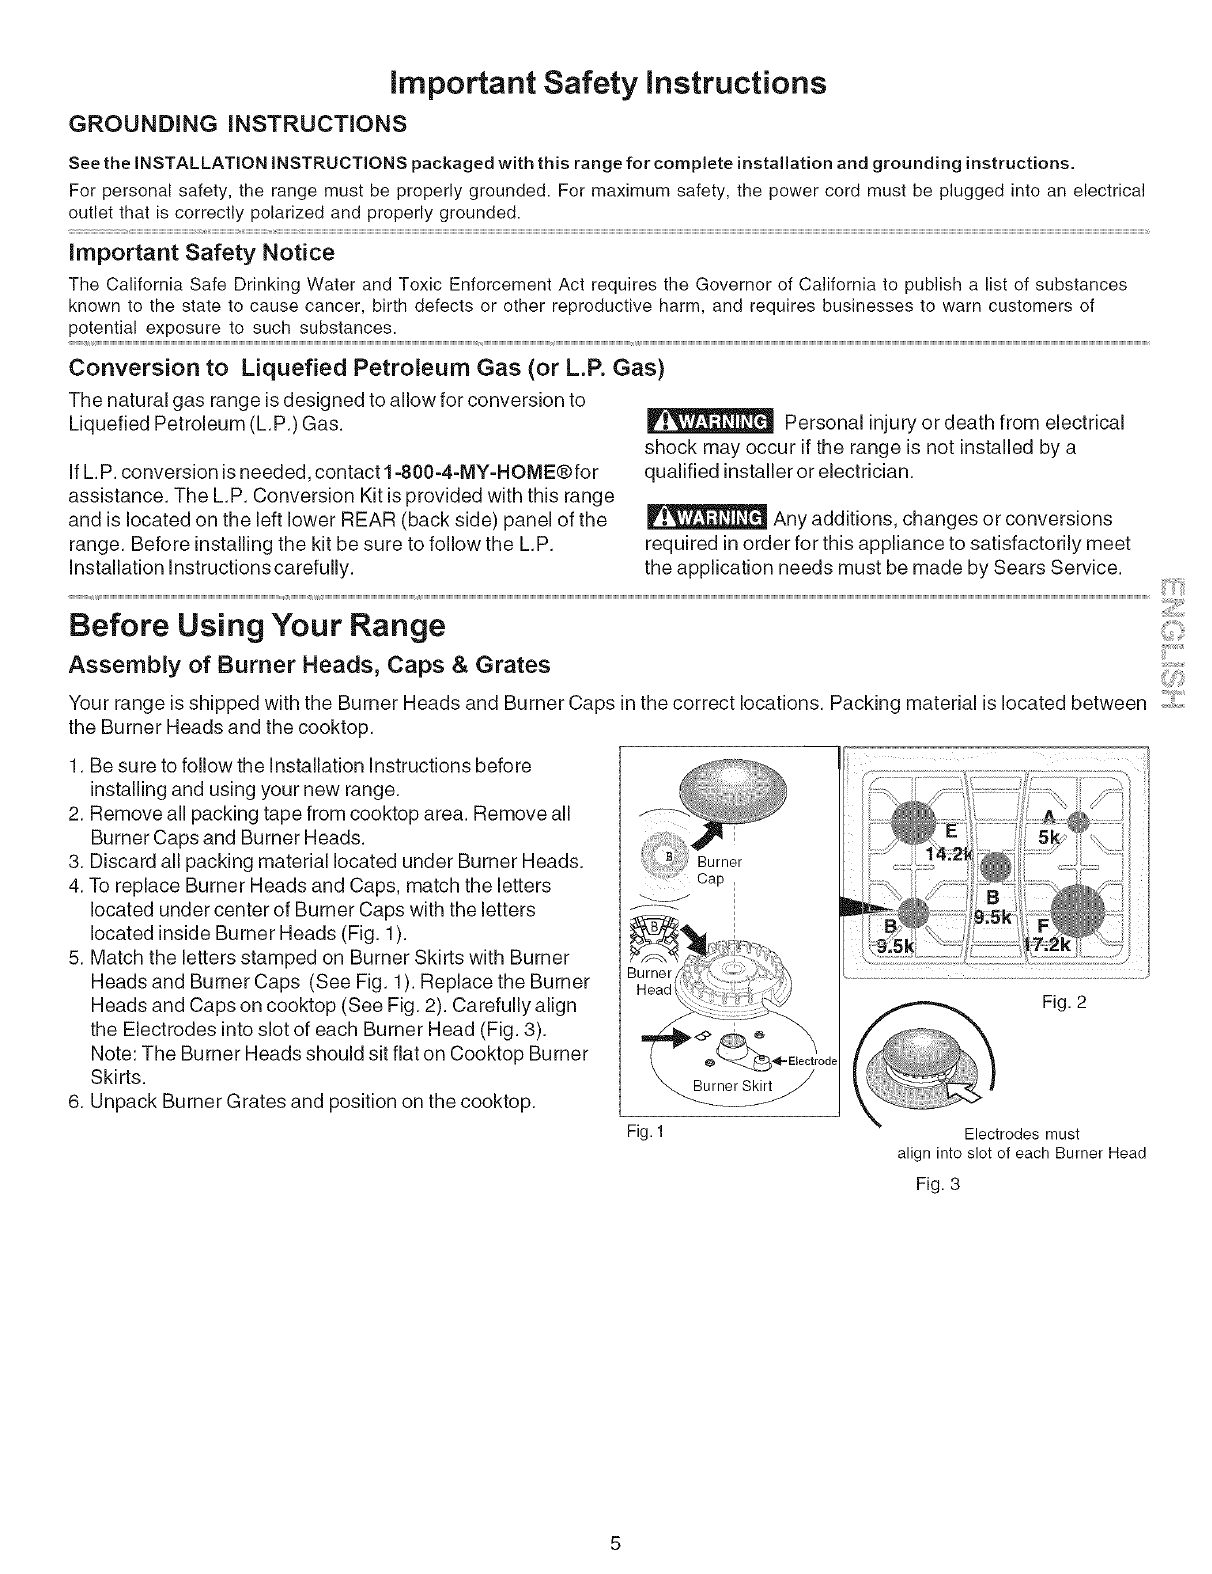
4. To replace Burner Heads and Caps, match the letters
located under center of Burner Caps with the letters
located inside Burner Heads (Fig. 1).
5. Match the letters stamped on Burner Skirts with Burner
Heads and Burner Caps (See Fig. 1). Replace the Burner
Heads and Caps on cooktop (See Fig. 2). Carefully align
the Electrodes into slot of each Burner Head (Fig. 3).
Note: The Burner Heads should sit flat on Cooktop Burner
Skirts.
6. Unpack Burner Grates and position on the cooktop.
Fig. 1
Fig. 2
Electrodes must
align into slot of each Burner Head
Fig. 3