


General Care & Cleaning
FEATURE OVERVIEW
Cleaning Recommendations for Ceramic Glass Cooktops (cont'd)
Care & Cleaning of Stainless Steel
Removing & Replacing Oven Door
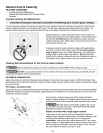
Do not use the following on the ceramic glass cooktop:
Do not use abrasive cleaners and scouring pads, such as metal and
some nylon pads. They may scratch the cooktop, making it more
difficult to clean.
Do not use harsh cleaners, such as chlorine bleach, ammonia or oven
cleaners, as they may etch or discolor the cooktop.
Do not use dirty sponges, cloths or paper towels, as they can leave soil
or lint on the cooktop which can burn and cause discoloration.
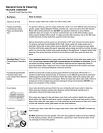
Care and Cleaning of Stainless Steel (Stainless Steel models only)
Some models are equipped with stainless steel exterior parts. Special care and cleaning _
are required for maintaining the appearance of stainless parts. Please refer to the table _f>
provided at the beginning of the General Care & Cleaning section in this Use & Care
Manual.
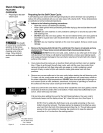
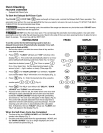
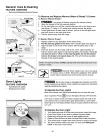
Removing and Replacing the Oven Door
The door isheavy. For safe, temporary storage, lay the door flat with the
inside of the door facing down.
To Remove Oven Door:
1. Open the door.
2. Remove screws located on the inside of the oven door near the hinges A (one on
each side.)
3. Close the door to the quarter-open position. Grasp the door firmly on both sides and
lift up and off the hinges.
4. To clean oven door, follow the instructions provided in the General Care & Cleaning
table.
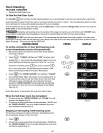
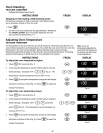
To Replace Oven Door:
1. Be sure the hinge arms are inthe quarter-open position. Be careful if pulling the
hinges open by hand. The hinges may snap back against the oven frame and could
pinch fingers.
2. Hold the door at the sides near the top. Insert the hinge arms into slots at the bottom
of the door.
3. Hinge arms must go into the range slots evenly. The hinge arms should be inserted
into the bottom corners of the door as far as they can go.
4. Replace the door mounting screws (See A in illustration).
5. If the door is not in line with the oven frame, remove it and repeat the above steps.
33