


13
3. Flush the water system by dispensing and discarding 2 to
3 gal. (8 to 12 L) of water. Flushing the system will take
approximately 6 to 7 minutes and will help clear air from the
line. Additional flushing may be required in some households.
NOTE: As air is cleared from the system, water may spurt out
of the dispenser.
4. Inspect the filter system for water leaks. If you see water
leaks, see the “Troubleshooting” section.
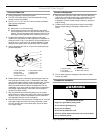
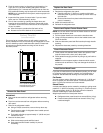
5. Turn on the ice maker by opening the freezer door and
lowering the wire shutoff arm as shown.
Please refer to the
“Ice Maker” section for further instructions on the operation
of your ice maker.
■ Allow 24 hours to produce the first batch of ice.
■ Discard the first three batches of ice produced.
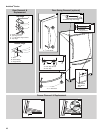
Factory Trim Kit
(on some models)
There may be an occasion when you will need to remove the
factory-installed trim kit, such as moving the refrigerator to a new
home or installing custom-made decorator panels. Please read
all instructions carefully before removing the trim kit and
decorator panels.
Remove the Door Panel
IMPORTANT:
■ Door must be removed from refrigerator before removing
handle.
■ Top trim must be removed from refrigerator before removing
door panel.
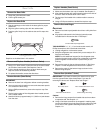
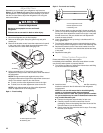
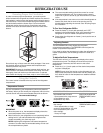
1. Remove the refrigerator handle:
■ Using a Phillips screwdriver, remove the top door cap.
■ Tap the bottom edge of refrigerator door handle upward
with a rubber mallet.
■ The handle will slide up approximately ³⁄₄" (19.05 mm) and
release from door.
2. Remove the door panel:
■ Slide out decorator panel and filler board.
■ Store panel and filler board carefully to prevent
scratching.
Replace the Door Panel
1. Replace the refrigerator door panel:
■ Carefully slide the ¹⁄₄" (6.35 mm), maximum thickness,
decorator panel in grooves provided by bottom door cap
and side trim.
■ Slide the filler board into place behind the decorator
panel, if necessary.
2. Attach the handle and trim.
3. Reinstall the refrigerator door.
Remove and Replace Freezer Drawer Panel
NOTE: You do not need to remove the freezer drawer to remove
or replace the decorator panel.
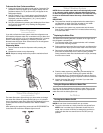
1. Pull the freezer drawer out to access the handle screws.
2. Using a Phillips screwdriver, remove the handle screws and
lift off the handle.
3. Slide the decorator panel and filler board up through handle
opening.
4. Replace the decorator panels by reversing directions.
Care of Decorator Panels
1. Clean panels with stainless steel cleaner and polish or mild
soap and water with a clean, soft, damp cloth.
2. Rinse panels thoroughly and blot dry using a dry, soft cloth or
chamois.
NOTE: Do not use paper towels or cleaners which contain
solvents such as ammonia. They can damage the surface of
the panels.
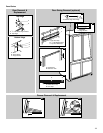
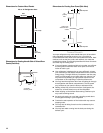
Install Custom Wood Panels
If you plan to install custom wood decorator panels, you will need
to create the panels yourself or consult your cabinetmaker or
carpenter. See dimensional drawings for wood panel inserts.
Flat Panels:
You can create a custom flat panel a maximum of ¹⁄₄" (6.35 mm)
thick to replace your decorator panels. Flat wood panels less
than ¹⁄₄" (6.35 mm) thick are not recommended.
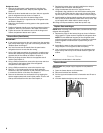
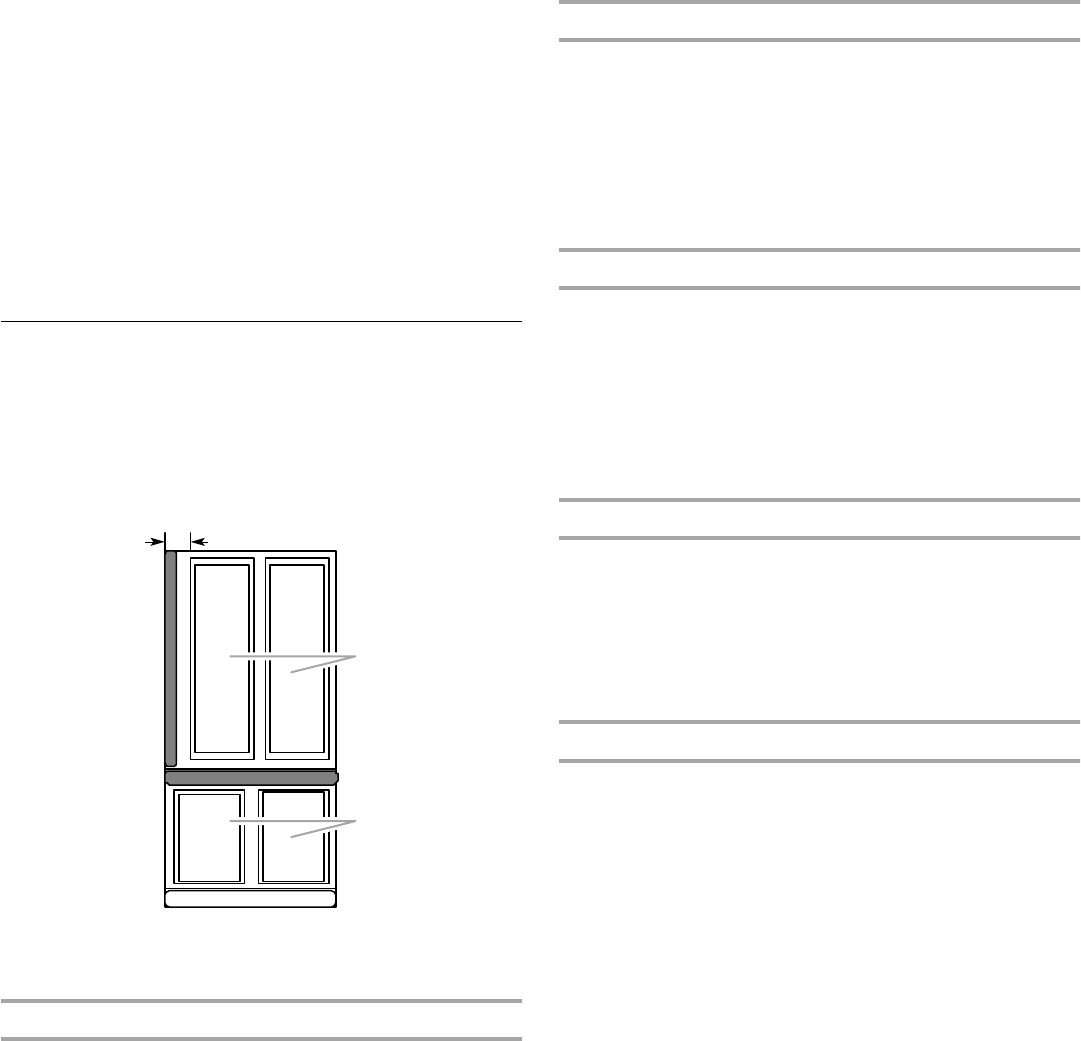
Raised Panels:
A raised panel design can be created by screwing or gluing wood
panels to ¹⁄₄" (6.35 mm) backing or by using ³⁄₄" (19.05 mm) stock
with routed edges. Allow 2¹⁄₂" (6.35 cm) minimum clearance
between raised edge of panel and handle.
Weight requirements for raised panel inserts:
■ Refrigerator door panel should not exceed 30 lbs (14 kg).
■ Freezer drawer panels should not exceed 15 lbs (7 kg)
combined weight.
A.2
¹⁄₂
" (6.35 cm) Clearance
B.Raised decorator panel
C.Raised drawer panel
A
B
C