


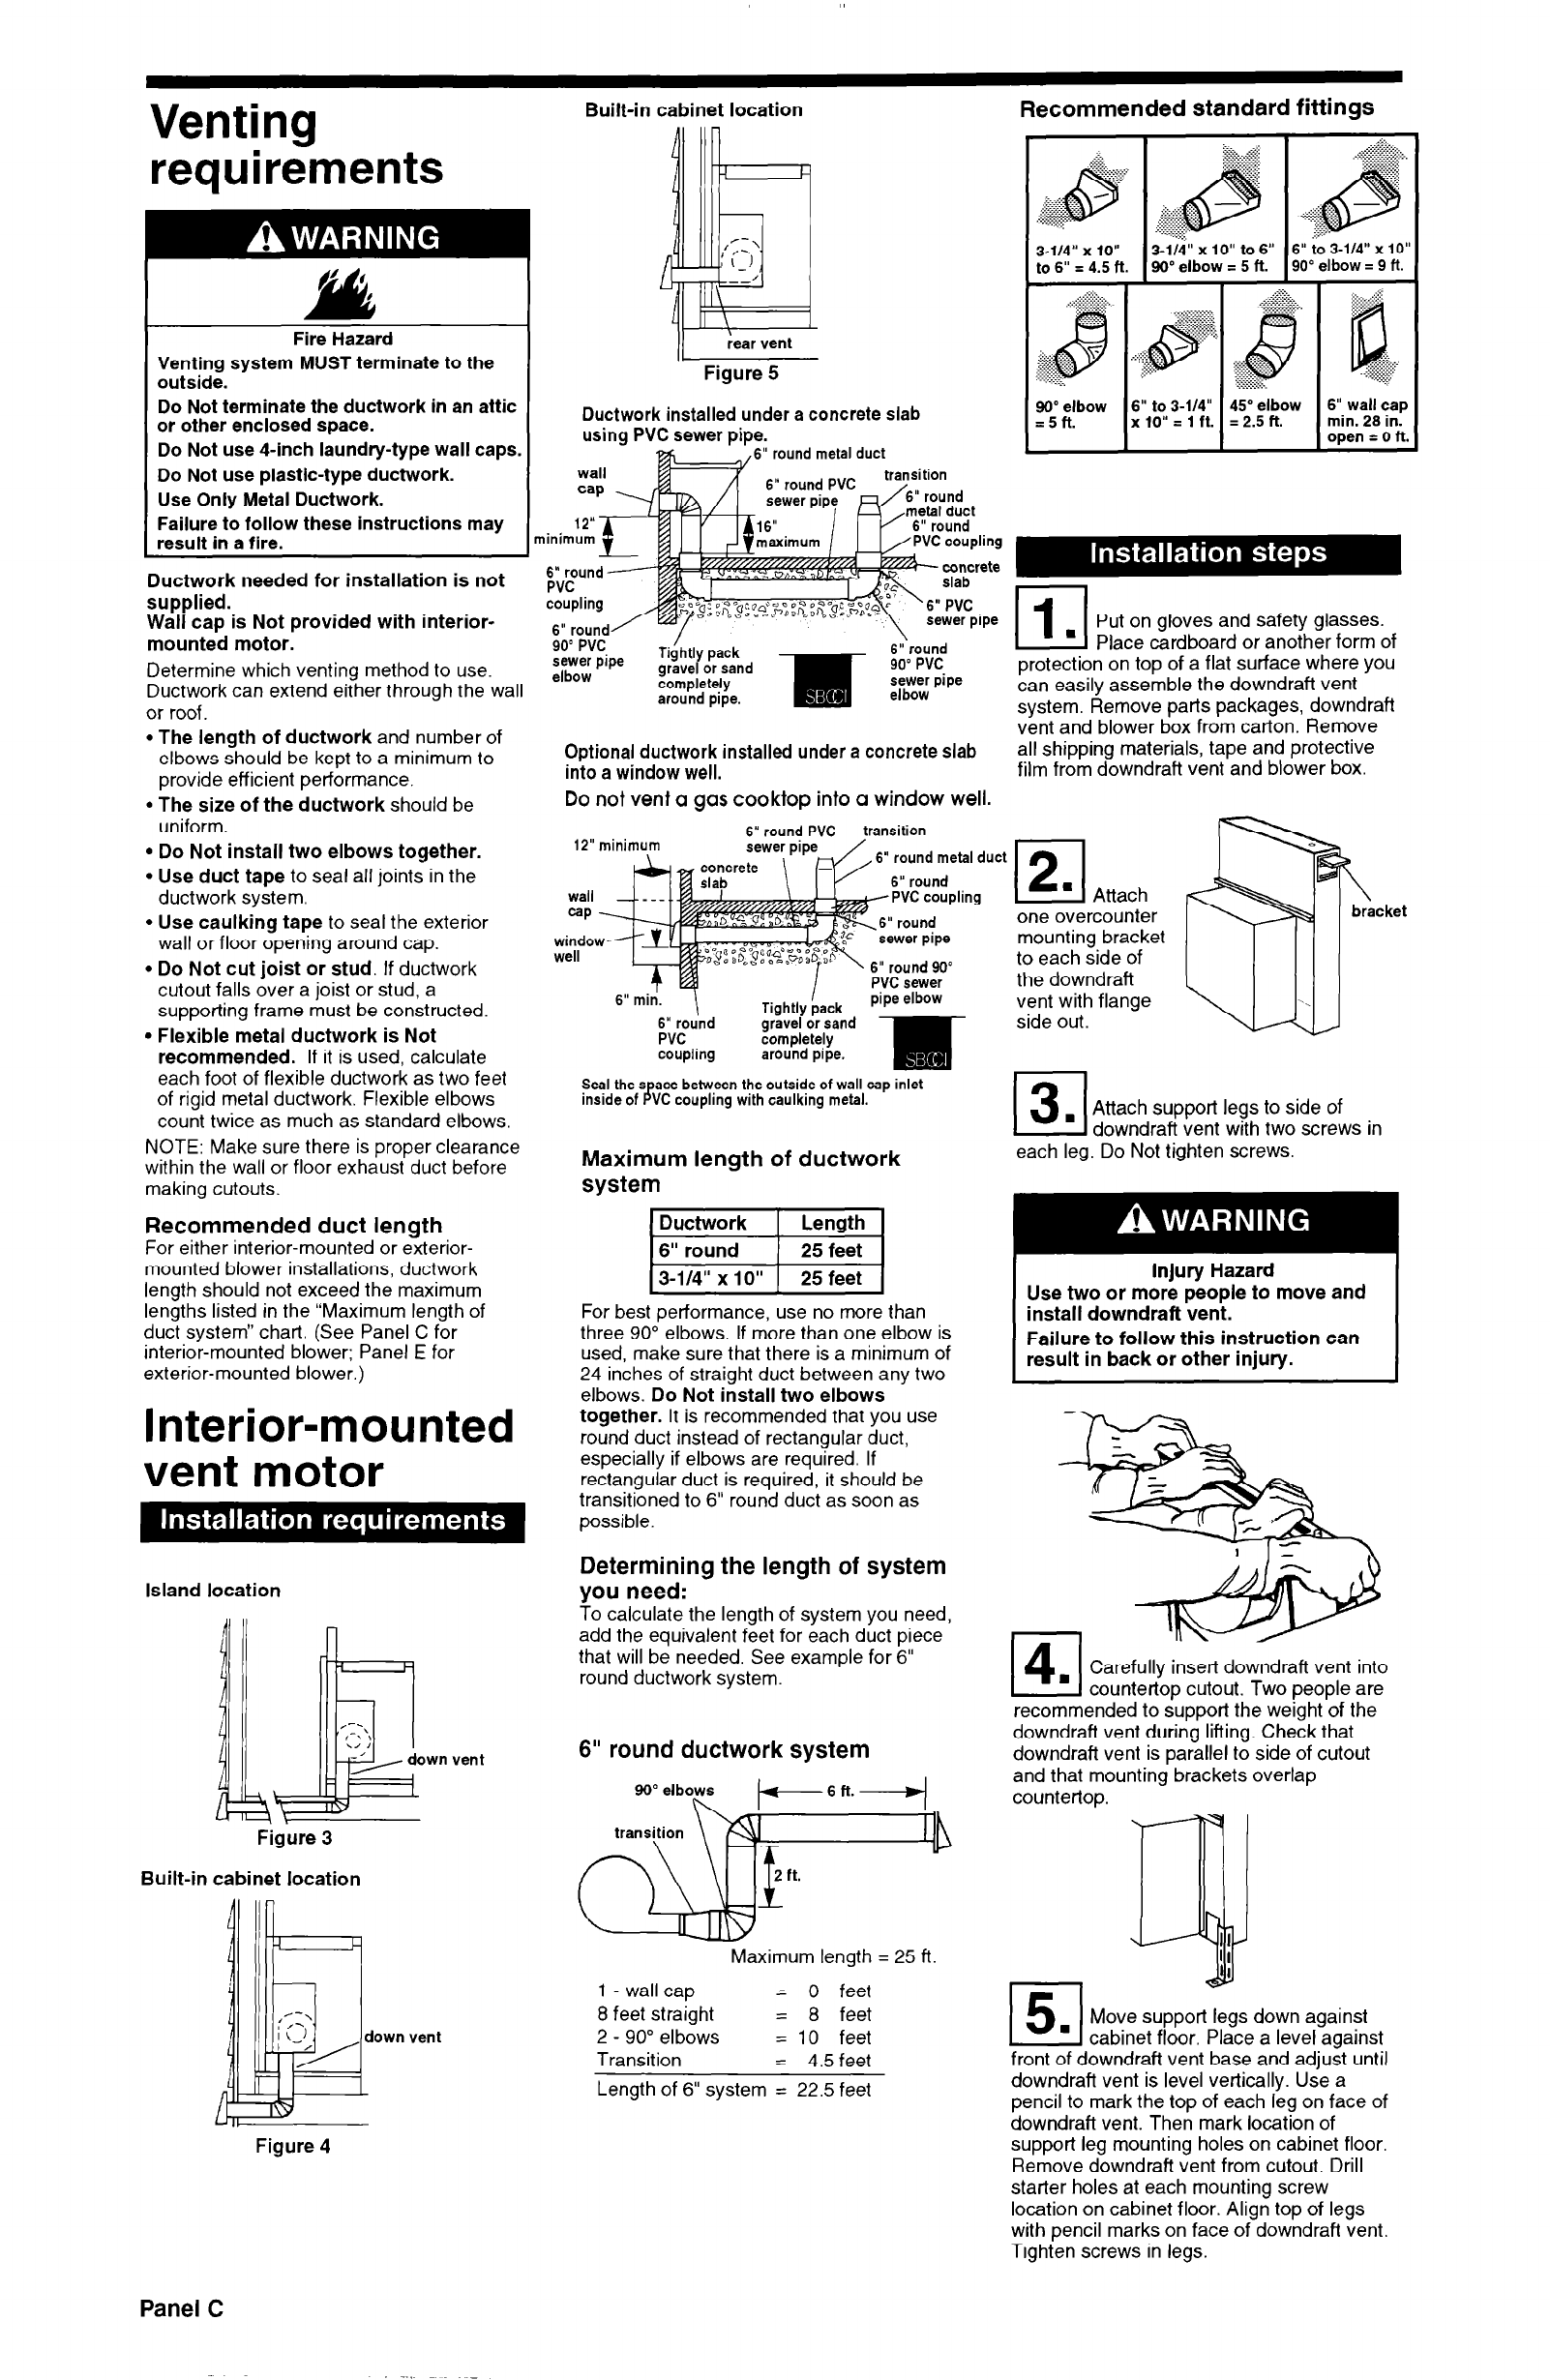
Venting
requirements
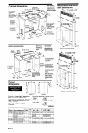
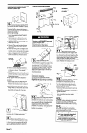
Built-in cabinet location
Recommended standard fittings
3-,,4” x ,o” =II
3.114 x 10” to 6” 6” to 3-114” x IO”
to 6” = 4.5 ft.
90” elbow = 5 ft.
90” elbow = 9 ft.
:.-;-.
. . . . . . . . . . . . . -.
..:.:.:.:.:.
-.-
. . . . . . . . . . . . . . . .
90” elbow
6” to 3.114” 45” elbow
6” wall cap
= 5 ft.
x 10” = 1 ft. = 2.5 ft.
min. 28 in.
open = 0 ft.
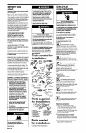
Fire Hazard
Venting system MUST terminate to the
outside.
Do Not terminate the ductwork in an attic
or other enclosed space.
Do Not use 4-inch laundry-type wall caps.
Do Not use plastic-type ductwork.
Use Only Metal Ductwork.
Failure to follow these instructions may
result in a fire.
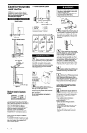
I/ iear vent
Figure 5
Ductwork installed under a concrete slab
using PVC sewer pipe.
6” round metal duct
Ductwork needed for installation is not
supplied.
Wall cap is Not provided with interior-
mounted motor.
Determine which venting method to use.
Ductwork can extend either through the wall
or roof.
l
The length of ductwork and number of
elbows should be kept to a minimum to
provide efficient performance.
l
The size of the ductwork should be
uniform.
l
Do Not install two elbows together.
l
Use duct tape to seal all joints in the
ductwork system.
l
Use caulking tape to seal the exterior
wall or floor opening around cap.
l
Do Not cut joist or stud. If ductwork
cutout falls over a joist or stud, a
supporting frame must be constructed.
. Flexible metal ductwork is Not
recommended. If it is used, calculate
each foot of flexible ductwork as two feet
of rigid metal ductwork. Flexible elbows
count twice as much as standard elbows.
NOTE: Make sure there is proper clearance
within the wall or floor exhaust duct before
making cutouts.
Recommended duct length
For either interior-mounted or exterior-
mounted blower installations, ductwork
length should not exceed the maximum
lengths listed in the “Maximum length of
duct system” chart. (See Panel C for
interior-mounted blower; Panel E for
exterior-mounted blower.)
II
.
Put on gloves and safety glasses.
Place cardboard or another form of
protection on top of a flat surface where you
can easily assemble the downdraft vent
system. Remove parts packages, downdraft
vent and blower box from carton. Remove
all shipping materials, tape and protective
film from downdraft vent and blower box.
90” PVC
sewer pipe
elbow
Tig/htly pack
gravel or sand
completely
around pipe.
6”round
90” PVC
sewer pipe
elbow
Optional ductwork installed under a concrete slab
into a window well.
Do not vent a gas cooktop into a window well.
6” round PVC
transition
6” round metal duct
(2
. Attach
one overcounter
mounting bracket
to each side of
the downdraft
vent with flange
side out.
6” mii.
6” round
PVC
coupling
Tightly back
pipe elbow
gravel or sand
completely
around pipe.
Attach support legs to side of
downdraft vent with two screws in
Seal the s ace between the outside of wall cap inlet
inside of B VC coupling with caulking metal.
each leg. Do Not tighten screws.
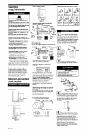
Maximum length of ductwork
system
For best performance, use no more than
three 90” elbows. If more than one elbow is
used, make sure that there is a minimum of
24 inches of straight duct between any two
elbows. Do Not install two elbows
together. It is recommended that you use
round duct instead of rectangular duct,
especially if elbows are required. If
rectangular duct is required, it should be
transitioned to 6” round duct as soon as
possible.
Injury Hazard
Use two or more people to move and
install downdraft vent.
Failure to follow this instruction can
result in back or other injury.
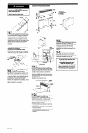
Interior-mounted
vent motor
Determining the length of system
you need:
To calculate the length of system you need,
add the equivalent feet for each duct piece
that will be needed. See example for 6”
round ductwork system.
Island location
I - I
14
. Carefully insert downdraft vent into
countertop cutout. Two people are
recommended to support the weight of the
downdraft vent during lifting. Check that
downdraft vent is parallel to side of cutout
and that mounting brackets overlap
countertop.
wn
vent
6” round ductwork system
Maximum length = 25 ft.
1 - wall
cap
= 0 feet
8 feet straight = 8 feet
2 - 90” elbows = 10 feet
Transition
= 4.5 feet
Figure 3
Built-in cabinet location
15)
’
Move support legs down against
cabinet floor. Place a level against
front of downdraft vent base and adjust until
downdraft vent is level vertically. Use a
pencil to mark the top of each leg on face of
downdraft vent. Then mark location of
support leg mounting holes on cabinet floor.
Remove downdraft vent from cutout. Drill
starter holes at each mounting screw
location on cabinet floor. Align top of legs
with pencil marks on face of downdraft vent.
Tighten screws in legs.
Length of 6” system = 22.5 feet
Figure 4
Panel C