10
OPERATING THE COFFEE MAKER
4
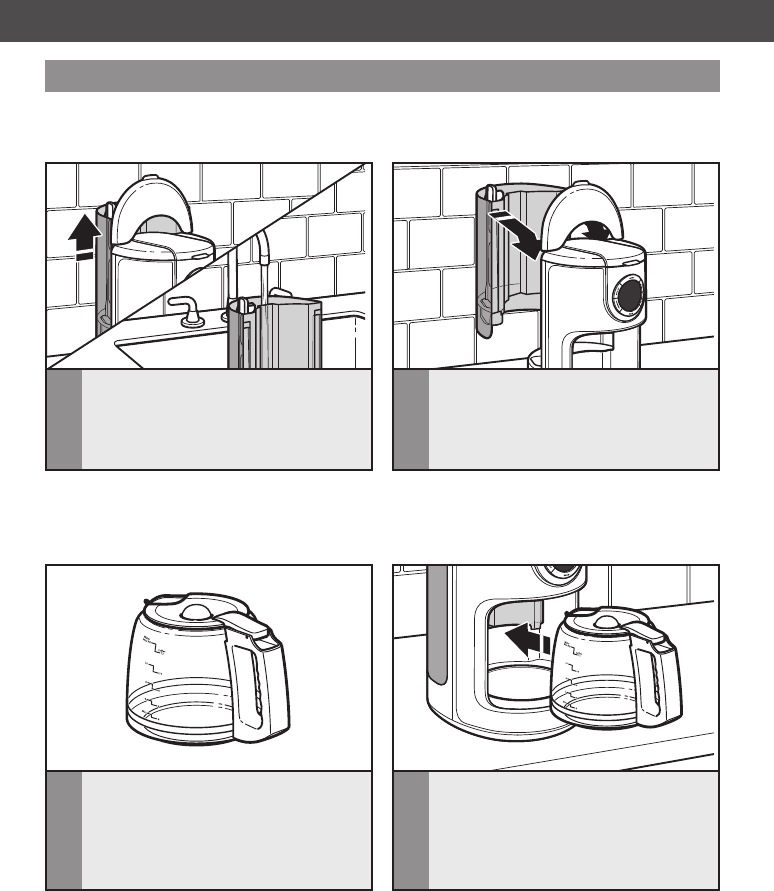
Place the carafe in the Coffee Maker.
Make sure the lid is securely in position
and the bottom of the carafe is fully
seated, or the Pause and pour feature
may not engage, causing water and
coffee to overflow the brew basket.
3
On the carafe: The right side of the scale
(Coffee) is a measurement of coffee
volume. The left side of the scale (Water)
indicates the amount of water needed to
produce a given number of cups.
NOTE: The water tank does not need to be removed in order to be refilled; simply lift the
tank lid and pour fresh, cool water into the tank. Water can also be poured directly into the
reservoir at the back of the Coffee Maker.
Filling the Coffee Maker with water for brewing
1
Remove the water tank and fill with
enough fresh, cool water to make the
desired amount of coffee. A graduated
scale on the water tank indicates the
amount of water needed.
2
When replacing the tank, make sure to
align the holes on the top of the tank
with the tabs on the back of the Coffee
Maker housing.
TIP: Brew one pot of fresh, cool water and discard before brewing the first pot of coffee
(see the “Preparing the Coffee Maker for Use” section).


