


6
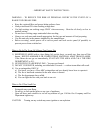
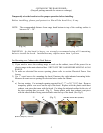
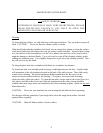
b) For rear venting: Unscrew the rectangular plastic vent portion at the back of the hood.
{Fig.4} Turn the vent piece over so that the flat surface is facing you. Cut along the
indented outline until there is a 3¼” X 10” opening. Fasten plastic vent piece with the
raised surface facing outward back onto the hood.
{Fig.4} {Fig.5} {Fig.6}
( Rear Venting )
5) Remove bottom panel & carefully place aside.
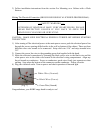
6) Take the hood, place electrical power line through access opening {Fig. 1b}, and use eight 1”
wood screws for mounting the hood. {Fig.1e}. CAUTION: MAKE SURE THE HOOD IS
SECURE BEFORE RELEASING.
7) Replace bottom casing.
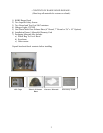
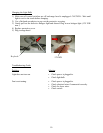
8) Slide each oval oil container into the oil container slots at the back of the safety screen.
{Fig.5}
9) Finally, place a round oil container with the three prongs into the larger holes in the specially
made openings in the center of the screen & turn clockwise until it snaps into place. Do the
same for the other round oil container. {Fig.6}
For Mounting on a Cabinet with a Recessed Bottom
1) If you need to move the cooking range to work on the cabinet, turn off the power for an
electric range at the main electrical box. SHUT OFF THE GAS BEFORE MOVING A GAS
RANGE.
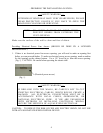
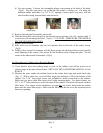
2) Measure the space (under the cabinet) between the inside front edge and inside back edge
{Fig. 3}. With a saber saw, cut wood filler strips (not included) to fill in the bottom of the
cabinet. Use 2-1/4” long wood screws (not included) to attach wood strips to the cabinet.
Make sure you have wood filler strips for all eight mounting holes. For metal cabinet, use
3/8” x 2-1/2” bolts and nuts to secure the strips to the cabinet. The hood will mount on these
filler strips. (For a more secure installation, you can also use screws from inside the cabinet
down into the wood filler strips.) Make sure the filler strips do not cover the electrical power
line access opening.
{Fig. 3}