


17
GN/SGN/es..6
GB
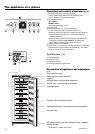
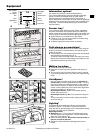
Equipment
* Depending on model and options
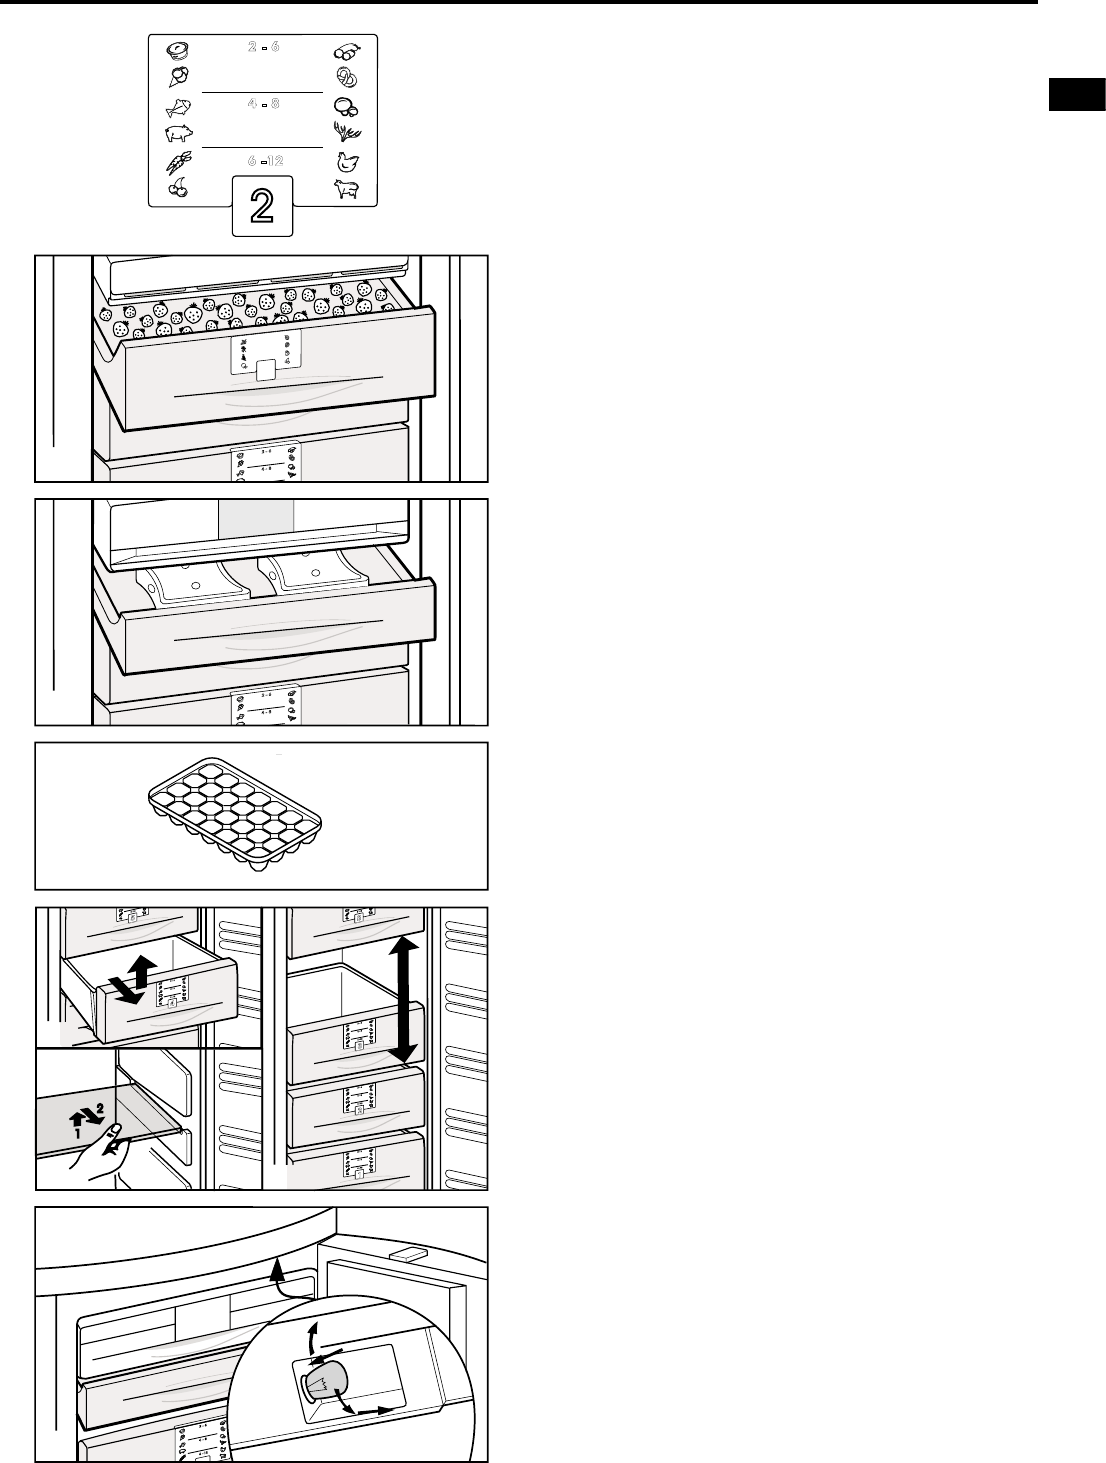
Information system*
Use frozen food within the recommended period.
The numbers between the symbols indicate the storage
period in months for different kinds of frozen foods.
Storage times given are guide times for food frozen at
home. Whether or not the lower or upper value is applicable
depends on the food quality and how it was processed prior
to freezing. The lower values always apply to food with a
high fat content.
Freezer tray*
This is used for gently freezing berries, herbs, vegetables
and other small items and prevents them from sticking to-
gether. Items being frozen will largely retain their shape, and
it will be easier to remove exactly the right quantity later on.
W Spread the items out loosely on the tray, fig. H.
W Freeze for 10 to 12 hours, then transfer to a freezer bag
or container and put in a drawer.
W To defrost, spread the frozen items out loosely.
Cold-storage accumulators*
These prevent the temperature in the freezer from rising too
quickly in the event of a power failure, thus preserving the
quality of the food.
W To save space, you can freeze and store the cold-storage
accumulators in the freezer tray, fig. I.
- To ensure maximum storage time in the event of a power
failure, place the frozen cold-storage accumulators in the
top freezer drawer on top of the food.
Making ice-cubes
W Fill the ice-cube tray with water.
W Place the ice-cube tray in the appliance and leave it to
freeze.
W The ice-cubes can be removed from the tray by twisting
or by holding upside down for a short time under running
water.
VarioSpace*
- You can create a double-height space for big items of
frozen food by removing a drawer and a shelf. This ena-
bles you to freeze such things as poultry or big pieces of
meat without having to cut them up first, so they can be
served "whole" afterwards, and to store other large items
such as big gateaux or packs of ice.
- Removing the drawer, fig. K1: Pull forward until the
drawer stops and lift out.
- Removing the shelf, fig. K2: Lift up at the front and pull
out.
- To insert: proceed in reverse order; simply push shelf in
as far as it will go.
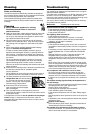
Lighting*
This switches off automatically after the door has been
opened for approx. 15 minutes. If it does not switch on
when the door is opened briefly, but the temperature display
is working, the bulb may be defective.
Replacing the bulb:
W Bulb data: max. 15 W; current and voltage must agree
with the details on the type plate. Only use bulbs of the
same size. Bulb fitting: E14.
W Switch off the appliance. Disconnect from the mains or
remove or unscrew the fuse.
W Change the bulb behind the operating panel as illus-
trated.
ice-cream
fish
pork
fruit
vegetables
sausages
bread
mushrooms
game
poultry
beef/veal
G
2 - 6
6 -12
4 - 8
2
1
2
3
5
5
4
K1
K2
K3
2
-
6
6
-
1
2
4
-
8
6
-
1
2
6
-
1
2
2
-
6
6
-
1
2
4
-
8
2
-
6
6
-
1
2
4
-
8
2
-
6
6
-
1
2
4
-
8
H
2
-
6
4
-
8
I
2
-
6
4
-
8
J
L
2
-6
6
-1
2
4
-
8
1
2
pre-cooked
meals