7
HC 1001 / HC 1050
A delight in freshness
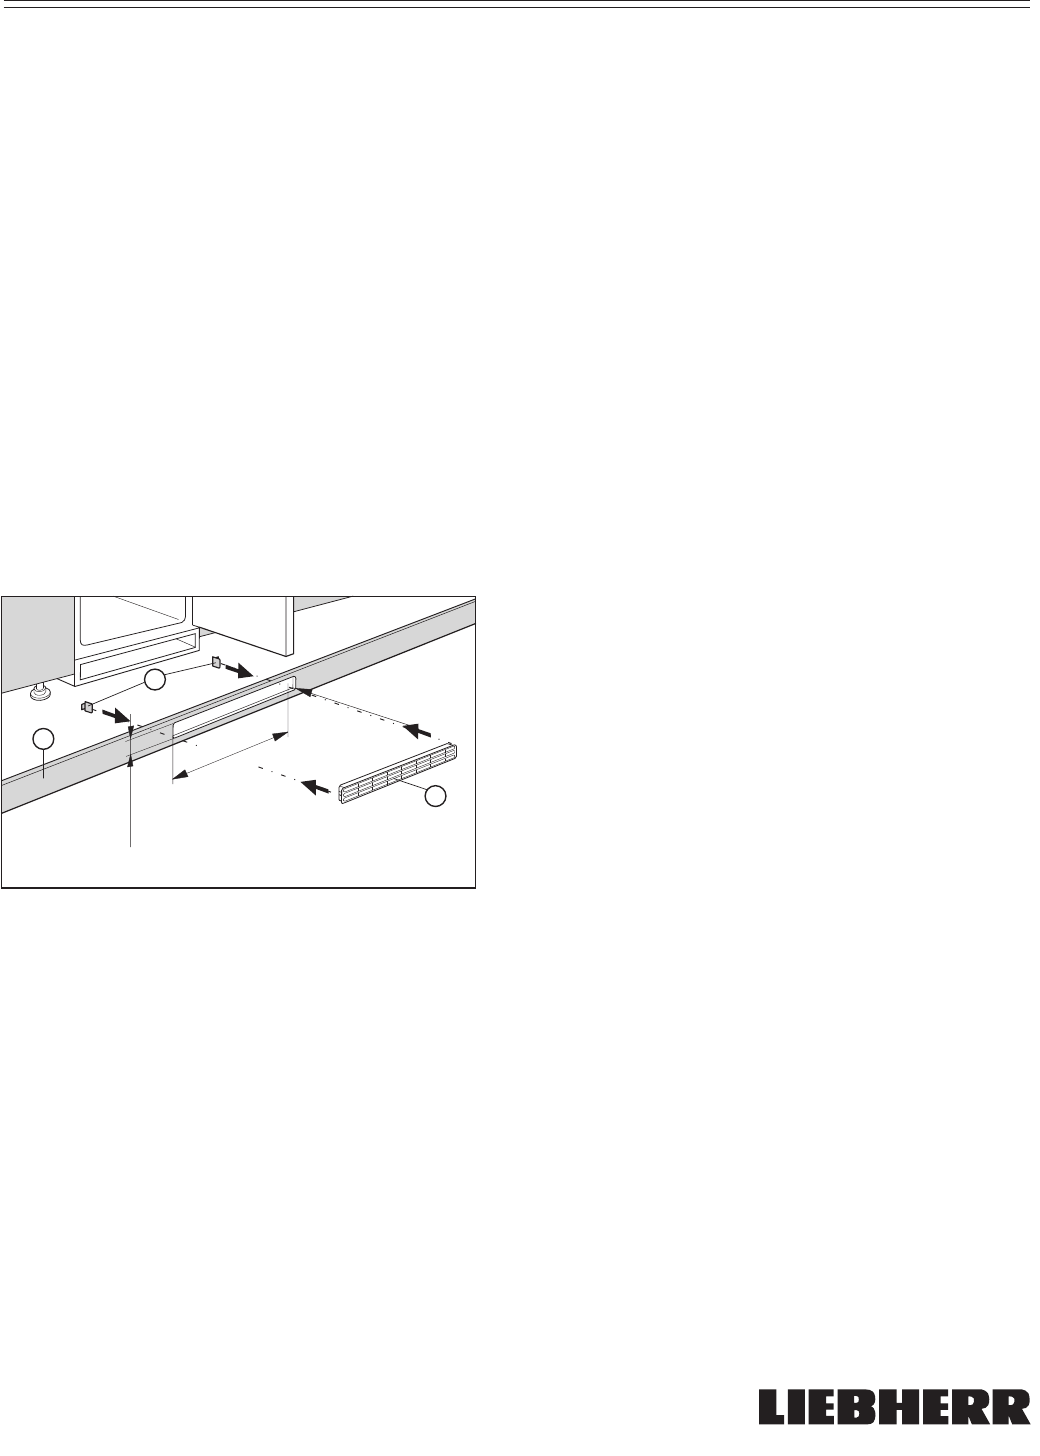
2. Ventilation through the cabinet base at the
bottom can be achieved by installing the
provided ventilation grille (Fig. 6, 3) or via a
ventilation opening of at least 31 in.
2
(200 cm
2
).
When using the provided ventilation grille
(Fig. 6, 3), please proceed as follows:
● In the cabinet base, cut out a ventilation
opening that is 17-23/32 in. (450 mm) in
width and 2-7/32 in. (56 mm) in height
(Figure 6).
● Insert ventilation (Fig. 6, 3) grille into the
cabinet base cut-out (Fig. 6, 1).
● From the back side, slide the snap-fits
(Fig. 6, 2) into the grille until the hooks
make contact with the cabinet base.
● Completely mount cabinet base (with
ventilation grille and snap-fits) to kitchen
cabinet.
Fi
ure
2-7/32
in.
(56mm)
17-23/32
in.
(450mm)
4xR 7/32 in.
(5 mm)
1
3
2
Figure 6
Construction of Kitchen Cabinet
- Figure 7
Construct the kitchen cabinet using the
dimensions shown in Figure 7.
1. Align the kitchen cabinet with a level (Fig. 7, 2)
and a square. If necessary, shim underneath the
cabinet to make it level. The floor and side
walls must be at right angles to each other.
2. Install the refrigerator-freezer in stable kitchen
cabinets only.
3. The joint between the upper and the lower kitchen
cabinet door must align with the joint between the
upper and lower refrigerator-freezer door.
If you use a pre-designed kitchen cabinet, you
may need to shim the refrigerator-freezer so the
doors are properly aligned.
Follow the dimensions provided in Figure 7 to
determine if any shims (Fig. 7, 4) are required.
Also make sure you adjust the height of the
kitchen cabinet (Fig. 7, Dimension “D”) if you
need to add any shims.
4. Use a fish line (Fig. 7, 1) to pull the plug up to
reach the outlet (Fig. 7, 3).
INSTALLATION
7082132-02_KIKNv_USA.indd 77082132-02_KIKNv_USA.indd 7 2/28/2005 11:06:28 AM2/28/2005 11:06:28 AM


