10
WF1051 / WFI 1051
A delight in freshness
W We recommend using a soft cloth and an all-purpose cleaner
with a neutral pH value. Only use food compatible cleaning
and care agents on the inside of the appliance.
W Use a commercially available stainless-steel cleaning agent
for stainless-steel appliances.
- In order to achieve best possible protection, apply a stain-
less-steel care agent uniformly in grinding direction after
cleaning. Points which are darker at the start and a more
intensive coloration of the stainless-steel surface are normal.
- Do not use abrasive sponges or scourers, do not use con-
centrated cleaning agents and never use cleaning agents
containing sand, chloride or acid or chemical solvents, as
these would damage the surfaces and could cause corro-
sion.
W Do not allow cleaning water to run down the drain gulley or to
penetrate the ventilation grilles or electrical components. Dry
the appliance.
- Do not damage or remove the type plate on the inside of the
appliance. It is very important for servicing purposes.
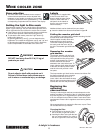
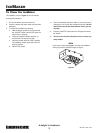
W The dust should be removed from the
wine cooler / freezer unit and heat
exchanger - metal grid at the back of
the appliance - once a year. Dust de-
posits increase energy consumption.
W Ensure that none of the wires or other
compo nents are dislodged, bent or
damaged.
W Then connect/switch on the appliance and start to insert the
food to be frozen as the temperature drops.
If the appliance is to be left switched off for any length of
time, empty the appliance, disconnect from the power source,
clean as described above and leave the door open so as to
avoid odours.
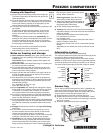
Notes on defrosting
The NoFrost system automatically defrosts the appliance.
Wine cooler zone
The wine cooler compartment defrosts automatically. The water
that forms on the rear wall wil evaporate through the compres-
sor heat.
Make sure the defrost water can fl ow freely through the drain.
W Wipe the cover strip's rubber lip with a damp cloth and a
cleaning agent with a neutral pH value.
Freezer compartment
Any moisture arising collects on the glass shelves and freezes,
and is periodically defrosted and evaporated.
The automatic defrosting system keeps the freezer frost-free
and eliminates the time and effort spent on defrosting manually.
Cleaning
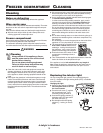
Always switch off the appliance, discon-
nect the power cord or turn off the circuit
breaker before cleaning.
Do not use steam cleaning equipment.
Failure to follow these instructions may
result in death or serious injury.
W Clean the outer walls, inside and equipment, except the
wooden grid shelves, by hand with lukewarm water and a
little detergent. Because of the risk of injury and damage
to the appliance, steam cleaning equipment should not be
used.
W Never clean the glass door* with abrasive agents or rough
cloths. The surfaces of the door and frame could become
matt and scratched. We recommend using a commercially
available glass cleaner. When cleaning the stainless-steel
frame, ensure that no cleaning agent comes into contact with
the glass surface and plastic frame. The surfaces could be
scratched.
Cleaning
Replacing the interior light
You can change the light yourself. The required lighting ele-
ment
2, dissipator with light emitting diode (LED), is available
from your dealer.
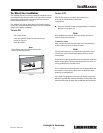
Changing the light:
W Switch off the appliance. Discon-
nect the power cord or turn off
the circuit breaker.
W Press the bulb cover
1 against
the compartment roof 1 and
release by pulling forwards 2.
W Unscrew the lighting element
2,
dissipator with LED, and loosen
the cable connector
3.
W Re-assemble with new lighting
element
2, working in reverse
order.
FREEZER COMPARTMENT CLEANING
!
WARNING


