Impinger I -–1000 Series Service Manual - Domestic 21
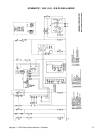
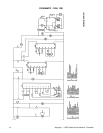
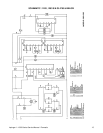
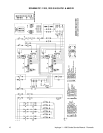
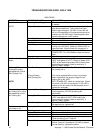
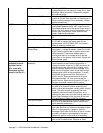
Air Pressure Switch Check for 120 VAC on both sides of switch. If
voltage present on one side only, check for air tube
blockage. Adjust air switch. If above fails, replace
air pressure switch.
Transformer, 24 VAC Check for 120 VAC to primary of transformer.
Check for 24 VAC from secondary of transformer. If
there is primary voltage, but no secondary voltage,
replace transformer.
(Model 1004 & 1005) For oven models 1004 and 1005, there is a 1 Amp
fuse located between the 24 VAC output from the
transformer and the coil of the burner motor relay. If
there is 24 VAC output from the transformer, but no
burner motor relay action, check fuse and fuse
holder. Replace as necessary.
Burner Motor Relay Delete burner motor relay refer to Section D, Page
34.
Burner Blower Motor Check for 120 VAC supply to burner blower motor.
If 120 VAC is present and motor does not run,
replace motor. WITH POWER OFF: turn blower
wheel to check for locked rotor.
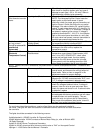
NOTE:
Centrifugal Switch of Burner
Blower Motor
Check for 24 VAC output from secondary of
transformer. If voltage is present, check for 24 VAC
at pin 6 and the ground bar on ignition control and
valve assembly. If the burner blower motor is
running and there is no voltage at pin 6 and the
ground bar on the ignition control valve, replace the
burner blower motor.
Ignition Control and Valve
Assembly
Check for 24 VAC supply to the ignition control and
valve assembly at pin 6 and the ground bar. If
voltage is present, check for 24 VAC across pin #1
and the ground bar (pilot valve). If voltage is not
present, replace electronic control package. If the
pilot valve is energized, check to see that the high
voltage ignitor circuit is also energized. To check,
disconnect the ignitor lead from the bottom of
ignition control. Place female terminal of ignitor
lead approximately 1/8" from terminal post on
ignition control. Spark should jump the 1/8" gap. If
no spark is present, replace ignition control.
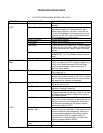
No Pilot If the ignition control is supplied with 24 VAC, and
the pilot valve (internal to valve assembly) and
ignitor circuits are energized, visually check for pilot
flame. This may be done by opening the small
inspection door on the end of the burner, or by
opening the main oven door and looking under the
lower finger housings on the right side of the oven.
If no pilot flame is visible, check the following.
Pilot Shut-off Valve Check to see that pilot shut-off valve is open (shut-
off valve is located between ignition control and
valve assembly and burner.)
Pilot Tube Check for gas pressure at pilot tube. Disconnect
pilot tube at burner and connect manometer to pilot
tube. If no gas pressure is present, check for
blockage in pilot tube or pilot shut-off valve. If these
are clear, and there is gas supplied to the oven,
replace the ignition control and valve assembly.
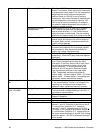
For ovens with
Johnson Controls
Ignition Control
(For ovens with
Honeywell Ignition
control, See Pg. 21)
Pilot Orifice If there is gas pressure at the pilot tube, check the
pilot orifice for obstructions. Replace as need


