Impinger X2 – Digital Service Manual – Dom & Int’l
19
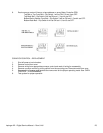
AIR PRESSURE SWITCH, MAIN FAN MOTOR – REPLACEMENT
1. Shut off power at main breaker.
2. Remove control box cover.
3. Remove cover from air pressure switch. Disconnect wiring from air pressure switch and mark all
wiring for reassembly.
4. Remove air switch tube from air pressure switch. Note location of air switch tube, tube must be
connected to the “HIGH” port of the air pressure switch.
5. Remove mounting screws and remove air pressure switch.
6. Reassemble in reverse order. Adjust air pressure switch for proper operation (see below) and
check system operation.
AIR PRESSURE SWITCH, MAIN FAN MOTOR – ADJUSTMENT
1. Start the oven. After the burner ignites, turn the air pressure switch adjustment screw Clockwise
until the burner shuts off .
2. Turn the adjustment screw Counterclockwise until the burner ignites, plus one full turn.
3. Seal adjustment screw with nail polish.
4. Replace cover on air pressure switch.
AIR PRESSURE SWITCH, BURNER MOTOR – REPLACEMENT
1. Remove control panel top.
2. Disconnect wires from switch making note of wire number and location for reinstallation.
3. Remove air tube from switch assembly.
4. Remove switch from wire hangar.
5. Install new switch in reverse order, make sure air tube is not blocked or misaligned. Adjust as needed.
AIR PRESSURE SWITCH, BURNER MOTOR – ADJUSTMENT
To adjust the air pressure switch, remove snap-on cover on the side of the switch to expose adjusting screw. To
increase sensitivity, turn screw counter clockwise; to decrease sensitivity, turn screw clockwise. Check for proper
line voltage switching from N.C. to N.O. as the air pressure switch closes.
THERMOCOUPLE – REPLACEMENT
1. Shut off power at main breaker.
2. Remove control box cover.
3. Disconnect thermocouple from oven control. Note wire colors for reassembly.
4. Remove oven back assy. Remove thermocouple from mounting flange in blower housing. Remove
thermocouple from oven.
5. Reassemble in reverse order and check system operation.
THERMOSTAT, HI-LIMIT – REPLACEMENT
1. Shut off power at main breaker.
2. Remove control box cover.
3. Disconnect all wiring from hi-limit thermostat and mark all wiring for reassembly.
4. Remove oven back assy. Remove capillary tube from mounting bracket.
5. Remove mounting nut and remove hi-limit thermostat from oven.
6. Reassemble in reverse order and check system operation.
7. NOTE: Depress reset button to insure thermostat is set for operation.
TEMPERATURE REGULATION VALVE – REPLACEMENT
1. Shut off power at main breaker.
2. Shut off the gas supply to the oven and disconnect the flexible gas hose from the oven.
3. Remove control box cover.
4. Disconnect all wiring from the temperature regulation valve, modulating gas valve and the main gas
valve. Mark all wiring for reassembly.


