


10
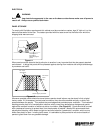
FLOOR ASSEMBLY
Lay out all floor panels in sequence as shown on assembly drawings and make sure they are level. Fasten
these panels as evenly as possible to one another. Tighten the cam fasteners all the way so that the panels
are aligned evenly and as snug one to the other as possible.
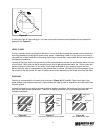
CEILING AND WALL PANEL ASSEMBLY
NOTE: When facing the interior of the wall panel, all vertical latch access holes should be on the left
side of the panel.
Lay out wall panels in accordance with the assembly drawings supplied with the walk-in. It is suggested to
begin by assembling the front of the walk-in first. The front is normally considered that portion of the walk-in
that has the walk-thru door in it. However, if the walk-in is to be installed inside an existing building or space
with two or three of the walk-in walls restricted, assembly then may be accomplyshed easier by beginning at
the rear (opposite the door wall). Assemble the wall panels of the front portion until you get to both corners
and then start to assemble roof sections so as to secure that portion of the walls that are already in place. As
wall panels are assemled, they should be completely aligned and cam fasteners completely tightened. If wall
panels appear to have a stair-step effect on the top horizontal egde as thy are being assembled, the foor is not
level. At this point, you must stop immediately and take corrective measures to poperty level floor panels. All
walls and corners can be assembled prior to the installation of the ceiling. As ceiling panels are assembled,
each one should be property aligned to the adjoining ceiling and wall panels and locked into position as tightly
as possible.
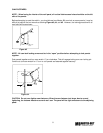
DOOR AND FRAME INSTALLATION
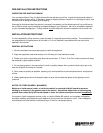
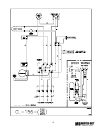
NOTE: It is very important that the floor be level where that walk-in is to be installed. Shims may be
installed under the floor, if necessary, to ensure that the entire walk-in is square and plumb.
SHIMS
FLOOR PANEL
1/4" SPACE
ROOF PANEL
Figure #9
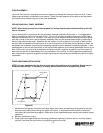
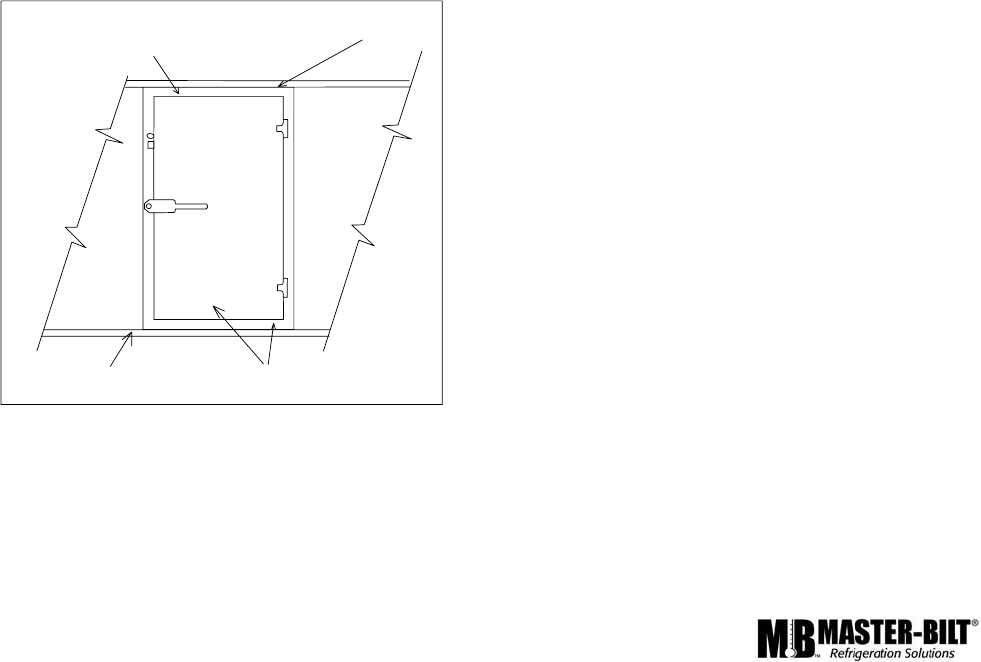
1. Set wall and roof panels, except the roof panel above door frame and adjoining corner panel to the right
side of the door frame (when facing the inside of the door), in accordance with the Walk-in Installation
instructions and plan drawing supplied. (Make sure all are assembled square and plumb to ensure proper
operation.)
2. Set door and frame in place.
3. Place a spirit level against the door frame leg (inside door opening) to ensure that it is correctly aligned
vertically, and latch the door frame to the adjoining wall/corner panel.