


35
Page 3 of 10
WARNING
BEFORE PERFORMING ANY SERVICE WORK, THE ELECTRICAL POWER SUPPLY
AND THE GAS SUPPLY MUST BE TURNED OFF.
Before you Begin
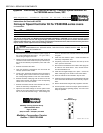
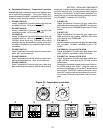
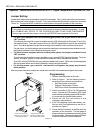
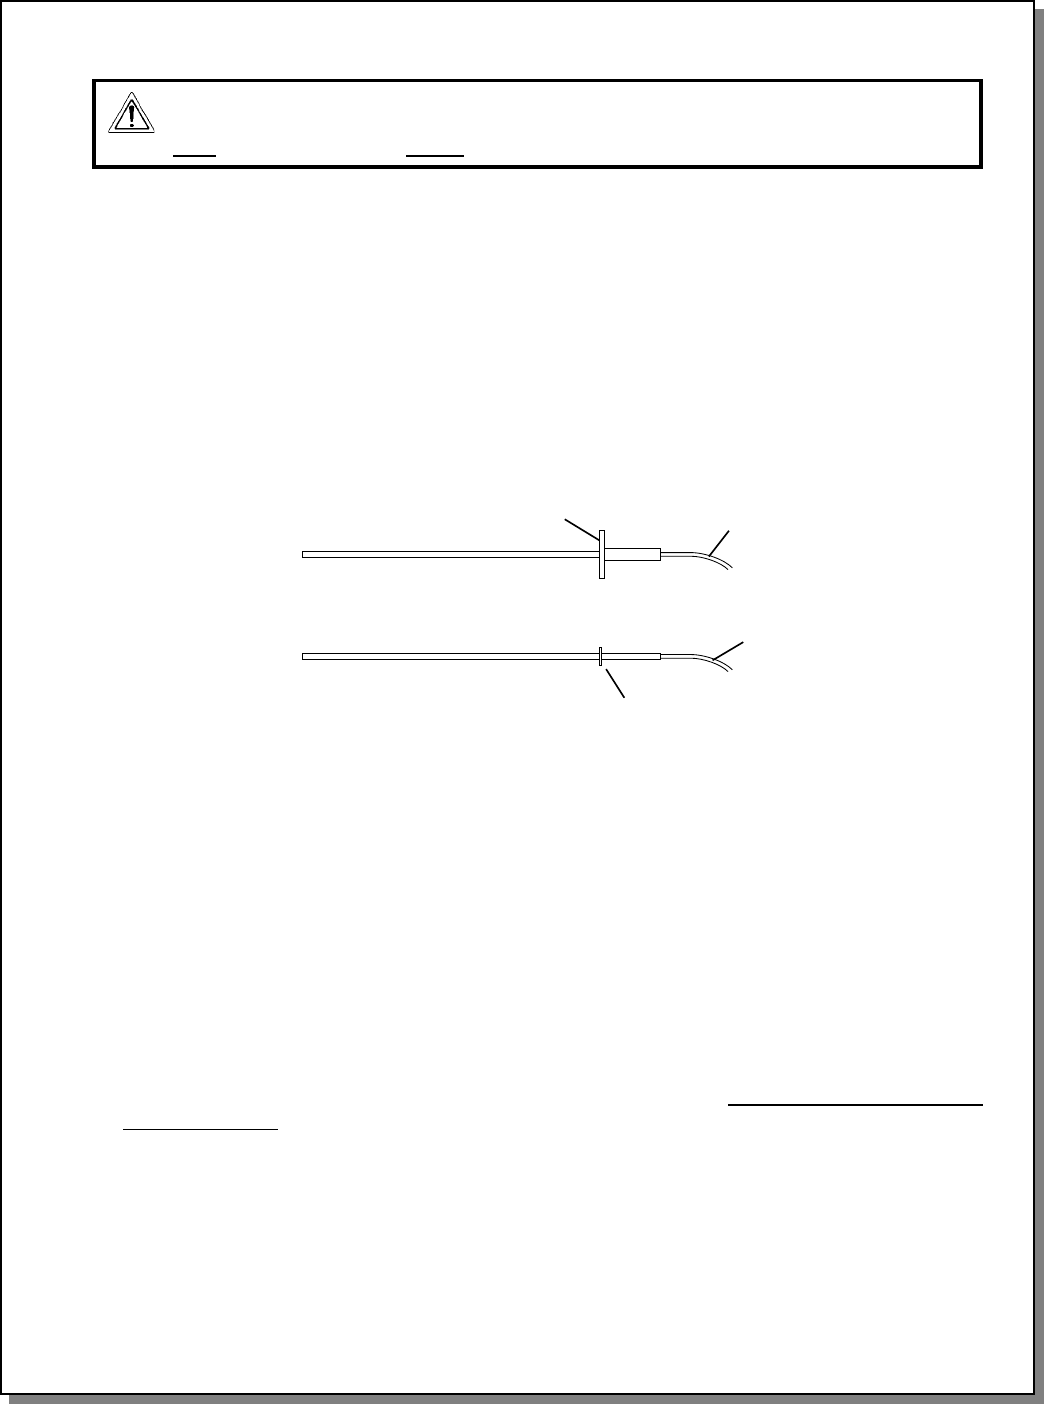
1. This Temperature Controller requires a current-version thermocouple for proper operation. Check
that the thermocouple(s) installed in the oven match the current three-lead, flanged versions BE-
FORE you begin to install the Temperature Controller. See Figure 2.
If the oven is not equipped with current thermocouples, you should replace them BEFORE you install
the new Temperature Controller.
P/N 33984: Thermocouple kit for PS300-series, PS555 and PS570
P/N 33985: Thermocouple kit for PS200-series and PS536
flange
Figure 2
clip
Cable
(3 leads)
Cable
(2 leads)
Current thermocouple
Obsolete 2-lead
thermocouple
Installation
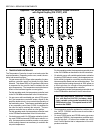
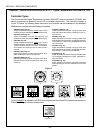
1. Check the ovens existing temperature controller, as shown on the previous page.
IF THE EXISTING CONTROLLER IS P/N 36056 OR P/N 46837 (shown in Figure 1G), the new
controller can be installed directly into the existing sleeve as follows:
- Loosen the Phillips screw at the bottom center of the faceplate.
- Pull the old controller out of the sleeve.
- Skip ahead to the Jumper Setting section of these instructions on Page 6 to set up the new
controller. After the jumper is configured, the new controller can be installed directly into the
existing sleeve.
IF THE EXISTING CONTROLLER IS OF ANY OTHER TYPE, the sleeve will have to be replaced
with the one included in this Kit. Continue on to Step 2 in this section.
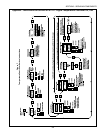
2. Access the back of the existing temperature controller. Tag each wire that connects to the controller
with its terminal number. These numbers will be used later to wire the new controller.
3. Disconnect all wires from the terminals on the temperature controller.
Be sure to retain any jumpers
that are removed.
4. Remove the controller and sleeve from the oven as follows:
For analog controllers P/Ns 28071-0012 and 28071-0018 (Fig. 1A), remove the two bracket
screws on the back of the control. Then, remove the bracket. Pull the controller and sleeve out
through the front of the oven panel.
For all other controllers, remove the two screws and brackets that hold the controller in place.
Then, pull the controller and sleeve out through the front of the panel.
SECTION 3 - SERVICING COMPONENTS
Appendix - Instructions for Service Kit 47321 - Digital Temperature Controller Kit, 2/02