


60
5
PS536
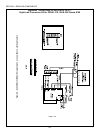
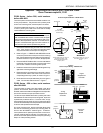
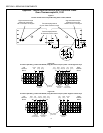
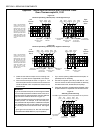
Thermocouples on these ovens are located inside the ma-
chinery compartment. They are secured in place by a sheet
metal screw that traps the thermocouple flange against the
wall of the compartment. See Figure 7.
NOTE FOR HIGH LIMIT THERMOCOUPLES:
PS536 ovens have two thermocouples, one mounted
above the other. The upper thermocouple senses the
oven temperature and is connected to the temperature
controller. The lower thermocouple is connected to the
high limit control module. Either thermocouple can be
replaced using this Kit.
1. Loosen the sheet metal screw that holds the thermo-
couple flange to the wall of the machinery compart-
ment.
2. Pull the thermocouple out of the machinery compart-
ment. Disconnect the thermocouple leads.
3. Install the new thermocouple so that its flange fits firmly
against the wall of the machinery compartment. Tighten
the sheet metal screw so that its head holds the ther-
mocouple flange securely in place.
NOTE: PS536 ovens do not use a thermocouple mount-
ing tube, so it is CRITICAL that the thermocouple flange
is securely fastened to the wall of the machinery com-
partment.
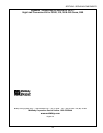
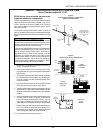
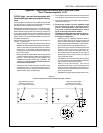
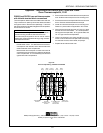
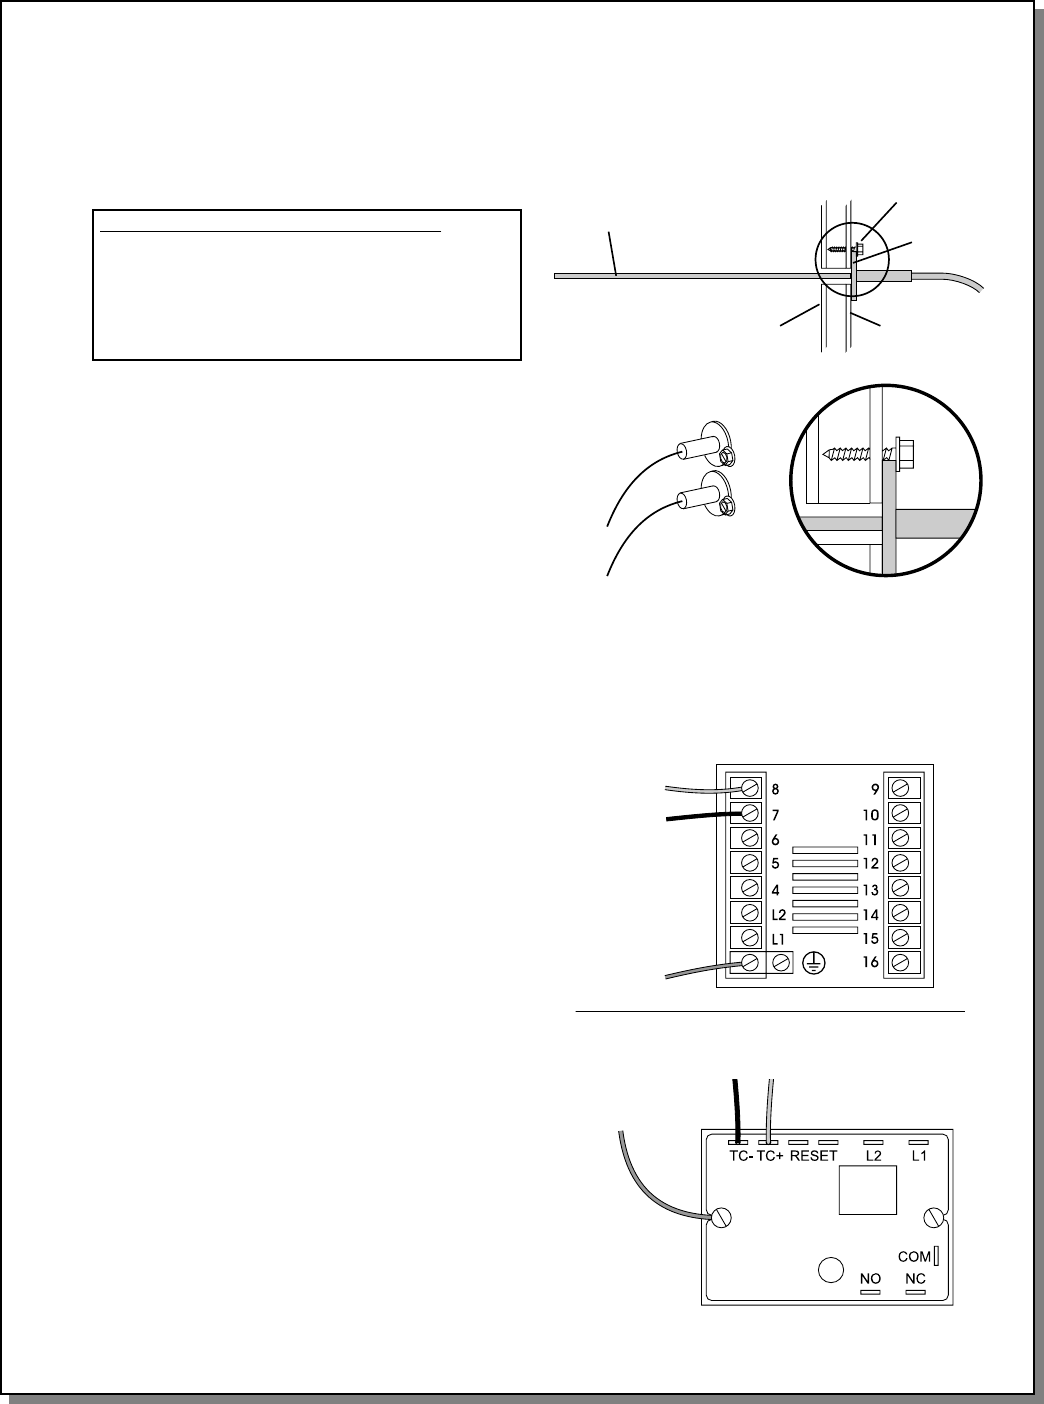
4. Route the thermocouple leads away from the ignition
cable. Connect the leads as shown in Figure 8.
Figure 7
Thermocouple Installation - PS536
Thermocouple
Sheet
metal
screw
Machinery
compartment
wall
Thermocouple
flange
Plenum
wall
Screw head holds thermocouple
flange in place
Figure 8
Thermocouple Wiring - PS536
Digital Temperature Controller
High Limit Control Module
Red
White
Shielded
ground lead
Shielded
ground lead
Red White
Temperature-
sensing
thermocouple
High limit
thermocouple
Appendix - Instructions for Service Kits 33984 and 33985 -
Oven Thermocouple Kit, 11/01
SECTION 3 - SERVICING COMPONENTS