


5. Read carefully the following instructions for
installation. Familiarize yourself with the mounting
hardware and procedure, before you begin actual
installation.
Installing The Coffeemaker
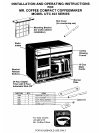
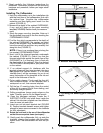
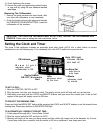
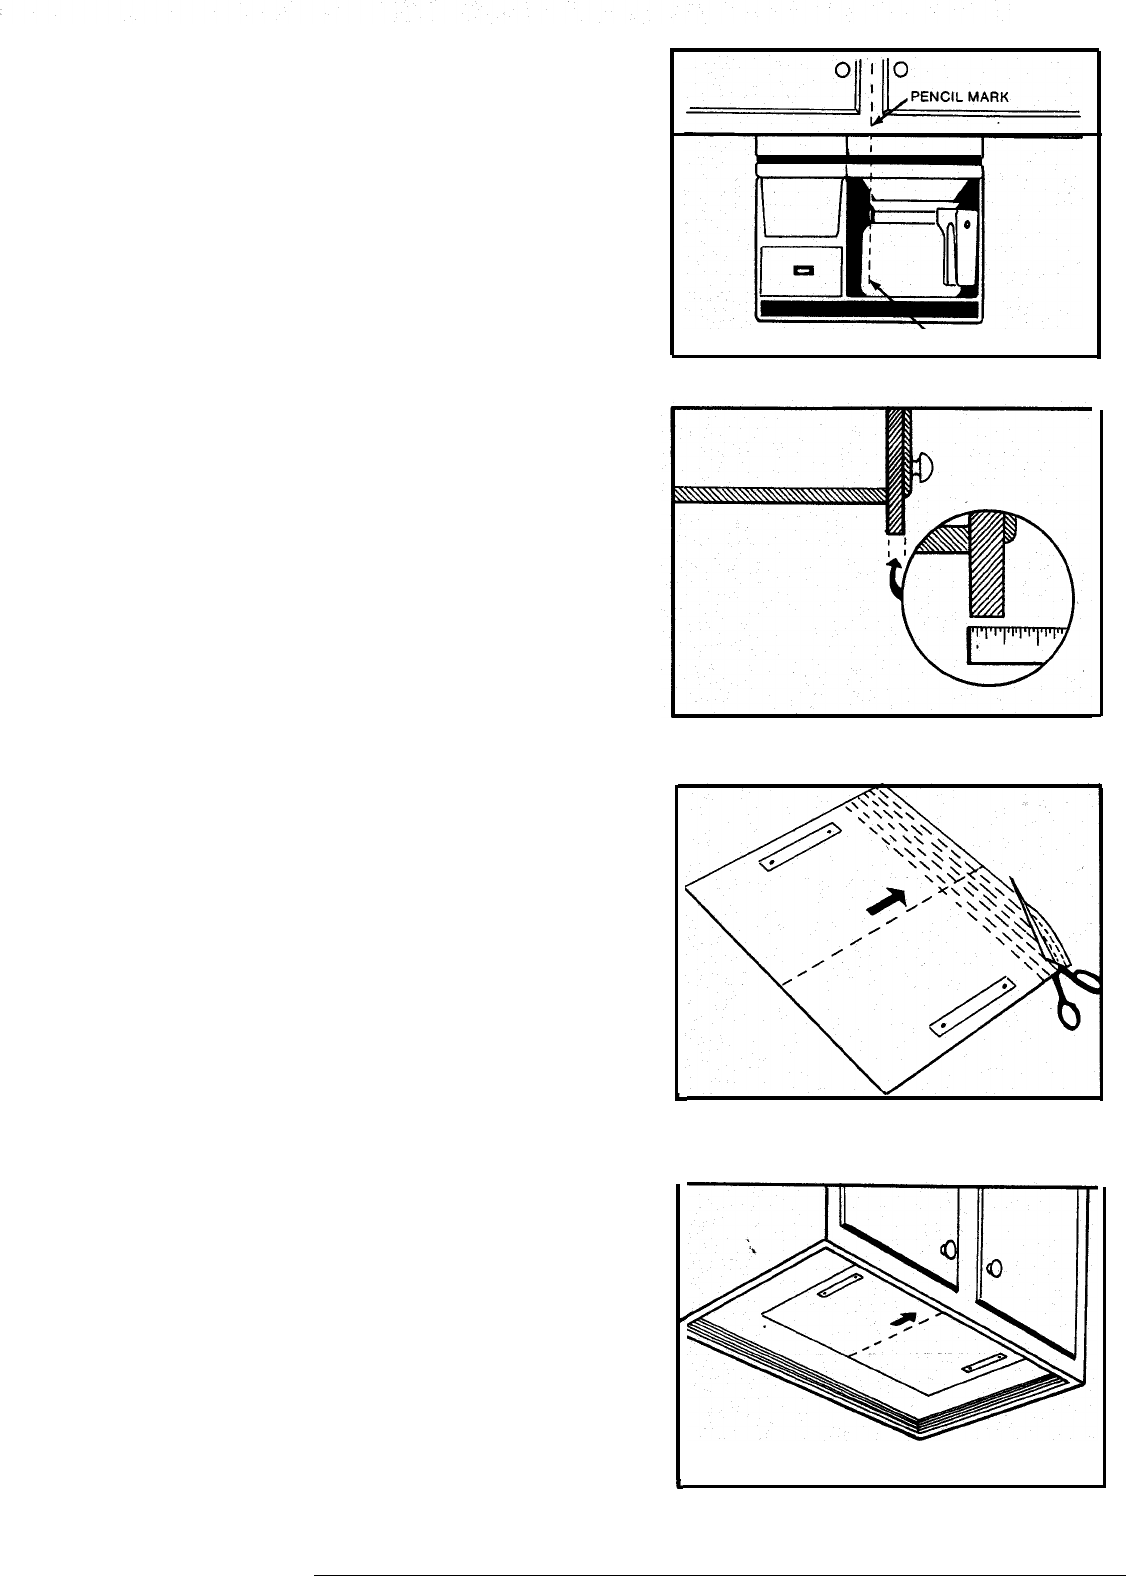
1. Hold the coffeemaker up to the installation site
with the front face of the coffeemaker flush with
the cabinet face. Visualize the coffeemaker
centerline and then lightly pencil mark it on the
cabinet (FIGURE A).
2. Measure the depth of the cabinet OVERHANG,
if any, and jot it down on the paper mounting
template(FIGUREB).Double check you measure-
‘CENTERLINE
ment.
A.
3. Study the paper
mounting
template. Note on it
the graduated lines next to the line denoting the
COFFEEMAKER FRONT.
4. Find the line which corresponds to the depth of
the cabinet OVERHANG -the number you jotted
down on the template. Now, doublecheck that you
have the correct line and then very
carefullly
cut
along this line (FIGURE C).
NOTE:
If there is no overhang then cut along the
line marked COFFEEMAKER FRONT.
5. Next, trial fit the trimmed template underneath
the cabinet (FIGURE D). Orient it so that the
trimmed edge butts against the inside face of the
6. If no cabinet support rib interferes with the
template placement then tape template into place
flat against the cabinet bottom. If a rib does
interfere then it will be necessary for you to cut
away that section of the template at the rib and
equal to the thickness of the rib.
7. Put on safety glasses. Firmly mark the four drill
hole locations shown, on the template with a
centerpunch or nail, then remove template.
8.
Drill the four
l/4”
mounting holes. Have firm control
of the drill to prevent the bit from skating, and
drill slowly straight upward.
OVERHANG (or if no overhang, then is flush with
the front edge of the cabinet). Align the dashed
CENTERLINE of the template to your pencil mark
on the cabinet.
B. Measure overhang depth.
9. Drilling sometimes leaves rough edges on the
holes. Carefully sand or file the edges smooth.
C. Cut along line denoting your overhang
10. Open the hardware package. Locate the 2
depth.
SUPPORT PLATES and place them inside the
cabinet, flat side down, aligned over the drillholes.
Insert a screw into each hole.
11. Insert one nut into each bracket slot (FIGURE
E). Position brackets beneath screws and tighten
enough to leave some movement in the brackets
for final adjustment.
12.
Rotate the vent
knob
in the rear of the coffeemaker
so that the arrow points down (vent open).‘-
13. Gently push the coffeemaker fully up onto the
brackets, aligning the brackets with the
coffee-
maker slots. The coffeemaker will lock into po-
sition.
4
D. Bottom view
4