


14. Finish tightening the screws.
15. Secure the power cord against the cabinet bottom
or rear wall by using the two Adhesive-backed
cord clips.
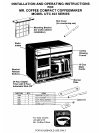
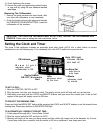
Removing The Coffeemaker
1.
2.
Remove the glass decanter and brew funnel. After
use, allow the coffeemaker to cool completely.
Grasp the bottom left and right edges and depress
the 2 BRACKET RELEASE BUTTONS. Lower the
coffeemaker off the brackets.
IMPORTANT, THE CLOCK ON THIS MODEL MUST BE SET FIRST, BEFORE THE COFFEEMAKER WILL
OPERATE.
Please refer to setting the clock instructions, below.
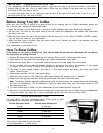
Setting the Clock and Timer
The clock in this appliance includes an automatic brew start mode (AUTO) with a safety feature to prevent
accidental turn-on the following day if it is mistakenly left in the AUTO mode from.a previous use.
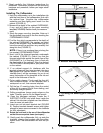
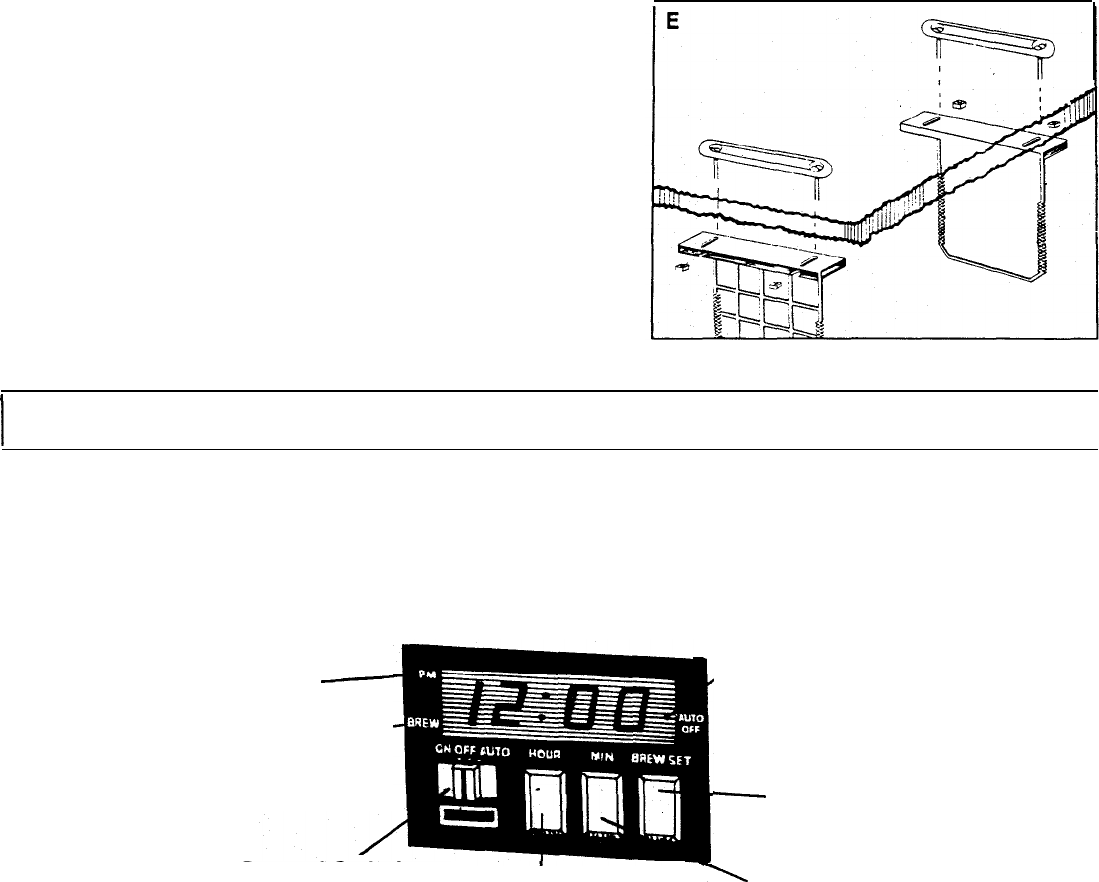
PM Indicator
Brew Light!
indicates when
coffeemaker is ON
Control Switch
ON-OFF-Automatic
Start
/Auto Off Light
indicates machi
shut itself off
Brew Set
sets time to
auto brew
Hour
advances clock
Minute
by the hour
advances clock
by minute
ne
TO SET CLOCK.. .
1. Move the CONTROL SWITCH to OFF.
2. Plug the power cord into your electrical outlet. The display on the clock will flash until you set the time.
3. Alternately press and hold the HOUR and MINUTE buttons until you reach the current time. A red dot will
appear in the upper left display corner for PM time.
TO PRE-SET THE BREWING TIME.. .
Press and hold the BREW SET button while pressing the HOUR and
M!,NUTE
buttons to set the desired brew
starting time. Please pay attention to PM INDICATOR light.
TO AUTOMATICALLY BREW AT PRE-SET TIME.. .
1. Follow steps
#l
through
#6
in “How
to-Brew
Coffee”.
2. Slide the control switch to OFF and then to AUTO.
3. Brewing will begin at the time you have preset and the coffee will remain hot in the decanter for 2 hours.
If more keep warm time is needed, slide the switch to ON for an additional 2 hour keep warm time.
5