


IMPORTANT
To Reset Auto Brew at Pre-Set Time.. .
This coffeemaker will NOT automatically come on again the next day if you leave the switch in the AUTO
position after its last use. This is a safety feature. Each time you choose to use auto brew you must slide
the switch to OFF and then to AUTO.
To make sure Auto
~brew
is set, check the auto off light. If the light is off, auto brew is set. If it is on,
slide the switch to OFF and then to AUTO.
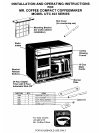
Before Using Your Mr. Coffee
Make sure your first cup of coffee is as good as can be by cleaning your Mr. Coffee coffeemaker before you
use it the first time. Just follow these simple steps:
1. Wash the decanter, lid and brew funnel in a mixture of mild detergent and water. Rinse each thoroughly.
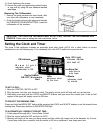
2. Set the clock. The clock on this model must be set first, before the coffeemaker will operate. See instructions
for setting the clock.
3. Slide the brew funnel into place and then follow steps
#4
through
#7
in the “HOW TO BREW COFFEE” section.
This will clean the inside of your coffeemaker.
4. When the brew cycle is finished, slide the control switch to off. Discard the water in the decanter and rinse
the decanter and brew funnel.
Your coffeemaker is now ready to use.
How To Brew Coffee
If the display on the clock is flashing, the clock has not been set yet and the coffeemaker will not operate.
See instructions for setting the clock.
1. Remove the brew funnel from beneath the top housing. Place one Mr. Coffee paper filter inside.
2. Place coffee into the paper filter according to the coffee measurement chart below.
3. Make sure the paper filter is in the proper position then slide the brew funnel back into position.
4. Fill the decanter with tap water to desired capacity as marked on the side of the decanter. (1 cup equals
5 ounces.) To brew 10 cups of coffee, fill the decanter to the bottom of the silver band.
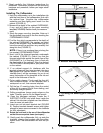
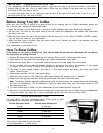
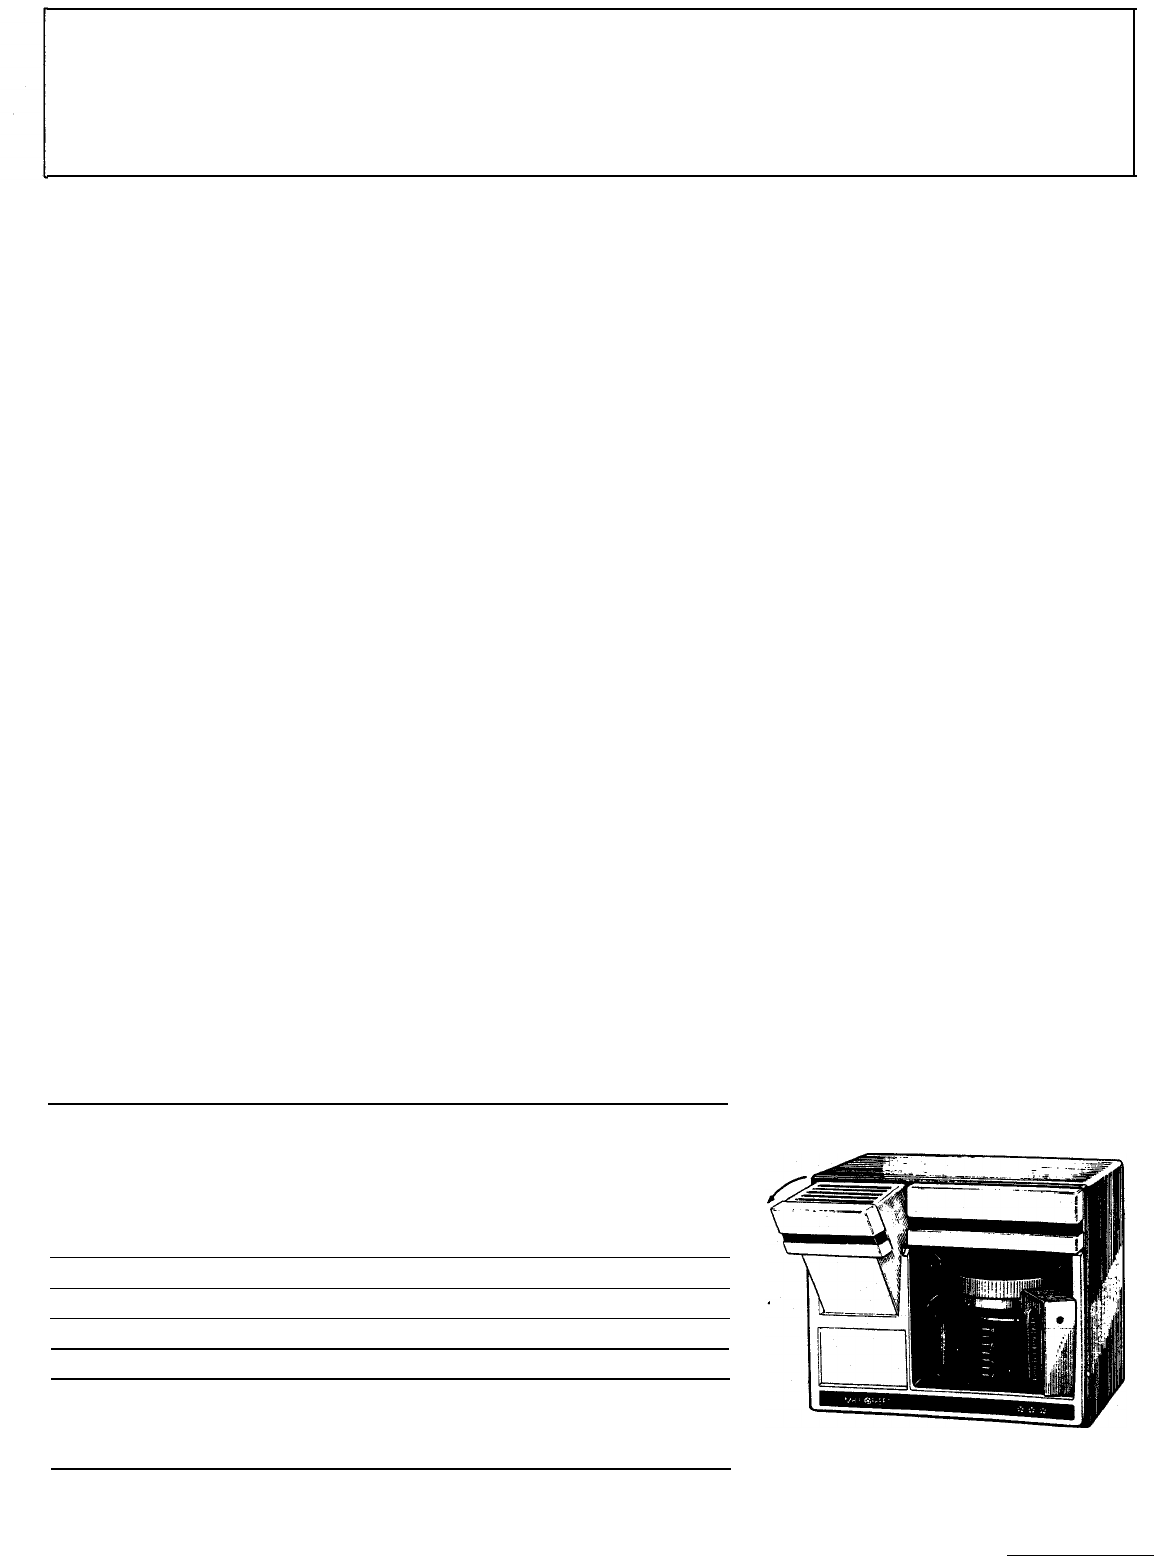
5. The water fill door swings outward (see Figure
-1).
Pull door outward and slowly pour water into intake
screen. Close the door.
6. Place empty decanter, with lid, onto warmer plate.
7. Slide the control switch to ON. When the coffee stops flowing, the brewing cycle is complete.
8. Discard the used grounds and filter. Rinse the brew funnel and slide it back into place.
.
Note: The warmer plate will keep your coffee piping hot for 2 hours and then, as a safety feature, the coffeemaker
will shut off automatically. For an additional 2 hours of keep warm time, slide the control switch to OFF
and then back to ON.
9. To make another pot of coffee, turn the coffeemaker off and repeat steps
#l
through
#8.
10.
Be sure to turn the control switch off when the decanter is empty and you are no longer using your coffeemaker.
Unplug the power cord when not in use for prolonged periods (this will also turn off the clock).
COFFEE MEASUREMENT CHART
For best results, use level tablespoons (ibis.) of drip grind or grind
recommended for automatic drip coffeemakers.
To brew this much coffee:
Use this many tablespoons:
12 cups
11 level tbls.
10 cups
9 level tbls.
8
CUDS
7 level tbls.
6
CUDS
6 level tbls.
4
cups
5 level tbls.
2 cups
3 level tbls.
*Use more or less coffee to suit
your
taste.
2 level tablespoons = 1 coffee scoop.
Figure 1
6