


32 13
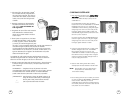
C. BREWING COFFEE NOW
1. After completing the steps in the “Adding Water
and Coffee” section and with the glass decanter
and the filter basket securely in place, turn the
coffeemaker on.
For Programmable models: press the SELECT
button once to turn the coffeemaker on. The BREW
NOW green light will turn on to signal that the
coffeemaker is on and brewing. The green regular
strength light will come on to show that you are
brewing a regular strength carafe of coffee. The
Audible Ready Signal will beep three times when
the brew cycle is complete.
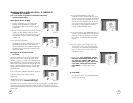
For Switch models, press the BREW NOW button
and the on light will come on. The green regular
strength light will come on to show that you are
brewing a regular decanter of coffee.
2. To enjoy a more full flavored cup of coffee, press
the Brew Strength button once. The STRONG
Brew Strength red light will come on. The
coffeemaker will remain in the Brew Strength you
have selected until you change it back to regular
strength by pressing the Brew Strength button or
until you unplug the machine.
3. After the used coffee grounds have cooled,
carefully open the filter basket and discard them.
NOTE:
Shower head cover is hot after brewing.
Always allow the coffeemaker to cool
down before cleaning.
4. Prior to making a second pot of coffee, turn the unit
off. This will reset the FRESH BREW™ TIMER feature.
Switch models - Make sure you turn the
coffeemaker off and then back on before brewing
more coffee, otherwise the two-hour auto shut-off
time period will not be restarted.
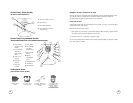
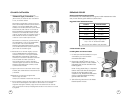
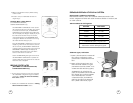
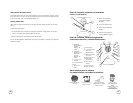
3. Coloque el filtro de agua MR. COFFEE
®
en la canasta del filtro, asegurándose
de que el lado marcado “this side up”
(“este lado hacia arriba”) apunta hacia
usted y de que el filtro de agua esté
nivelado.
4. Añada la cantidad de café deseada y
sacúdala suavemente para nivelar el
café. Vea la “Tabla de Medidas de
Café Sugeridas”.
5. Asegúrese de que el filtro esté centrado
adecuadamente e insertado hasta
dentro en la canasta exterior del filtro.
Cierre la tapa.
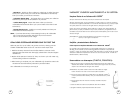
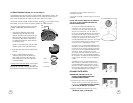
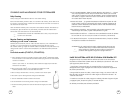
6. Llene la jarra con agua fresca y fría hasta
la capacidad deseada (1 taza es igual a
5 onzas) (Figura 6). Para un llenado fácil
y preciso, las marcas de agua en la jarra
de vidrio y en las ventanillas dobles del nivel de agua muestran la
cantidad de agua requerida para preparar la cantidad
correspondiente de tazas deseadas. No llene por encima de la
línea rotulada “12 cup MAX line” (“Línea de 12 tazas MAX”) o el
agua se derramará por el agujero de sobrellenado en la parte
trasera del tanque de agua.
La cantidad de café colado siempre será levemente menor a la
cantidad de agua vertida en el tanque de agua. Esto se debe a la
absorción mínima de agua por la borra o café molido.
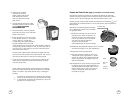
7. Levante la Tapa para Verter del Tanque de Agua y vierta el agua en
el tanque de agua. Cierre la tapa y coloque la jarra vacía en el
plato calefactor.
ADVERTENCIA: Asegúrese de que la jarra esté colocada
completamente sobre el plato calefactor o sino el agua y la borra
se desbordarán de la canasta del filtro. Un desbordamiento
puede causar lesiones personales o daños a la propiedad.
¡ADVERTENCIA! Para disminuir el riesgo de dañar la jarra y/o el
riesgo de lesiones personales, no añada agua
fría a la jarra si ésta ya está caliente. Permita
que la jarra se enfríe antes de usarla.
Figura 6