


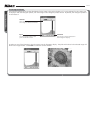


Nikon Capture 4 Editor
10 /15
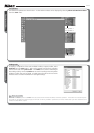
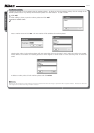
Photo Effects
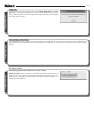
The Photo Effects palette is used to convert pictures to black-and-white, sepia, or another monochrome tint, or to adjust the
brightness of the cyan / red, magenta / green, and yellow / blue channels.
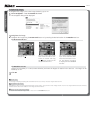
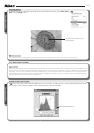
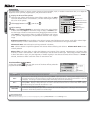
1
Display the Photo Effects palette
Select the tool palette containing the Photo Effects palette from the View
menu (the default location is Tool Palette 1) and click the triangle at the top
left corner of the palette.
2
If the Apply button is off ( ) , turn it on ( )
3
Adjust settings
Effect: Choose Black and White to convert the image in the active window
to black and white, Sepia to convert the image to sepia, or Tinted to con-
vert the image to another monochrome tint by dragging the balance sliders.
Select None to use the balance sliders to adjust the brightness and contrast
of the cyan / red, magenta / green, and yellow / blue channels in the original
image.
Brightness / contrast slider: Drag the slider to the right to increase overall brightness and contrast, to the left to reduce bright-
ness and contrast, or enter a value between –100 and +100 directly in the text box to the right of the slider.
Enhance Dark Tones: Select this option to bring out details in shadows.
Auto: Click this button to optimize brightness and contrast without affecting color balance. Enhance Dark Tones is auto-
matically selected.
Balance sliders: Use these sliders to adjust the brightness and contrast of the cyan / red, magenta / green, and yellow / blue
channels, or enter a value between –100 and +100 directly in the text boxes to their right. If the image has been converted
to black-and-white or sepia, only the brightness of shades originally in the selected channels will be affected. If Tinted is
selected, the balance sliders control the choice of monochrome tint.
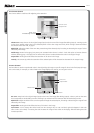
Apply button
Effect menu
Enhance Dark Tones
Balance sliders
Settings button
Brightness / contrast
Auto button
Magenta / green
Cyan / red
Ye ll ow / b l ue
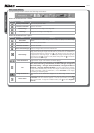
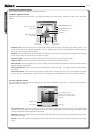
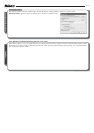
The Photo Effects Settings Menu
Clicking the triangle
in the top right corner of the Photo Effects palette dis-
plays the Photo Effects settings menu.
Option Description
Copy to Clip board Copy current Photo Effects settings to the clipboard.
Load…
Select this item to load settings previously saved using the Save… option (see be low). A dialog will be displayed where you
can navigate to the drive (volume) and di rec to ry con tain ing the desired settings fi le (only fi les with the extension “.npe” will
be dis played). The settings in the Photo Effects palette will in stant ly revert to the saved settings.
Save…
Select this item to save Photo Effects settings to a named fi le. These settings can later be recalled using the Load… option.
Choosing Save… displays a dialog where you can choose a destination and fi le name for current Photo Effects settings.
Photo Effects settings are saved with the ex ten sion “.npe”.
Reset to Neutral Reset Photo Effects settings to default values.
Recent fi les
Recent Photo Effects settings fi les (up to four) are listed at the end of the settings menu. Selecting a fi le from the list sets
the controls in Photo Effects palette to the saved settings.
The Set tings Menu
The Photo Effects Settings menu can also be displayed by selecting Photo Effects from the Set tings menu.