MAINTENANCE AND CLEANING GUIDE PMA–5/12 AND PMA–5/18 OWNER'S MANUAL
NU–VU® FOOD SERVICE SYSTEMS MENOMINEE, MICHIGAN 49858
page 14 SALES FAX (906) 863-5889 • SERVICE FAX (906) 863-6322 (906) 863-4401
DOOR LATCH, How to Adjust:
The Door Latch used on the PMA- series Pizza Ovens is preset at the factory during the
original installation. However, should your Door Latch ever need adjustment:
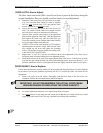
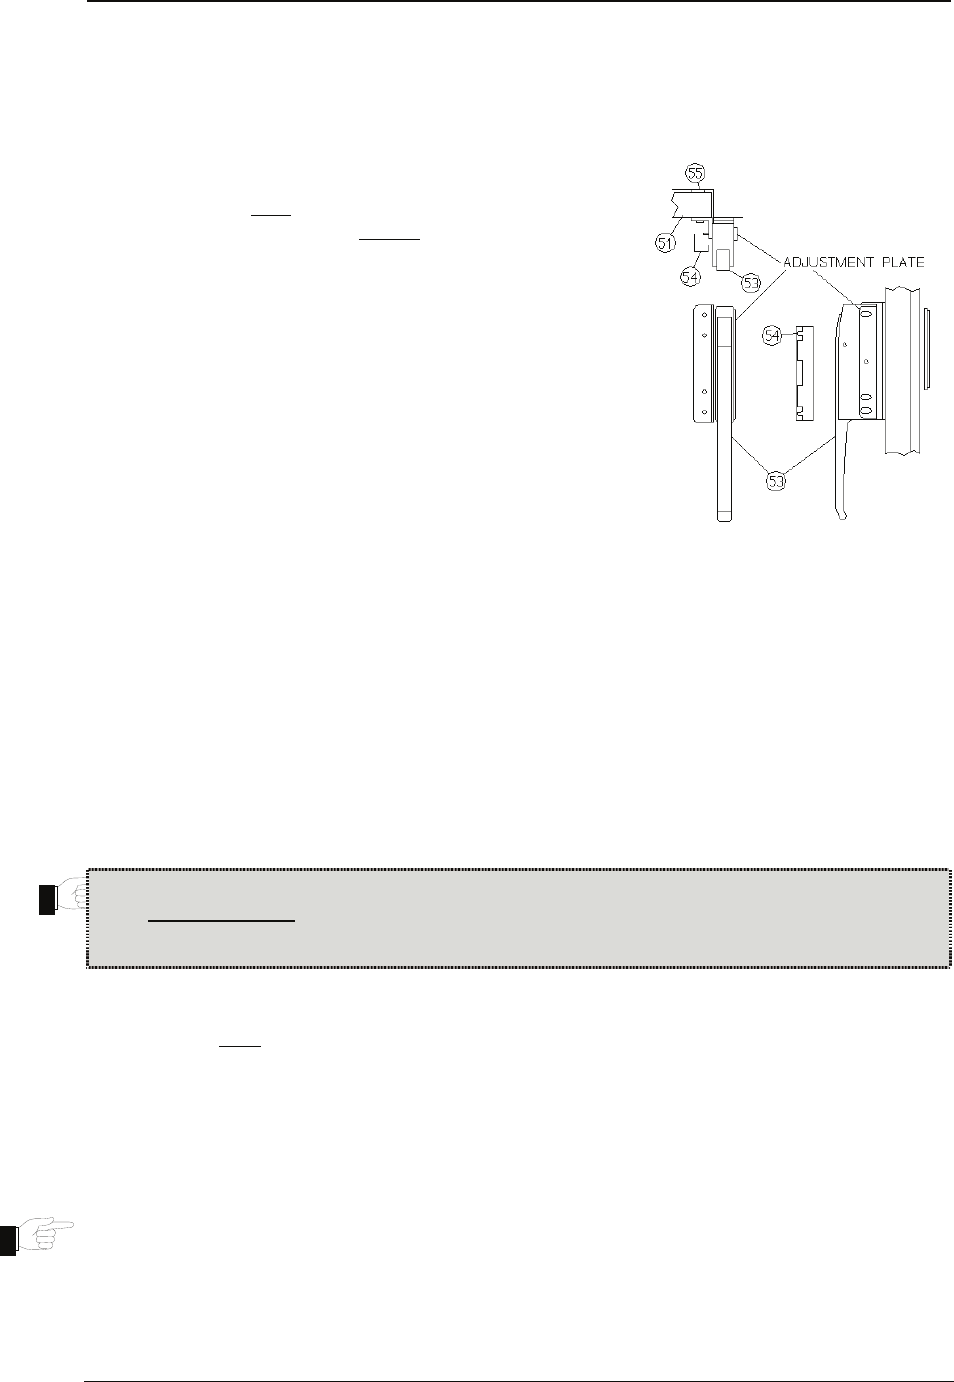
A. Determine if the Oven Door [51] is too loose or too tight.
If it is too loose the Door Latch [53] must be adjusted
OUT (or away
from the unit). If it is too tight the Latch
must be adjusted IN (or towards
the unit).
B. Loosen the two acorn nuts inside the Latch Cover [54]
with a 3/8" wrench. Pull the Latch Cover straight out from
the Oven Door to remove it and remove the acorn nuts.
C. Open the Door and take careful notice of the adjustment
plate position against the Latch body. Hold the adjustment
plate against the Latch body with one hand while you
loosen the mounting screws with the other hand. Back the
screws out approximately three full turns.
D. CAREFULLY move the Latch body IN or OUT under the
adjustment plate one notch at a time. Make sure the Latch
stays straight up and down and tighten the mounting
screws. Test the Door for proper closing and sealing (refer
to the DOOR TEST PROCEDURE).
E. Repeat steps "C" and "D" if you are not satisfied with the Door adjustment. If the Door tests as
satisfactory make sure the mounting screws are tightened securely.
F. Install the acorn nuts on the ends of the top and bottom Door Latch screws. Turn the nuts on all the
way until they just contact the back side of the Latch mounting bracket, then loosen them by 1½ to 2
full turns. Install the Latch Cover and tighten the acorn nuts lightly to hold the Latch Cover in place.
DOOR GASKET, How to Replace:
Follow these instructions to correctly install your Door Gasket with minimal problems. Use the installation
kit provided. If you have any problems or questions call NU-VU
®
at (906) 863-4401. Ask for the Service
Department.
A. Remove all pieces of the old Gasket. Thoroughly clean the Door frame in the area of the new
installation. Remove the old sealant and any baked-on deposits.
B. Pre-cut the replacement Gasket to a size slightly longer than you require.
C. Put a small
amount of soap water into and around the slot that the new Gasket will fit into (a small
trigger spray bottle works well). This step is optional but will help in the installation.
IMPORTANT: DO NOT DISASSEMBLE THE ACTUAL DOOR FRAME
WHEN REPAIRING OR REPLACING THE DOOR GASKET!!!


