


CAUTION: READ INSTALLATION / OPERATION INSTRUCTIONS PRIOR TO
INSTALLING AND OPERATING THE FRESHSTART BREWER
A. INSPECTION
Brewer comes complete with brew basket, detachable power cord and installation/operation manual (carafe may be
included, but is sold separately).
1. Inspect the carton and brewer for evidence of rough handling and concealed damage. Damage claims should be
filed with the carrier.
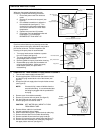
2. Remove top cover.
3. Remove float cap assembly from the feed reservoir. Inspect float arms to ensure they are moving freely (shipping
may cause floats to catch against the side of the float cap). If float arm is caught, pull arm down and ensure it is
moving freely.
4. Replace float cap assembly to the feed reservoir.
5. Check that the spray head tube from the solenoid valve to the spray head is securely connected (see Figure 8).
6. Replace top cover.
INSTALLATION INSTRUCTIONS
C. ELECTRICAL CONNECTION
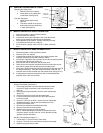
1. When tank has completed the water fill cycle, insert the IEC side of the electrical cord into the receptacle at the
rear of the brewer.
2.
Plug the three prong electrical cord in 120 Volts outlet capable of carrying 15 AMPS – 1600 Watts.
B. CONNECTING WATER SUPPLY TO BREWER
IMPORTANT: Unit must be installed on a water line with water pressure between 20 PSI and 90
PSI. If water pressure exceeds 90 PSI or has the ability to spike beyond 90PSI a
pressure regulator should be installed.
Flush water line prior to installing brewer. Brewer should be connected to a COLD
WATER LINE.
1. Place brewer on a level surface.
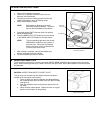
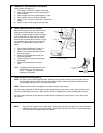
2. Insert water supply tube into external fitting (see figure 1). Brewer is equipped with an external fitting (located at
rear) capable of accepting a 3/8” tube.
NOTE: Brewers are shipped with a plug in the external fitting. Plug must be removed before installing the water
supply tube.
PLASTIC TUBING
• Cut tube ends square and straight. Do not deform the tube (i.e., cause tube to compress its diameter so it is
no longer round).
• Make sure the outer surface of the tube is clear of marks or scratches for a length equal to twice the tube
diameter. This allows the “O” ring to seat properly against the tube (See Figure 1).
• Avoid sharp changes in direction when routing the tubing. Sharp turns cause the tubing to flex and deform
which reduces its flow capacity.
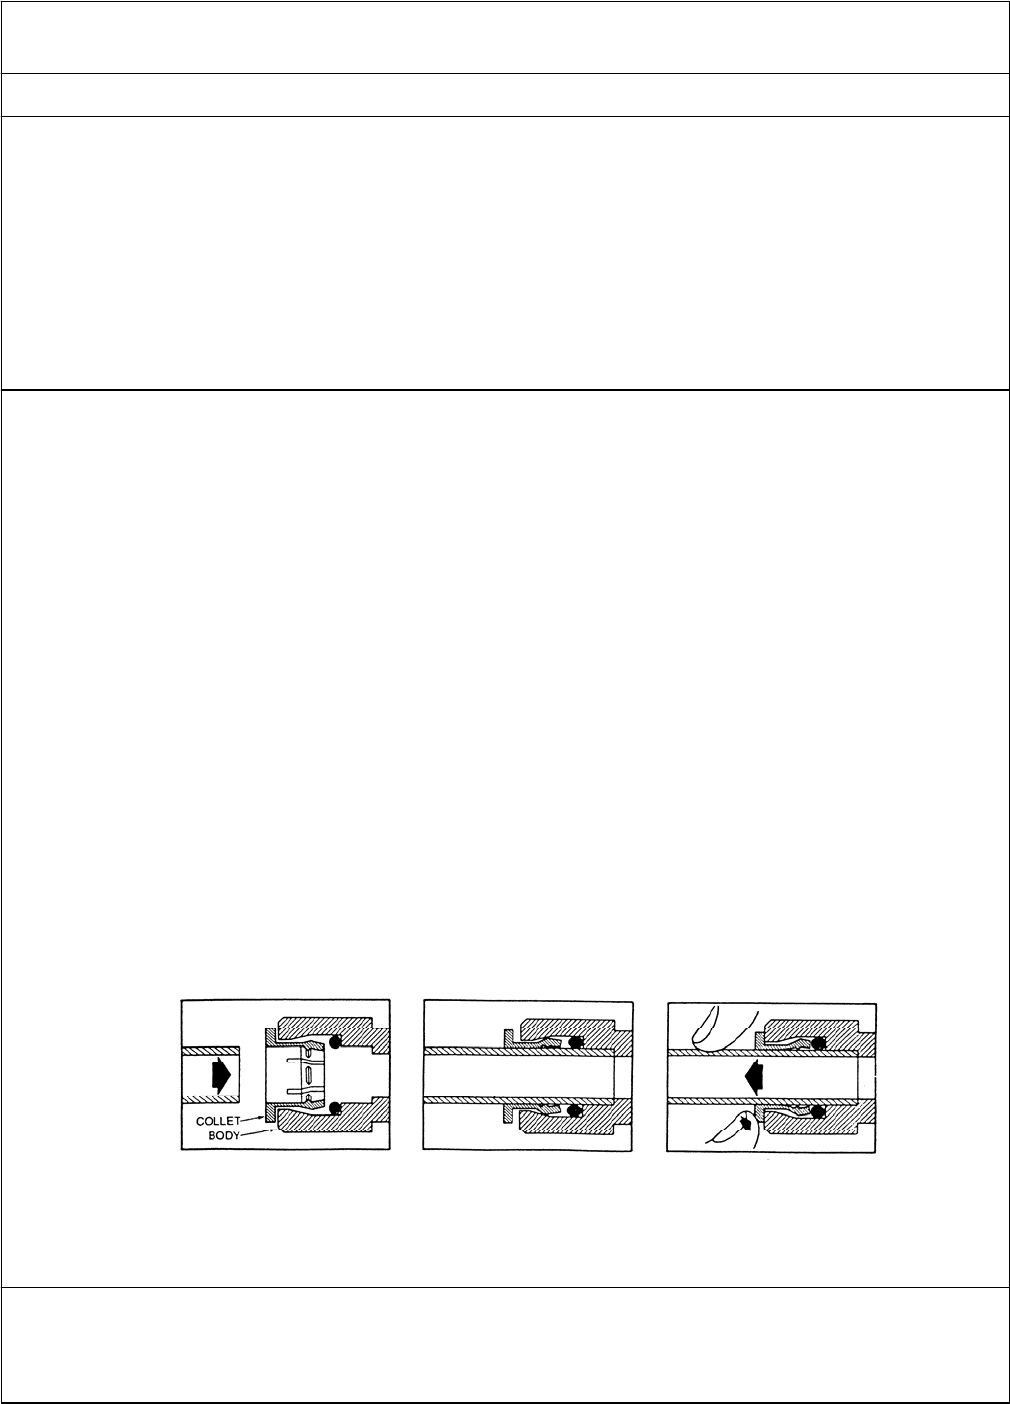
QUICK-CONNECT FITTINGS
• Fittings consist of two parts: a body and a collet (See Figure 1).
• To install a tube, push it through the collet until it seats firmly at the bottom of the fitting.
•
To remove a tube, push and hold the collet against the body while pulling the tube out.
3. Open water supply. The tank will immediately begin to fill. Tank fill time is approximately 3-5 minutes and is
complete when the sound of flowing water has stopped.
Figure1
How to Use Quick-
Connect Fittings
Push tube through Collet into Body
Push Collet against Body to
release tube
Tube must seat firmly at bottom of fitting