


1-8
1.5 INITIAL ADJUSTMENTS
After your fryer has been installed as described in section 1.4, it needs to be adjusted to ensure that
it will perform as designed. These adjustments must be performed by a qualified person. To perform
these adjustment the following tools will be needed:
• Manometer (low pressure gauge) • Digital Thermometer (Temperature probe)
• DC Millivolt Meter
1.5.1 Visual Checks
Before you begin filling and adjusting the fryer, perform the following
visual checks:
a. After the fryer is in its permanent location check the level-
ness. Any additional leveling that is necessary can be
performed as described in section 1.3.
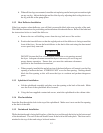
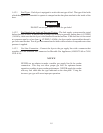
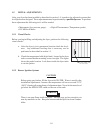
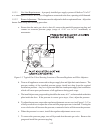
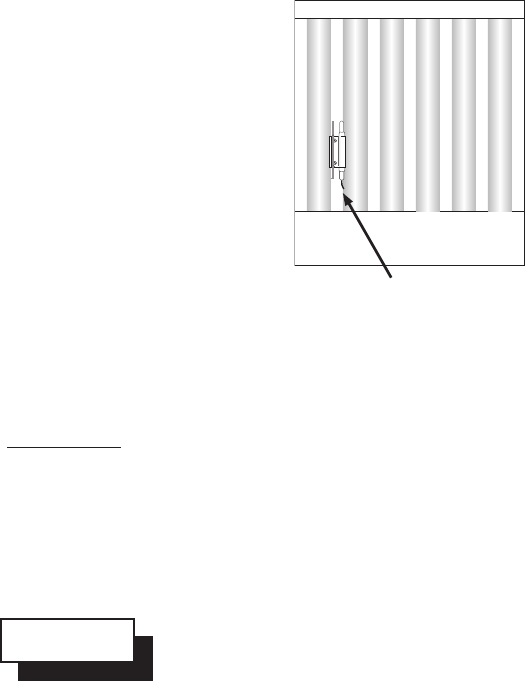
b. Check the temperature bulb (high-limit), located in the fryer
tank to ensure that the mounting screws are tight. The figure
shows the probe location. Look down inside the fryer tanks
to see the probes.
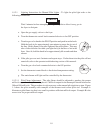
1.5.2 Burner Ignition Systems
CAUTION
Before going any further, fill the fryer with WATER. Water is used for the
installation adjustments because the temperature will never exceed 212°F
(100°C) thereby allowing plenty of adjustment time. Never let the water level
go below the MIN LEVEL mark on the rear of the tank.
WARNING
There is an open flame inside the fryer. The unit may get hot enough to set
near by materials on fire. Keep the area around the fryer free from combus-
tibles.
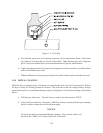
Ensure that these parts
are not loose.