


19
Two-piece vacuum caps seal by the cooling of the contents of the jar, not through pressure of the screw band on the lid. Therefore,
although the screw band is firmly tight, the jar is not sealed until cooled. During processing, the flexible metal lid permits air to be
exhausted from the jar.
Adjust two-piece vacuum caps by screwing bands down evenly and firmly until a point of resistance is met–fingertip tight. Do not
use undue exertion.
It is not necessary for the liquid on canned meats to congeal. The liquid will congeal only when there is a large amount of gelatin
from cartilage or connective tissue present.
The loss of color from beets, during canning, is usually due to the variety of beets used or beets that are too old. If possible, can
young, tender, very dark beets which are freshly gathered. Precook beets with 2 inches of the stem and all of the root on, as this helps
to retain the juices.
Discoloration of peaches and pears on the top of the jar is often due to enzyme activity which means that the processing time was not
long enough or the temperature not high enough to render enzymes inactive
Fruit which has been canned without sugar will often turn brown when exposed to air just as fresh fruit does.
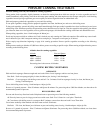
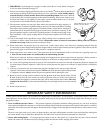
The diameter of Mason jars may vary from one manufacturer to another. Before filling Mason jars, test load your canner. It may be
necessary to double-deck pint and ½ pint jars to reach the maximum capacity of your canner as shown in the chart on page 6. It is
recommended that you stagger the jars by placing one jar on top of two. Jars may touch. The canning rack which accompanied your
Pressure Canner/Cooker must be placed on the bottom of the canner to prevent jar breakage. Although it is not necessary to use a
rack between layers of jars, if you wish to do so, a rack can be ordered from the Presto Consumer Service Department. See page 37
for address.
How To Can foods usinG boilinG waTeR MeTHod
Note: Your 16-quart canner can be used as a boiling water canner for ½ pint and pint jars only. It is not tall enough to allow
adequate space for quart jars.
1. Place cooking/canning rack on bottom of canner. Fill canner halfway with water.
2. Preheat water to 140°F for raw-packed foods and to 180°F for hot-packed foods.
3. Remove overpressure plug and pressure regulator from canner cover and set aside.
4. Use jar lifter to place filled jars, with lids and rings fastened according to manufacturer’s directions, on cooking/canning rack in
canner.
5. Check water level. Add more boiling water, if needed, so the water level is at least 1 inch above jar tops.
6. Turn heat to its highest setting until water boils vigorously.
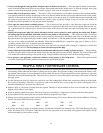
7. Look through the vent pipe on the canner cover to be certain it is open before placing cover on canner. To clean the vent pipe, draw
a pipe cleaner or small brush through the opening.
8. Place cover on canner, aligning the V mark on the cover with the
V
mark on the body handle and lock securely by turning in the
direction indicated to close the cover (clockwise). Cover handles must be centered over body handles. Do not force beyond this
position.
9. Set a timer for the minutes required for processing the food based on tested canning recipe.
10. Lower the heat setting to maintain a gentle boil throughout processing.
11. Add more boiling water, if needed, to keep the water level above the jars.
12. When jars have been boiled for the recommended time, turn off the heat and remove the canner cover.
13. Using jar lifter, remove jars and place them on a towel, leaving at least 1-inch spaces between jars during cooling.