


3
Fan oven cooking is particularly suitable for baking on several
shelves at one time and is a good ‘all-round’ function. It may
be necessary to reduce the temperature by approximately
10°C for recipes previously cooked in a conventional oven.
If you wish to preheat the oven, wait until the temperature
indicator light has gone out before inserting the food.
Defrost
Set the temperature control to 0°C. This operates the
fan to circulate cold air only, so no heat is applied.
This enables small items such as desserts, cream
cakes and pieces of meat, fish and poultry to be defrosted.
Defrosting in this way speeds up the process and protects
the food from flies. Pieces of meat, fish and poultry should
be placed on a rack, over a tray to catch any drips. Be sure to
wash the rack and tray after defrosting.
Defrost with the oven door closed.
Large items, such as whole chickens and joints should not be
defrosted in this way. We recommend this be carried out in a
refrigerator.
Defrosting should not be carried out in a warm oven or when
an adjoining oven is in use or still warm.
Ensure that dairy foods, meat and poultry are completely
defrosted before cooking.
Grill
This function operates the top element. The
temperature control should be set to between 50°C
and 250°C and the grill preheated for 5-10 minutes.
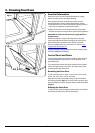
Grilling must always take place with the oven door closed to
ensure correct performance of this function. Check your food
regularly to avoid overcooking.
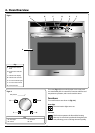
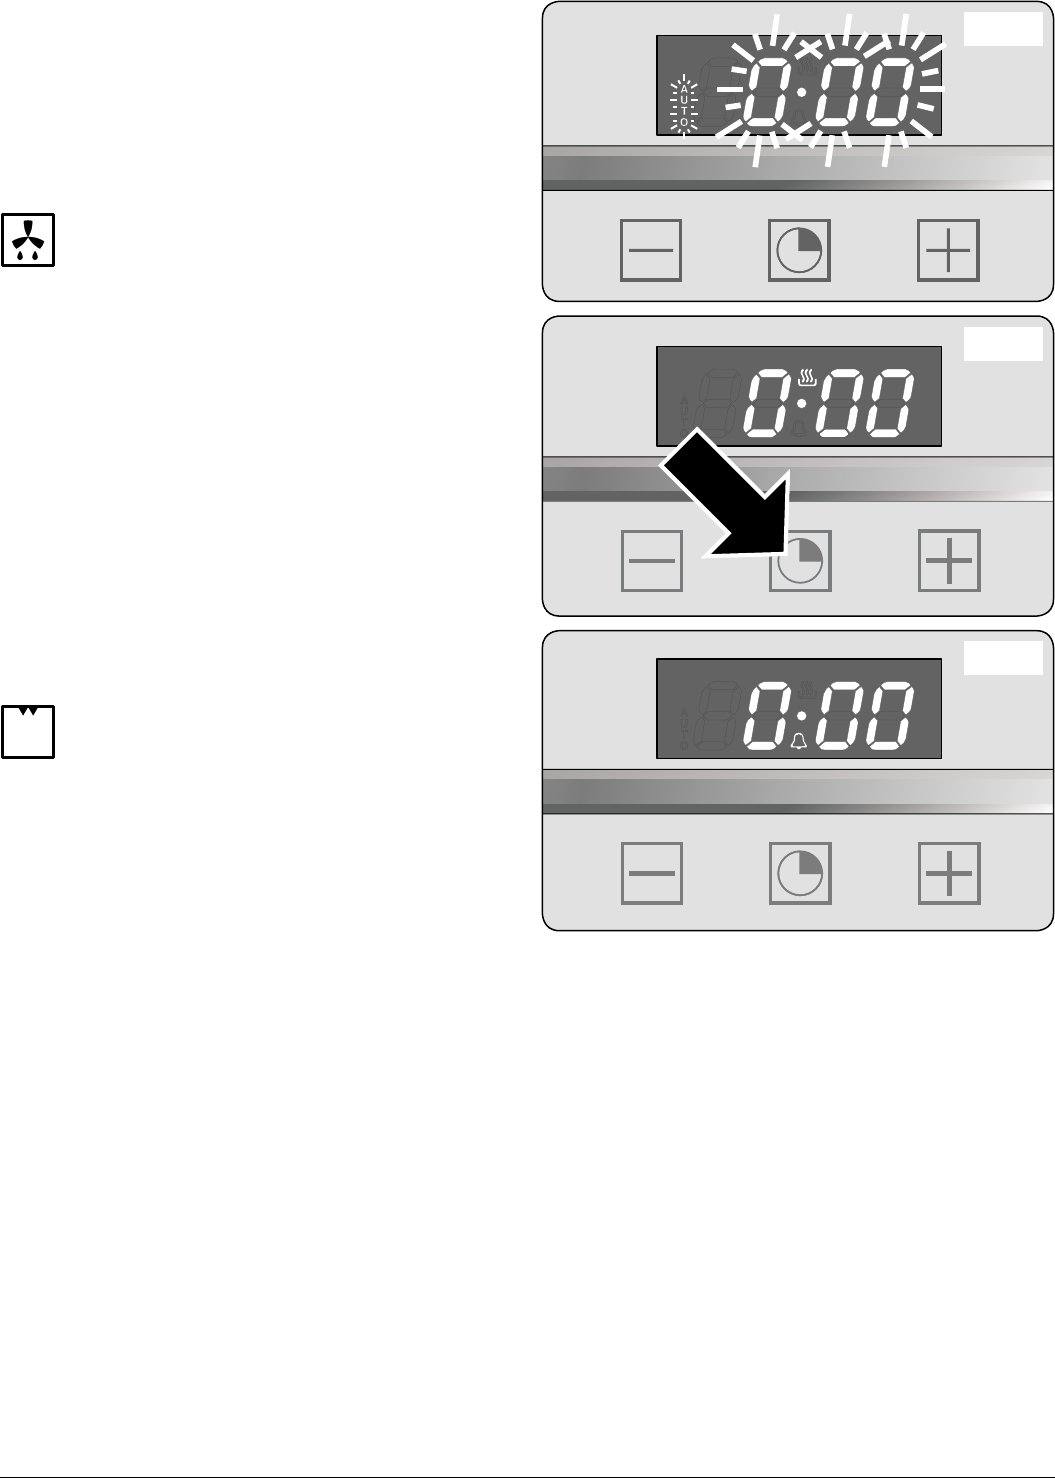
The Clock
Setting the time of day
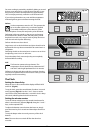
When the oven is first connected the display will flash ‘Auto’
and ‘0:00 ’ (Fig.2-3).
To set the clock, press the central button for about 3 seconds
until [] appears (Fig.2-4). Use the ‘+’ and ‘–‘ keys to set the
correct time of day. Remember this is a 24-hour clock. A beep
will sound, indicating that the clock has been set.
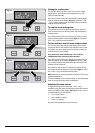
Setting the minute counter
To set the minute minder, press the central timer button for
about 3 seconds until [] appears (Fig.2-5). Using the ‘+’ and ‘–‘
keys, set the required time.
To adjust the duration once the timer has been set, simply
press the timer key for 3 seconds and then adjust the time as
above.
To stop the beeper when it sounds, press any of the clock
buttons.
Note: The oven does not switch off after the alarm has
sounded.
ArtNo.030-0006
9-function oven
symbols
ArtNo.030-0006
9-function oven
symbols
ArtNo.030-0006
9-function oven
symbols
ArtNo.030-0006
9-function oven
symbols
ArtNo.030-0006
9-function oven
symbols
ArtNo.030-0006
9-function oven
symbols
ArtNo.030-0006
9-function oven
symbols
ArtNo.030-0006
9-function oven
symbols
ArtNo.030-0006
9-function oven
symbols
ArtNo.030-0006
9-function oven
symbols
ArtNo.030-0006
9-function oven
symbols
ArtNo.030-0006
9-function oven
symbols
ArtNo.030-0006
9-function oven
symbols
ArtNo.030-0006
9-function oven
symbols
ArtNo.030-0006
9-function oven
symbols
ArtNo.030-0006
9-function oven
symbols
ArtNo.030-0006
9-function oven
symbols
ArtNo.030-0006
9-function oven
symbols
ArtNo.303-0001 Setting the clock 1
ArtNo.303-0002 Setting the clock 2
Fig.2-3
ArtNo.303-0003 Setting the minute timer
Fig.2-4
Fig.2-5