USERS GUIDE
Page 11
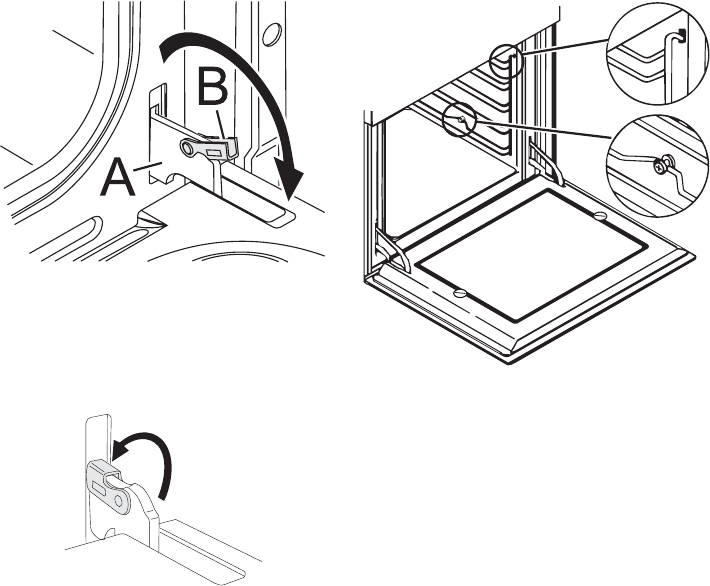
Grip the sides of the door and lift it
upwards and slide it forward to remove.
To refit the door, slide the hinges into
their slots. Before closing the door,
remember to rotate the two toggles B,
used to lock the two hinges, fully back.
Do not immerse the door in water
Clean the enamelled interior surface and
the glass using a damp cloth and a
proprietary mild cream cleaner, rinse, then
dry carefully using a soft cloth. If
necessary, the inner door glass can be
removed by unscrewing the two fixing
screws. Make sure that the glass is dried
thoroughly before re-fitting. Take care not
to over tighten the fixing screws when re-
fitting.
Removing the shelf support
Some models have detachable shelf
support, which can be removed, from the
oven for cleaning by hand or in a
dishwasher. Grasp the shelf support and
press downwards to release from the clip
device on the lowest runner (see diagram).
The shelf support can then be hinged
upwards and lifted from the mounting
holes in the upper corners of the oven
prior to removal. To re-fit the shelf
supports, reverse the procedure ensuring
that the clip device engages firmly on the
lowest runner.
Oven accessories
The oven shelves, oven pans and trivets
should be washed in hot water with a mild
detergent then dried carefully, or they can
be washed in a dishwasher.
Cleaning the oven interior
The interior of the oven has an enamelled
finish. In order to make cleaning easier,
any spillage’s should be wiped away as
soon as possible after they occur. Clean
the enamelled interior surfaces using a
damp cloth and a proprietary mild cream
cleaner, rinse, then dry carefully using a
soft cloth. Any burnt-on soiling can be
carefully removed using a plastic scourer.
Do not use caustic or abrasive cleaning
agents, knives or other metal
implements as these could damage the
oven.


