


10
Fitting the Furniture Door
If you need the door to open from the other side, then reverse
the door before tting the furniture door (see ‘Reversing the
door’).
Tools required:
• Tape measure
• Sharp pencil
• Small flat bladed screwdriver
• Spanner
Procedure
1. Undo the 2 screws from the mounting bracket. Remove
the bracket.
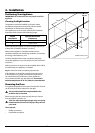
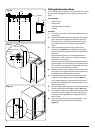
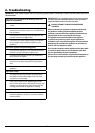
2. Measure the width of the furniture door. At the halfway
point mark a line vertically down the inner surface of
the furniture door. You should draw the line from the
top of the furniture door to approximately halfway
down.
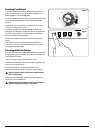
3. Place the mounting bracket on the reverse of the
furniture door (Fig.4-8). The middle of the mounting
bracket should be positioned on the line that you have
just drawn.
Please note the position of the mounting bracket in
the drawing – make sure that you have the mounting
bracket the correct way up.
The top of the mounting bracket should be positioned
approximately 15 mm from the top of the furniture door.
This will allow a 5 mm gap from the top of the furniture
door to the underneath of the worktop.
4. Mark the position of the 10 xing points in the bracket.
Using the screws supplied, x the mounting bracket to
the furniture door. Fully tighten the screws.
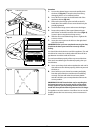
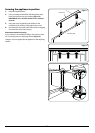
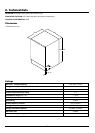
5. Hang the furniture door onto the appliance door and
using the screws supplied, secure in place (Fig.4-9).
Use a suitable spanner to adjust the gap on the lower
section of the adjusting bolts. The gap should be set to
approximately 9 mm.
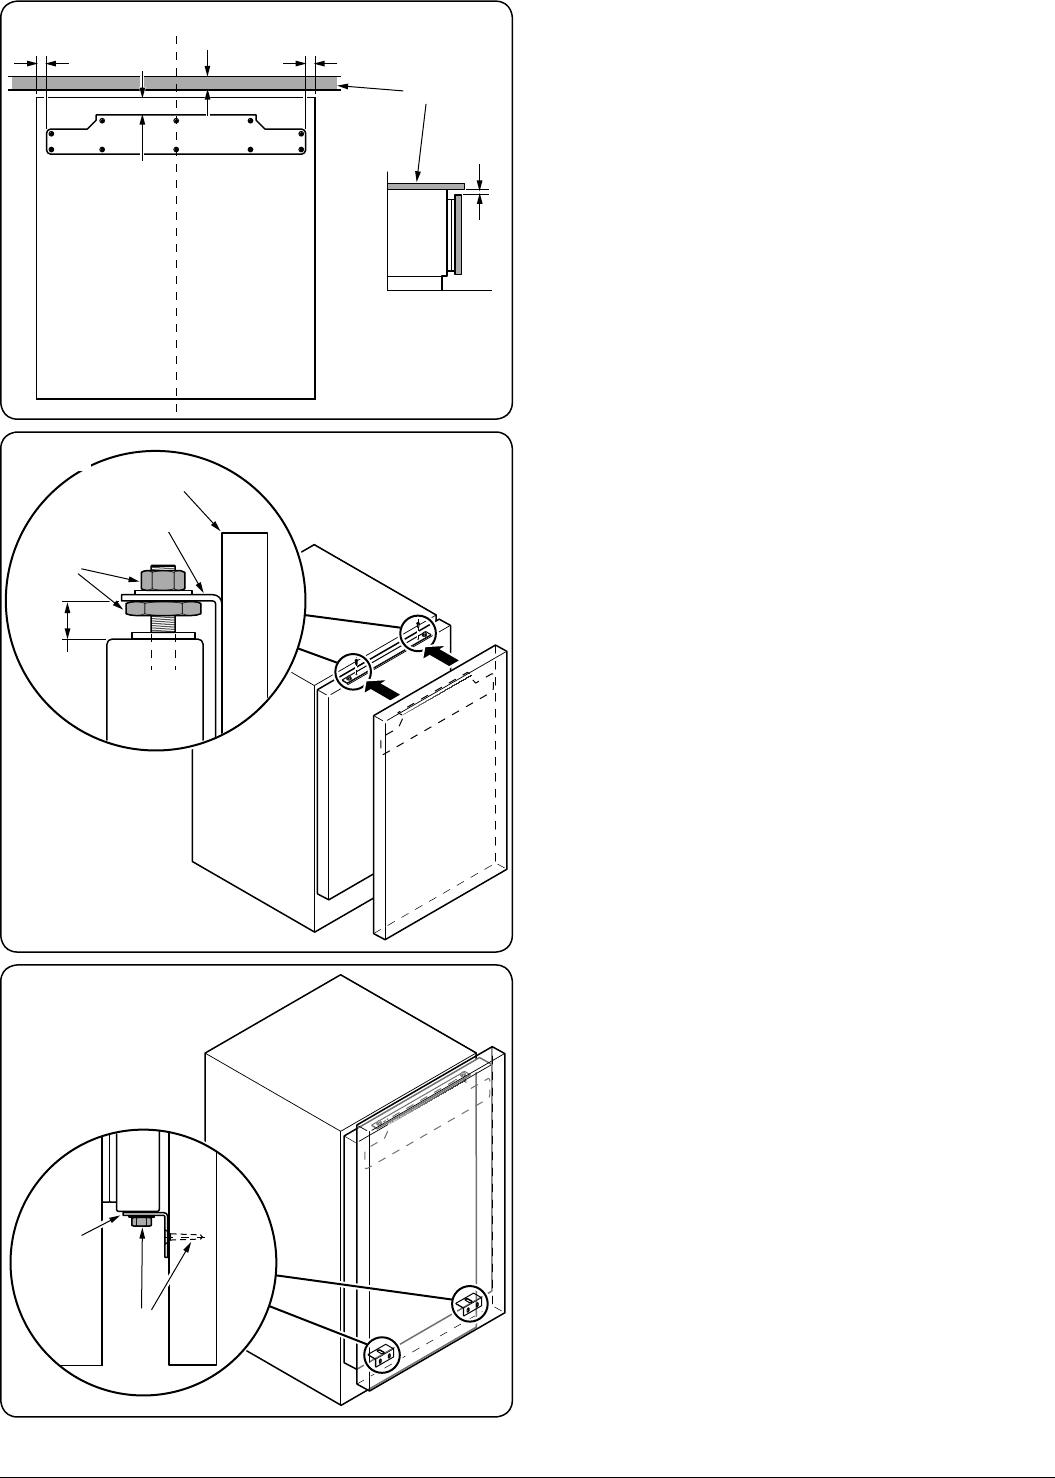
6. Fix the lower bracket to the bottom of the furniture door
and the underneath of the appliance door (Fig.4-10).
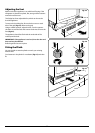
7. It is possible to make minor adjustments to the position
of the furniture door using the screws on the top and
the bottom of the appliance door. Adjust the door so
that it is level.
8. Insert the cover trim to the top of the appliance – this
will slide into the slot in the mounting bracket
(Fig.4-11).
= =
15 mm
5 mm
5 mm
Side view
Worktop
9 mm
Furniture door
Adjusting
nuts
Mounting bracket
Bracket
Fixing
screw
Fig.4-9
Fig.4-8
Fig.4-10