


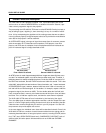


16
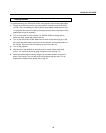
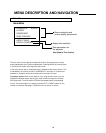
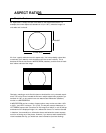
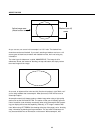
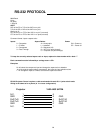
After pressing ENTER, the picture quality menu will appear (the menu to the right
of the main menu above). To adjust a certain function, highlight it with the or
DOWN buttons, and press ENTER. The following will then appear on-screen (we’ll
use COLOR as an example):
MENU DESCRIPTION AND NAVIGATION
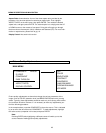
COMPOSITE
COLOR: 0
AGC ENABLED
To Change the value of the function (Color in this case), simply press the UP button to increase the
value, and the DOWN button to decrease the value. For COLOR and CONTRAST, to turn AGC on or
off, press the ENTER button.
• TINT
Also known as ‘HUE’. Decreasing this will give the picture a ‘redder’ tint, increasing it gives the pic-
ture a ‘greener’ feel. This is actually a ratio of one color vs. another (red, green or blue), so making
the picture ‘greener’ for example, is actually affecting all three colors. It is recommended that this
function stay about mid-range.
• COLOR
Also known as ‘SATURATION’. Decreasing this will decrease the amount of color in the image (it will
be black and white if it is decreased all the way), Increasing this will add color to the image. This is
typically best at about mid-range, but increasing it a little will add more vibrance to the colors.
However, if it is increased too high, the picture will look very unnatural.
The ‘AGC enabled/disabled’ function should normally be left in ‘AGC Disabled’. If, however, you are
using an unstable source and are having color level fluctuations in the image, you may try to use
‘AGC Enabled’ to see if it helps.
• BRIGHTNESS
This actually controls the black level of the picture- not the overall light output! If this is set too low,
then there will be no detail in the dark areas of the image. If it is set too high, then the picture will
appear ‘washed out’. This is normally set using a ‘PLUGE’ test pattern; if this has already been cali-
brated it should not be adjusted (for best results).
• CONTRAST
This is the ratio of brightest whites to the darkest scenes. Basically, this increases the ‘white level’ of
the image. While it will increase the light output to a certain extent it could also cause ‘clipping’ if it is
increased too high. This appears as a loss of definition in the brightest scenes, where the whites
appear to ‘bleed together’.
The ‘AGC enabled/disabled’ function should normally be left in ‘AGC Disabled’. If, however, you are
using an unstable source and are having brightness (light output) level fluctuations in the image, you
may try to use ‘AGC Enabled’ to see if it helps.