


10_ setting up
4. Flush 1 gallon of water through the fi lter before
drinking or using the water from the refrigerator.
(Flush approximately 6 minutes.) To fl ush, press a
large glass or cup against the water dispenser lever.
Fill the glass, empty it into the kitchen sink after it is
fi lled, and then repeat.
5. After you turn on the refrigerator, let the ice maker
make ice for 1 to 2 days. Over that period of time,
throw out the fi rst 1 or 2 buckets of ice the freezer
makes to ensure all impurities have been removed
from the water line.
Only connect the water line to a drinkable water
source.
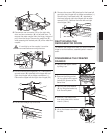
If you have to repair or disassemble the water line, cut
off 1/4“ of the plastic tubing to make sure you get a
snug, leak-free connection.
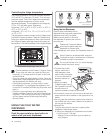
COMPLETING THE SET UP
Now that you have your new refrigerator installed in
place, you are ready to set up and enjoy the features
and functions of the appliance. By completing the
following steps, your refrigerator should be fully
operational.
1. Make sure your refrigerator is in an appropriate
location with reasonable clearance between it and
the wall. Refer to installation instructions in this
manual.
2. Once the refrigerator is plugged in, make sure the
interior light comes on when you open the doors.
3. Set the Temperature control to the coldest
temperature and wait for an hour. The freezer
will get slightly chilled and the motor will run
smoothly. Reset the refrigerator and freezer to the
temperatures you want.
4. After you plug the refrigerator in, it will take a few
hours to reach the appropriate temperature. You
can store food and drinks in the refrigerator after
the temperature is suffi ciently cool.
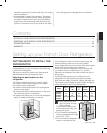
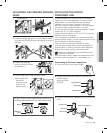
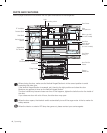
Connecting the water supply line to the
refrigerator.
There are several items that you need to purchase to
complete this connection.
You may fi nd these items sold as a kit at your local
hardware store.
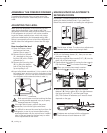
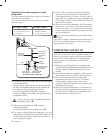
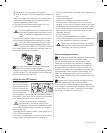
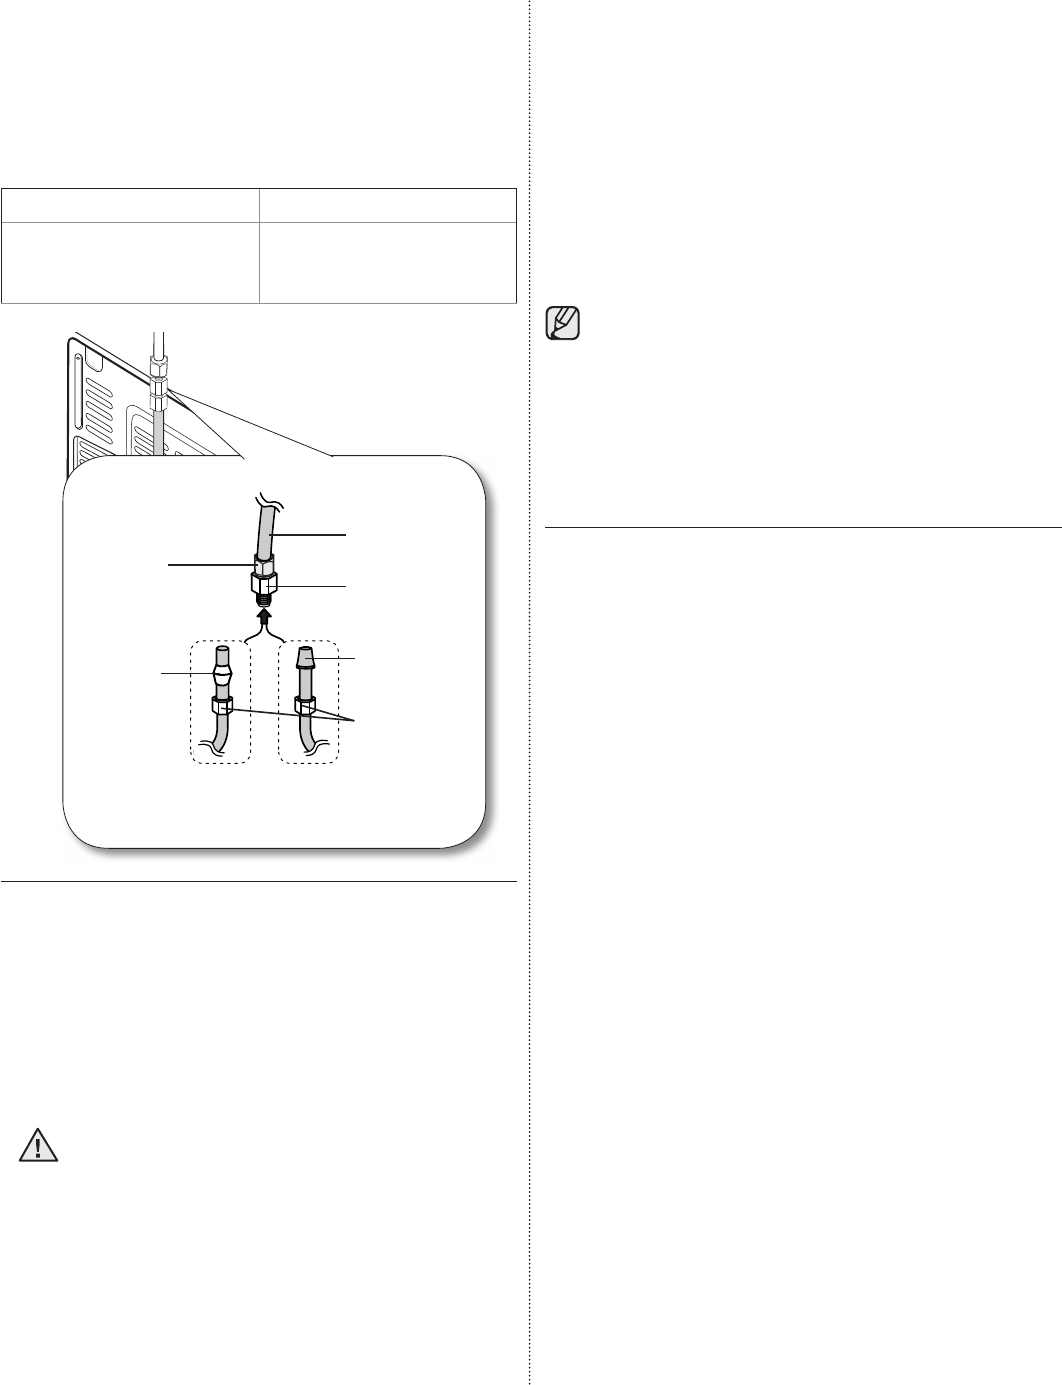
1. Connect the household water line to the assembled
compression fi tting.
- If you are using copper tubing, slip the compression
nut ( B ) (not supplied) and ferrule (not supplied) on
the copper tubing (not supplied) as shown.
- If you are using plastic tubing ( B ) , insert the
molded end (Bulb) of the plastic tubing ( B ) into the
compression fi tting.
Do not use without the molded end (Bulb) of
the plastic tubing ( B ).
2. Tighten the compression nut ( B ) onto the
compression fi tting.
Do not over-tighten the compression nut ( B ) .
3. Turn water on and check for any leakage. If you fi nd
water drops or leakage in the connection areas, turn
off the main water supply. Check the connections
and, if necessary, tighten.
Compression Compression
Nut (1/4”) Nut (1/4”)
(Assembled) (Assembled)
Ferrule Ferrule
(Not supplied)(Not supplied)
Plastic TubingPlastic Tubing
(Assembled)(Assembled)
Compression Compression
FittingFitting
(Assembled)(Assembled)
Molded Molded
end(Bulb)end(Bulb)
Compression nut Compression nut
(B) (1/4”) (Not (B) (1/4”) (Not
supplied)supplied)
or
Copper tubingCopper tubing
(Not supplied)(Not supplied)
Plastic tubing (B)Plastic tubing (B)
(Not supplied)(Not supplied)
Household water supply line
Refrigerator
Use Copper Tubing Use Plastic Tubing
• ¼” copper tubing
• ¼” compression nut (1pc)
• Ferrule (2pc)
• ¼” plastic tubing
→
Molded end(Bulb)
• ¼” compression nut (1pc)
CAUTION