


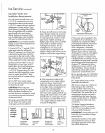
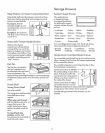
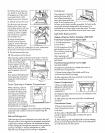

5oPullthedrawerpartway
out.Reachin,pushtherear
oftheglassup;atthesame
time,pushitbackuntilit
clearsfront-cornerretainers
6oTiltandremovethecover
7.Pullthedrawerforward,
liftthefronttoclearstops,
andpullthedraweroutuntil
ithitsthedoorThenliftthe
drawerupuntilit ishigher
thanthedrawersupports,
tiltit andtakeitouL
8. If tape hotds bottom
drawer cover to drawer
supports, remove the tape_
Pull drawer partway out
j ........
Reach in, push the rear of the glass up and, at the same
time, back, until it dears front-corner retainers,
9. Tilt and remove the cover,
10. Tilt and remove the drawer
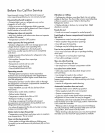
After cleaning, replace drawers and covers in reverse
order Reinstall the gasket at the rear of the top drawerr
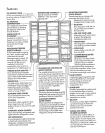
Fitthe end of the plastic
drawer support into the slot
on the gasket, with the rubber
gasket flap facing you Make
sure the gasket snaps into
place
Then repIace the light panel
by hanging top of panel on
upper pins and pushing in
at bottom
Drain Opening in Freezer Compartment
When cleaning, remove Il!
the freezer bin and flush
a solution of baking soda
(one teaspoon) and two
cups of hot (not boiling)
water through the drain
line with the help of a
meat baster This will help
eliminate odor and reduce
the likelihood of a clogged drain line,
If drain becomes clogged, use a meat baster and baking-
soda-and-water solution to force the clog through the
drain llne
Behind Refrigerator
Take care moving your refrigerator away from the wall.
All types of floor coverings can be damaged, particularly
cushioned coverings and those with embossed surfaces
Pull the refrigerator straight out and return it to position by
pushing it straight in Moving refrigerator in a side
direction may damage floor covering or refrigerator
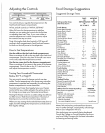
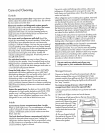
Condenser
The condenser is located
behind the base grille For
most efficient operation,
remove the base grille (see
page 3) and sweep away or
vacuum up dust that is readity accessible For best results,
use a brush specially designed for this purpose. It is
available at your Sears store or service center, This easy
cleaning operation should be done at least once a year
Light Bulb Replacement
Unplug refrigerator before changing a light bulb,
Fresh Food Compartment-Upper Light
1. Pull off temperature
control knobs
2, PuTIthe bottom of the
fight shield down and
forward, then rotate the
top up and off
After replacing with
same size bulb, reinsta!l
light shield
Pin
Fresh Food Compartment-Lower Light
(on some models)
This light islocated behind a shield at the rear of
the fresh food compartment
1.Grasp the top edge of the shield and lift it up
and forward to free itstop edge
2. After replacing with same size bulb, hook the top
of the shield back in place
Freezer Compartment
1_Remove shelf just below
light panel (Shelf will be
easier to remove if it is
emptied first )
2. Puff plastic light panel toward you, (It will bend to free
tabs from grooves)
3. After replacing with same size bulb, reinstall panel
and shelf,
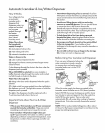
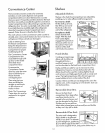
Convenience Center
1. Remove top door bin and
raise Convenience Center
inner door
2. Press sides of flexible light
panel to release locking tabs and a!low the panel
to swing down,
3° After replacing with night-light bulb of same wattage,
place rear tab of light panel into door and rotate panef
up until tabs lock into slots above
17