


24
Care and Cleaning
Self Clean (Cont.)
note
The oven lights do not operate while the oven is in self clean •
mode to protect them from damage.
Self clean will not work with the meat probe connected (the •
meat probe symbol will flash.)
If you want to stop the self clean cycle, press the CANCEL
· SECURE key. Keep in mind that the oven door will
remain locked until it is safe enough to open. The lock
symbol will disappear from the display when the door lock
is released. You will still need to exercise caution when
the door lock is released because the inside of the oven
may still be hot.
After the self clean cycle is complete...
The door latch will release when the inside has cooled •
down. The clean icon, lock icon and “ON“ will disap-
pear from the display. Exercise caution because the
oven will still be hot (about 400°F) at the time the
door lock is released.
Reinstall the convection lter and oven racks before •
using your oven.
You may notice a powder ash residue in the bottom of •
the oven after self cleaning. This condition is normal.
Use a damp cloth or sponge to wipe up the residue
after the oven cools down.
Self Cleaning Tips
If any soil remains in the oven after the self clean •
cycle is done, you may repeat the cycle if you want.
Self clean the oven regularly to prevent excessive soil •
build-up. Doing so will make the self clean cycle work
better and reduce smoke and odors.
Setting the Oven to Self Clean at a Later
Time
Prepare the oven for self cleaning as instructed on 1.
page 23. Observe all safety precautions and remove
all items listed from inside the oven. Clean the door
gasket and around the door as instructed.
Close the oven door.2.
Press the 3. SELF CLEAN key.
Press the 2, 3 or 4 key to select the desired self clean 4.
time.
Press the 5. START TIME key.
Enter the desired start time. For example, press 6.
1-2-3-0 for 12:30. You may enter a time up to 22
hours and 59 minutes ahead of the present time.
Press 7. START. When you press START, “DELAY” will
appear on the display and the oven door will lock. The
oven will start to self clean at the time selected.
When the oven is set to clean at a later time...
If you want to view the time, push the • CLOCK key.
If the clock is displayed, you can push • START TIME
to check when the self clean cycle will start.
When the self clean cycle starts, “• DELAY” will disap-
pear and “ON” will appear on the display.
To cancel the time delayed self clean cycle...
Press • CANCEL/SECURE.
If the self clean process has not started, allow about •
a minute for the door to unlock before attempting to
use the oven.
If the oven is in the middle of the self clean process, •
the door will unlock when the oven has cooled down
enough to open safely. The oven will still be hot
(about 400 °F.)
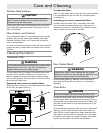
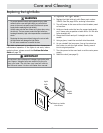
Cleaning the Exterior
Control Panel
warning
Do not use abrasive cleaners or scrubbers on the control panel.
They will permanently damage the finish.
To avoid accidentally turning the oven on while cleaning
the control panel, activate the lock-out feature. Press the
CANCEL · SECURE key for six seconds. The lock-out fea-
ture disables the keys. When the control panel is locked,
the word “OFF” appears on the display.
When you want to re-activate the control panel, press
CANCEL · SECURE for six seconds.
Clean the control panel with the soft side of a sponge
dampened with a mild solution of detergent and warm
water. Dry the control panel completely with a soft, lint-
free cloth.