


Instructions for the installer
25
16. FINAL OPERATIONS
After replacing the nozzles, reposition the flame-spreader crowns, the burner caps and the grids.
Following adjustment to a gas other than the preset one, replace the gas adjustment label fixed to the
appliance with the one corresponding to the new gas. This label is in the packet together with the
nozzles.
16.1 Regulation of the hob burner minimum level for natural gas
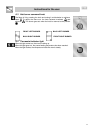
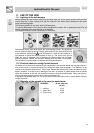
Light the burner and turn it to the minimum position
. Extract the gas tap
knob and turn the adjustment screw at the side of the tap rod until the correct
minimum flame is achieved.
Replace the knob and check burner flame stability: (rapidly turning the knob
from maximum to minimum position, the flame should not go out). Repeat the
operation on all the gas taps.
16.2 Regulation of the hob burner minimum level for LPG
In order to adjust the minimum with LPG, the screw at the side of the tap rod must be turned
clockwise all the way.
The bypass diameters for each individual burner are shown in paragraph “15.2 Burner and nozzle
characteristics table". Once the regulation has been completed, restore the seal on the by-passes
using paint or similar materials.
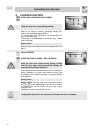
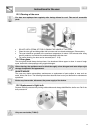
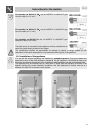
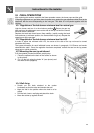
16.3 Mounting the rear top skirtboard
To fit the upstand, proceed as follows, step by step.
1. Place the upstand on the back of the cooker as shown
in the picture.
2. Fix it to the hob using the holes "A" (see picture) and
the three screws (supplied).
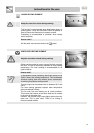
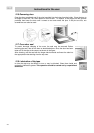
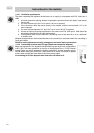
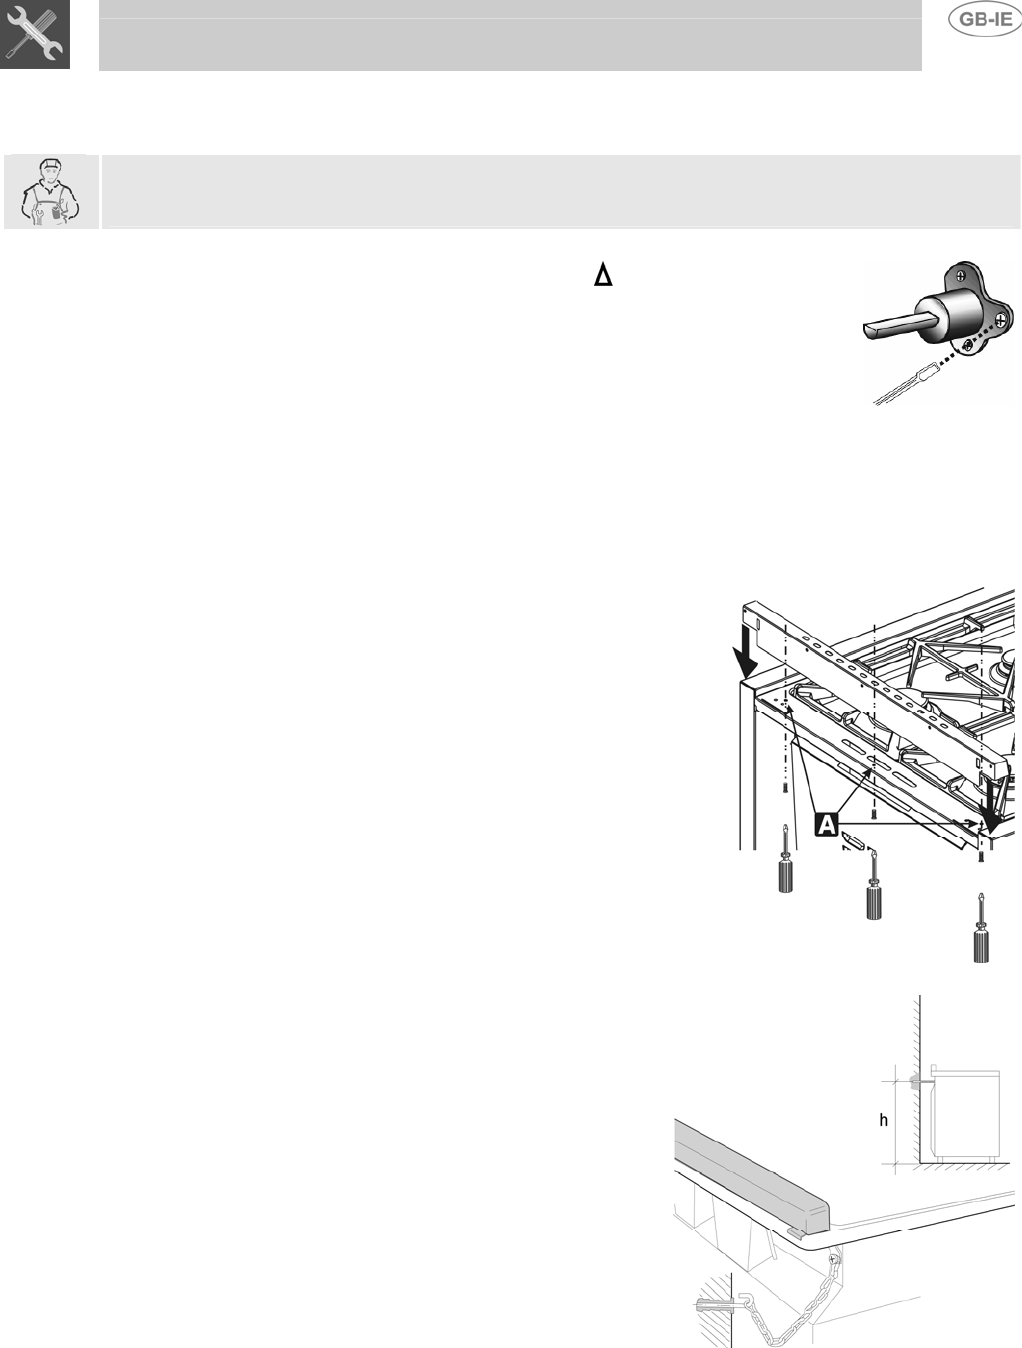
16.4 Wall fixing
• Stretch out the chain attached to the cooker
horizontally so that the other end touches the wall.
• Mark the wall in the position where the hole is to be
drilled.
• Drill the hole, insert a wall plug and attach the chain.
• Move the cooker up against the wall.