Instructions for the user
22
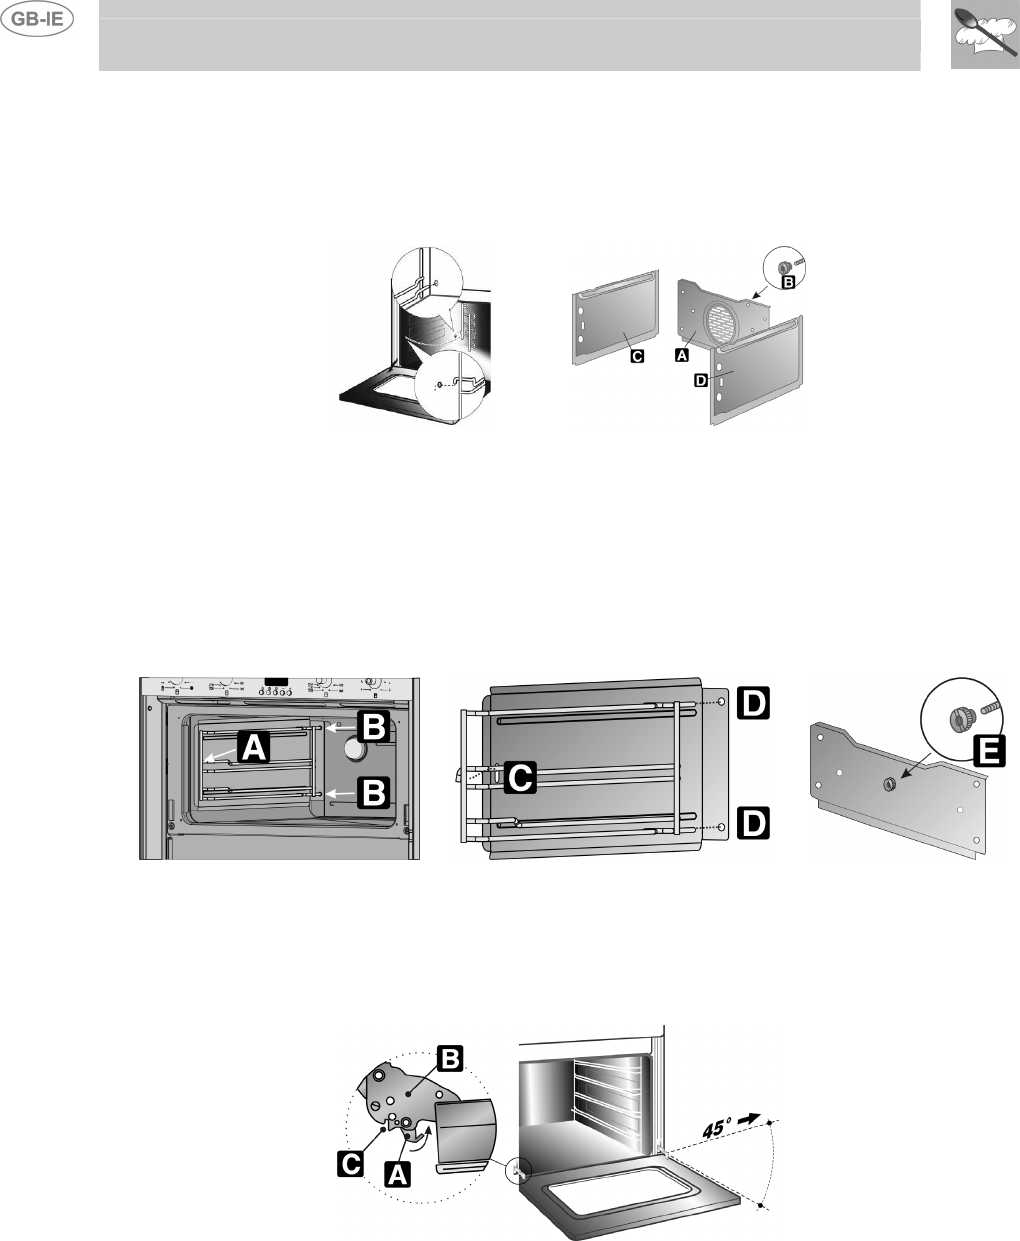
13.3.5 Assembling the self-cleaning liners (maxi oven)
1. Remove all accessories from the oven;
2. Remove the side grilles (fig.1);
3. Extract the side liners “C” and “D”(fig. 2);
4. Remove the back panel “A” after undoing the threaded ring-nut “B” (fig. 2).
5. Reassemble the panels, restoring them to their original position.
1)
2)
13.3.6 Assembling the self-cleaning liners (small oven)
1. Remove all accessories from the oven;
2. Remove the side runners and self-cleaning liner together by lifting out the pin A and extracting the
runners from the holes B on the bottom of the oven (fig.1);
3. Separate the self-cleaning liner from the runners by removing the runner pin from the slot in the
liner (Point C in fig. 2) and extracting the two runner pins from the holes in the bottom of the liner
(Point D of fig. 2);
4. Remove the liner which rests on the bottom of the oven by unscrewing the screw E and removing it
from the fixing pin (fig. 3).
5. Reassemble the panels, restoring them to their original position.
1)
2) 3)
13.4 Removing door
With the door completely open, lift the levers A until they touch the hinges B and take hold of the two
sides of the door with both hands close to the hinges. Raise the door to an angle of about 45° and
remove it. If the hinges have not locked, repeat the operation, raising the levers and keeping the door
slightly raised. To reassemble, fit the hinges B into their grooves, then lower the door into place,
ensuring that it remains fitted into the grooves C.


