Instructions for the User
25
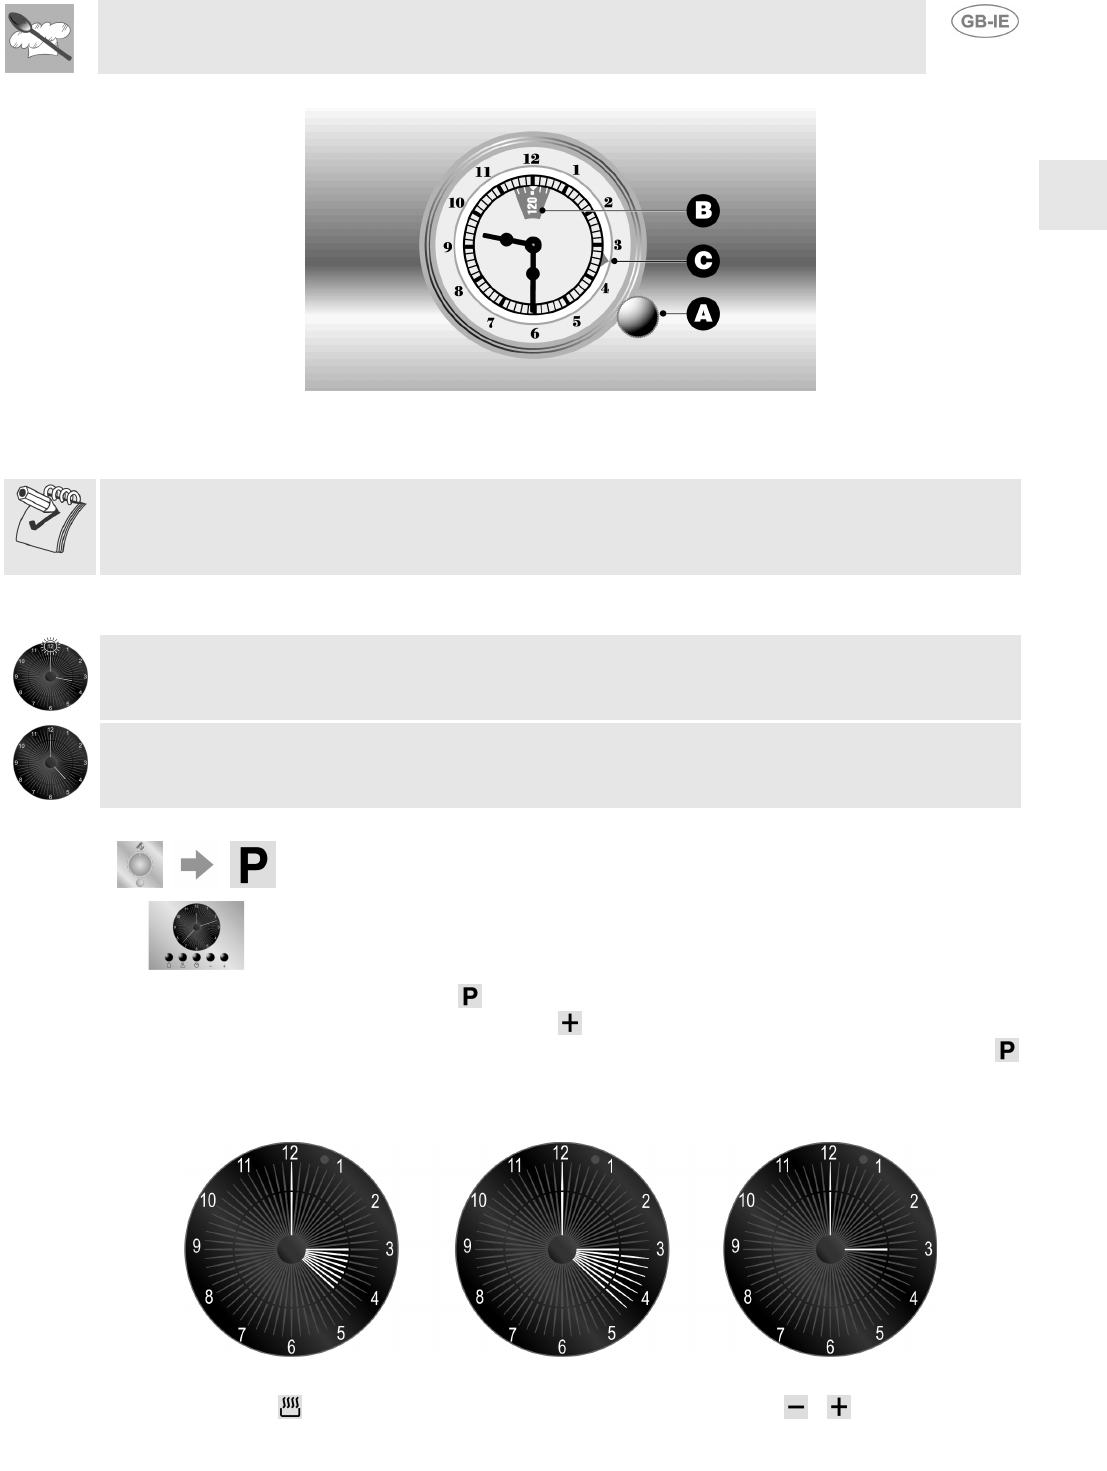
The cleaning cycle can be programmed to start at a preset time. Turn the knob A anticlockwise to set the
Pyrolysis duration in the window B. PULL the knob A and turn it anticlockwise until the arrow C is in line
with the cooking start time required.
The cleaning cycle must always be preset.
13.6.5 How the automatic cleaning cycle works (for models with electronic analogue clock)
The table below shows an example of operation of the automatic cleaning cycle.
One minute after the start of the pyrolysis cycle, an interlock device which prevents opening of the door
is tripped and number 12 on the timer starts to flash.
The door interlock is only released later, when the temperature inside the oven drops back below 300°C,
and number 12 on the timer stops flashing.
13.6.6 Setting the cleaning cycle with electronic analogue clock
FUNCTION SELECTOR KNOB
CLEANING CYCLE DURATION
Turn the function selector knob to the symol. The segments relating to the 90 minutes after the
current time will illuminate on the display. Press the keywithin 1/2 seconds to increase the duration of
this operation up to a maximum of three hours. 6/7 seconds after the knob has been turned to the
symbol or the pyrolysis duration has been set, the oven will start the cycle. The internal and external
segments on the display will flash in alternation, and finally they will go out, to be replaced by constant
display of the current time. The segments will continue to flash until the end of the pyrolysis.
The start of the pyrolysis cycle can be programmed within the next 12 hours. After setting the pyrolysis
duration, press the key and set the pyrolysys start time by pressing the / keys. The internal
segments will remain on and the external ones will flash until the current time is the same as the cycle
start time. The process will now start and the segments will start to flash as already described.


