


11
TROUBLESHOOTING GUIDE
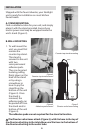
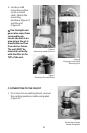
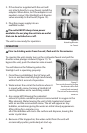
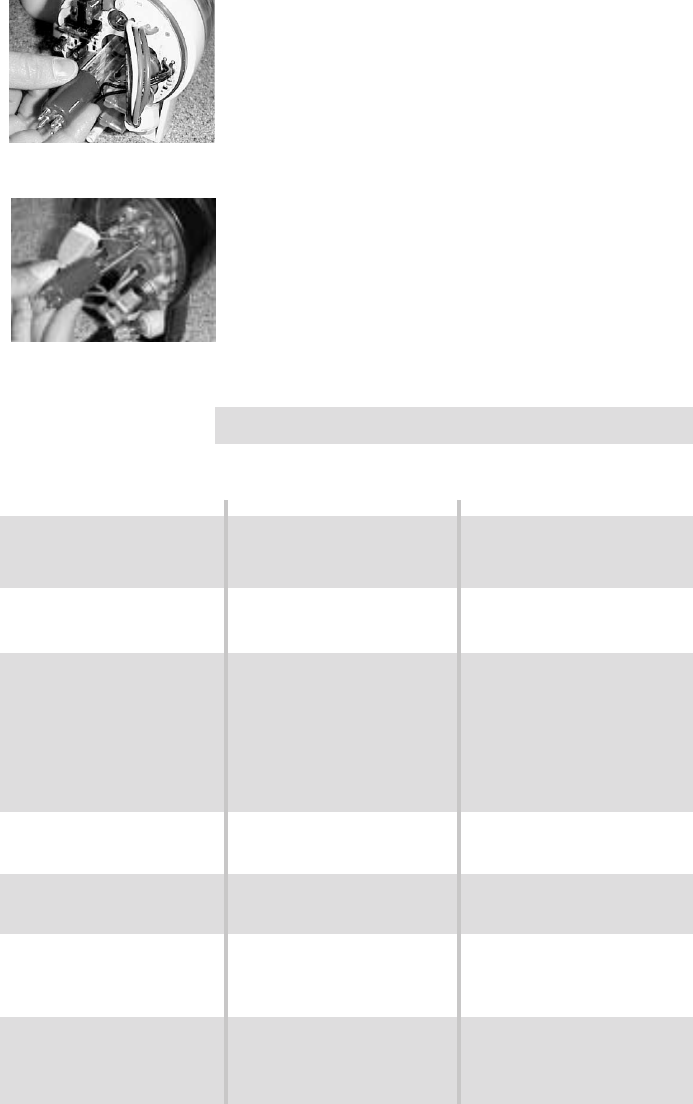
5. Loosen the lamp retention screw (External
Power supply units–Figure 26).
6. Slide the lamp out carefully
(Figures 26 and 27).
7. Insert the new lamp in the sleeve and
reinstall the lamp.
8. Reinstall lamp wiring and the bottom cover.
9. Reinstall the lter as provided in the lter
replacement instructions (see page 7).
10. Reconnect power.
The unit is now ready for operation.
Unit leaking at tubing
connection(s) after unit has been
serviced.
Unit leaks around top cap after
lter has been replaced.
Water is owing from the unit at a
very slow rate.
Lamp does not light when unit is
operated.
No bubbles are visible in the
incoming stream.
After removing unit for service,
no bubbles are visible in unit
when running.
Unit is mounted above counter
with diverted valve assembly
attached to the sink and partially
drains when not in use.
Tubing not securely connected
and/or tubing lock ring not
secured over tubing tting.
O-ring on top is not properly
seated.
Filter element plugged.
Diverter screen plugged.
Inlet plugged.
No power.
Lamp burned out.
Filter is exhausted.
Inlet and oulet tubing has been
reversed, causing reverse ow
through the unit.
Diverted valve not fully closing
when water is turned off.
Verify that tubing is properly
connected and that the lock ring
is engaged.
Verify O-ring is seated.
Replace lter.
Remove diverter valve from the
faucet and clean the screen.
Reverse ow to unit temporarily
to remove blockage. This can
be done by temporarily reversing
inlet and outlet ttings.
Make sure power is available.
Replace lamp.
Replace Filter.
Reverse tubing connections.
Push diverted valve in when unit
is not in use.
SYMPTOM POSSIBLE CAUSE POSSIBLE SOLUTION
Figure 26 (Internal Power Supply)
Removing lamp
Figure 27 (External Power Supply)
Removing lamp