


Felix Storch, Inc.
SUMMIT APPLIANCE DIV.
Page 10
ALARM INSTRUCTIONS (alarms are optional on most models)
SETTING THE HIGH/LOW ALARM
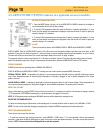
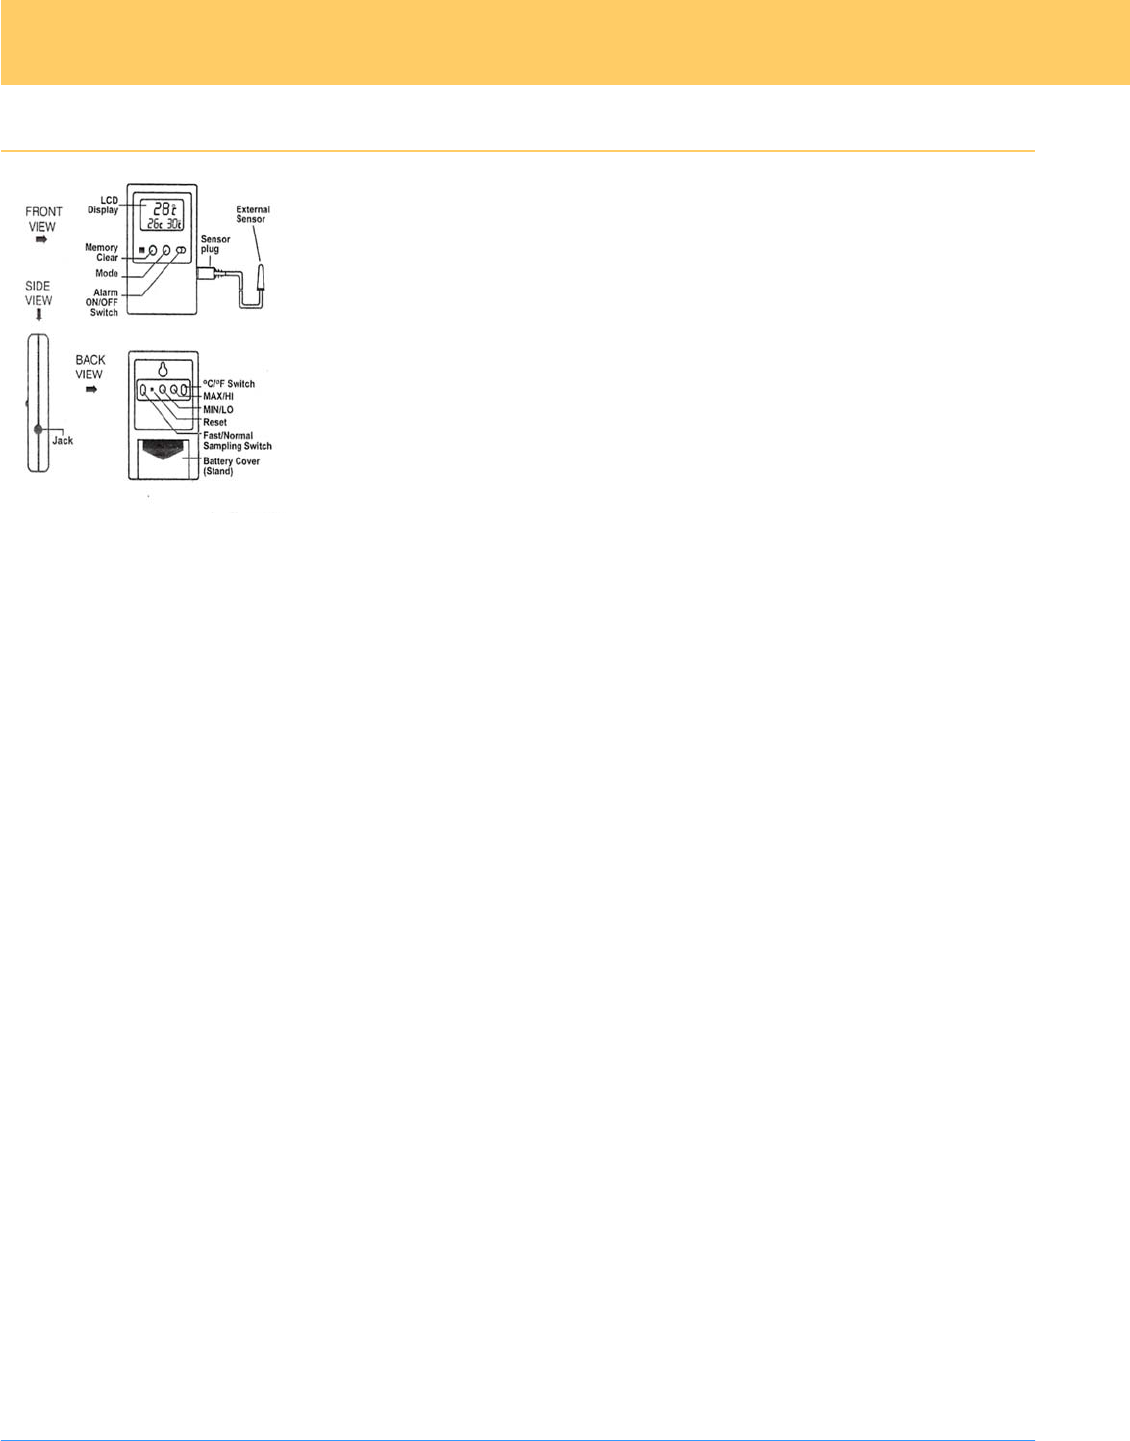
1. Press the MODE button until unit is in the ALARM DISPLAY MODE indicated by the display of
current temperature and HI and LO alarm settings.
2. To set the HIGH temperature alarm limit press the HI button, to advance the display in 1° incre-
ments, until the desired high temperature is displayed. Press and hold the HI button to rapidly ad-
vance the display in 5° increments.
3. To set the LOW temperature alarm limit press the LO button, to advance the display in 1° incre-
ments, until the desired low temperature is displayed. Press and hold the LO button to rapidly ad-
vance the display in 5° increments.
ALARM
The unit will sound the alarm in both NORMAL DISPLAY MODE and ALARM DISPLAY MODE
DISPLAY MODE. Slide the ALARM ON/OFF switch to ON. When the current temperature display rises above the HI set point, or falls
below the LO set point, the alarm will sound for 1 minute and issue a 3 second repeater beep every minute thereafter, for up to 12 hours.
The alarm will continue to sound even if the current temperature display returns to an “in range” condition.
To temporarily silence the alarm press either the HI or LO button on the back of the unit. The unit is still active and the alarm will sound
again if the temperature goes out of range. To permanently silence the alarm, slide the ALARM ON/OFF switch to OFF position.
OPERATION MODES
SUMMIT alarms have two operating modes: NORMAL AND DISPLAY
DISPLAY MODE and ALARM DISPLAY MODE. To change from one mode to another press the MODE button once.
NORMAL DISPLAY MODE - is indicated by the display of current temperature and the MIN (minimum) and MAX (maximum) tempera-
tures. These temperatures relate to external (probe) temperature if the probe is plugged in, and to ambient temperature if the sensor
probe is removed.
ALARM DISPLAY MODE - is indicated by the display of current temperature and the HI and LO alarm settings. These temperatures re-
late to external (probe) temperature if the probe is plugged in, and to ambient temperature if the sensor probe is removed.
RESETTING THE UNIT
Use a pointed object to push the RESET button on the back of the unit. It is necessary to reset the unit whenever a change is made to
°C/°F temperature, FAST/NORMAL sampling rate, or the probe sensor is plugged in or removed.
NOTE: HI/LO temperature alarm settings and MIN/MAX memories will be cleared after resetting the unit.
SELECTING THE SAMPLING RATE
To select normal sampling rate (60 seconds) or fast sampling rate (10 seconds) slide the switch on back of unit to NORMAL or FAST
NOTE: The unit must be reset after changing the sampling rate. Using the NORMAL sampling rate will extend battery life.
RESETTING MIN/MAX MEMORIES
There are two ways to reset the memories:
I. To reset both minimum and maximum memories - press MEMORY CLEAR button. 2. To reset individual minimum and maximum
memories - press either the MIN or MAX button (on back of unit) once to reset the respective memory. The other memory will remain un-
affected. NOTE: You must be in Normal Display Mode to reset the memories.