


Felix Storch, Inc.
SUMMIT APPLIANCE DIV.
Page 11
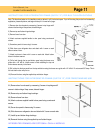
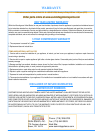
INSTRUCTIONS FOR INTREGRATED FRAME (SUFFIX ’IF’) FOR BUILT-IN APPLICATIONS
Note: The directions below are for installation under a cabinet in a 24 inch cutout space. If you will be using this product in a freestanding
application, please skip below, and begin with step A1 in lower half of page.
1) Remove door from chassis by unscrewing 3 screws in top hinge and 2
screws in bottom hinge. Keep screws, discard hinges.
2) Remove top and bottom hinge bushings.
3) Remove frame from door.
4) Attach customer supplied handle to door panel using countersunk
screws.
5) Screw door panel to frame using 14 screws.
6) Slide frame over refrigerator door and attach with 1 screw on each
side on center of door.
7) Attach top brace to frame with 1 screw on each side. Attach bottom
brace in the same manner.
8) Drill a hole through the top and bottom panel using the braces as a
guide with a 1/8” drill bit. Install screws to finish attaching the top and
bottom braces securely to the frame.
9) Drill a hole into the door panel from the top and bottom using the braces as a guide with 1/4” drill bit. Do not exceed 5/8” deep. This is
the hole that the door will pivot on.
10) Remount the door using the supplied top and bottom hinges.
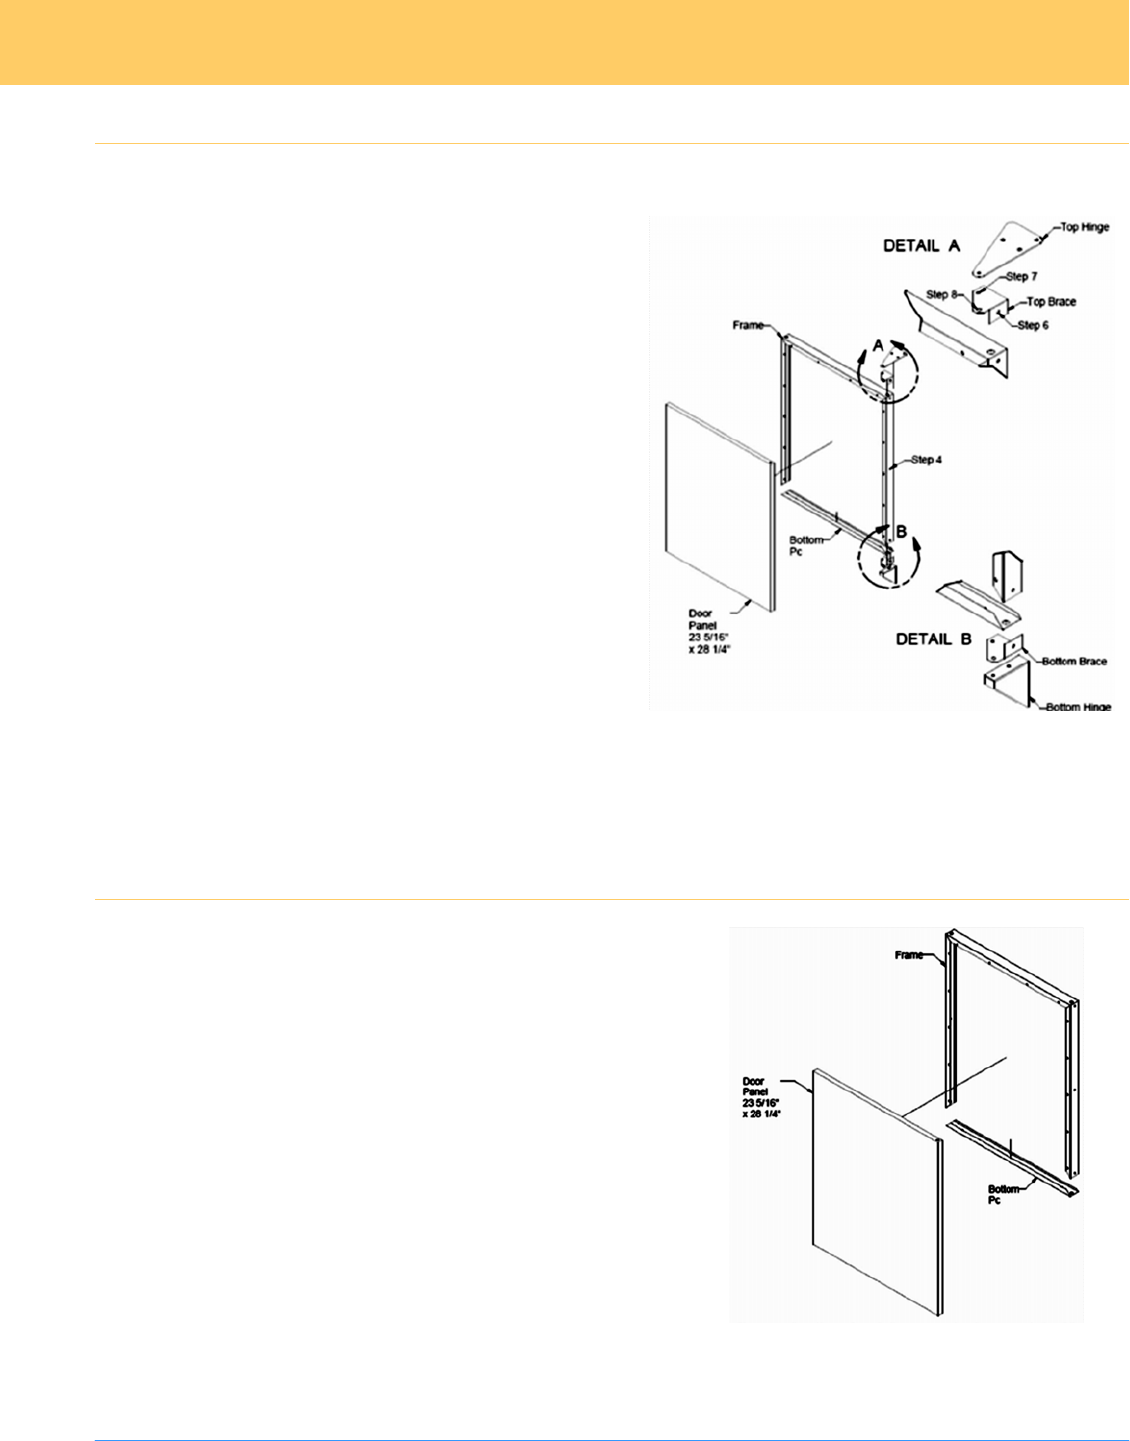
A1) Remove door from chassis by unscrewing 3 screws in top hinge and 2
screws in bottom hinge. Keep screws, discard hinges.
A2) Remove top and bottom hinge bushings.
A3) Remove frame from door.
A4) Attach customer supplied handle to door panel using countersunk
screws.
A5) Screw door panel to frame using 14 screws.
A6) Slide frame over refrigerator door and attach with 3 screw on each side
A7) Install top and bottom hinge bushings.
A8) Remount the door using the supplied top and bottom hinges.
INSTRUCTIONS FOR INTREGRATED FRAME (SUFFIX ’IF’) FOR FREESTANDING USE
INTEGRATED FRAMES ARE OPTIONAL ON ALL MODELS.