


Felix Storch, Inc.
SUMMIT APPLIANCE DIV.
Page 5
In order to ensure proper temperature, you need to permit proper airflow in the appliance. Do not block any air
vents. If the vents are blocked, airflow will be prevented, and temperature and moisture problems may occur.
Always position contents to allow some airflow between shelves or baskets.
Allow the appliance to cool at least 6 to 8 hours before adding contents. Allow 24 hours for temperature to
stabilize.
NOTE: When the appliance is first started, the compressor will run constantly until the appliance is cold, It may
take up to 6 or 8 hours (or longer), depending on room temperature and the number of times the appliance door is
opened. After the appliance is cooled, the compressor will turn on and off as needed to keep the appliance at the
proper temperature.
The outside of your appliance may feel warm. This is normal. The appliance’s design and main function is to
remove heat from packages and air space inside the appliance. The heat is transferred to the room air, making the
outside of the appliance feel warm. In some models the condenser that gets warm is inside the side walls, making
these walls warm to the touch.
REVERSING THE DOOR SWING (Selected models)
If you find the direction of opening the door on your appliance inconvenient, on some models you can change it.
Holes on the opposite side have already been prepared in the factory. On models with our wrapped stainless steel
door and 12 inch pro handle, (suffix SSTB, SSVH or CSS or with optional handles “TB” or “SH” ) you must order
these with either a right hand or left hand door swing in advance. These doors cannot be reversed. Models with a
suffix SSHH, BIFR, BIIF, and CSSHH can be reversed.
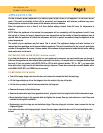
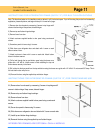
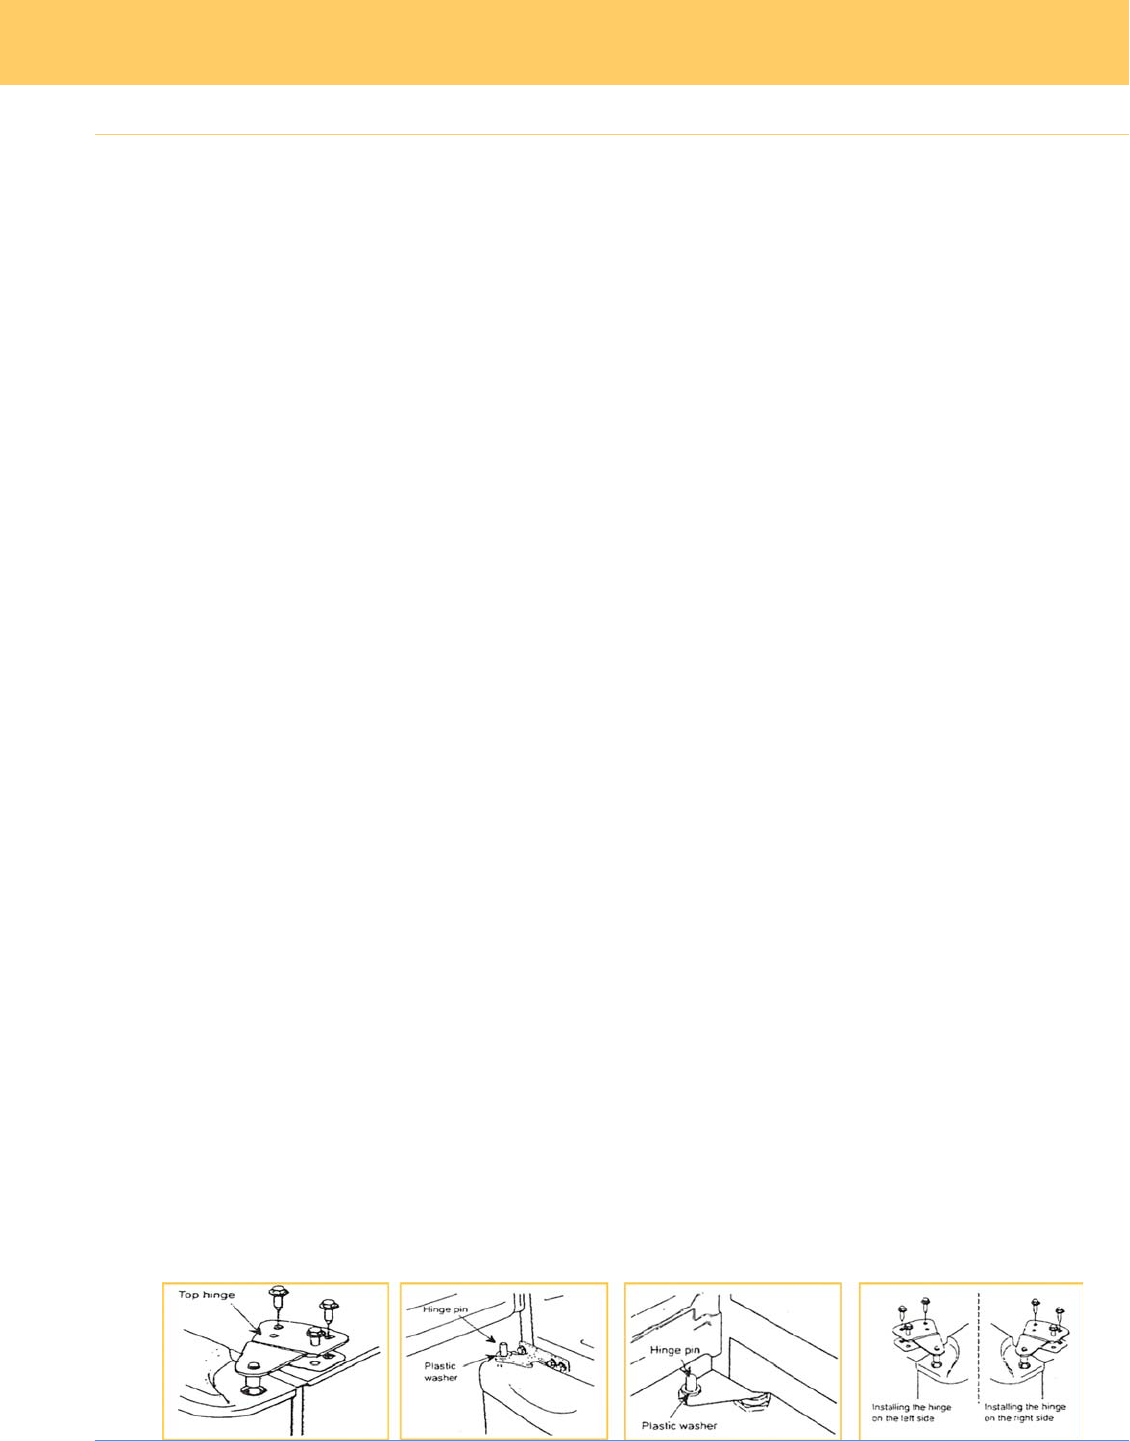
TO REVERSE YOUR DOOR
• Take off the upper hinge cover from the door and remove the screws that hold the top hinge.
• Lift the hinge straight up to free the hinge pin from the socket in the top of the door.
• Lift the door up away to free its bottom socket from the hinge pin.
• Remove the screws to the bottom hinge.
• Remove the decorative caps from opposite side and plug the holes from original side with the decorative caps.
• Move the bottom hinge to the opposite side and tighten the screws. Use any lock washers or nuts if they were
installed in the original installation.
• Replace door onto the hinge pin on the bottom hinge. Place top hinge pin into door. Insert screws into the top
hinge and tighten.
If you notice the door not hanging straight—loosen the top hinges, adjust the door until it is level and tighten the
screws.
APPLIANCE USE