11
5. Appuyez deux fois sur le bouton SELECT (de sélection) pour régler la cafetière
à BREW ONLY (infusion seulement). Le témoin BREW ONLY s’allumera, signe
d’infusion. Le signal sonore de café prêt émet trois bips pour signaler que l’infusion
est terminée. La cafetière se met automatiquement hors tension au bout de deux
heures durant lesquelles le témoin d’infusion seulement reste allumé.
REMARQUE: Par mesure de sécurité, la cafetière s’éteint automatiquement si
son couvercle est ouvert durant le broyage ou l’infusion. En ce cas, vous devez
recommencer le cycle de broyage en appuyant une fois sur le bouton SELECT ou
bien en appuyant deux fois sur SELECT pour recommencer le cycle d’infusion.
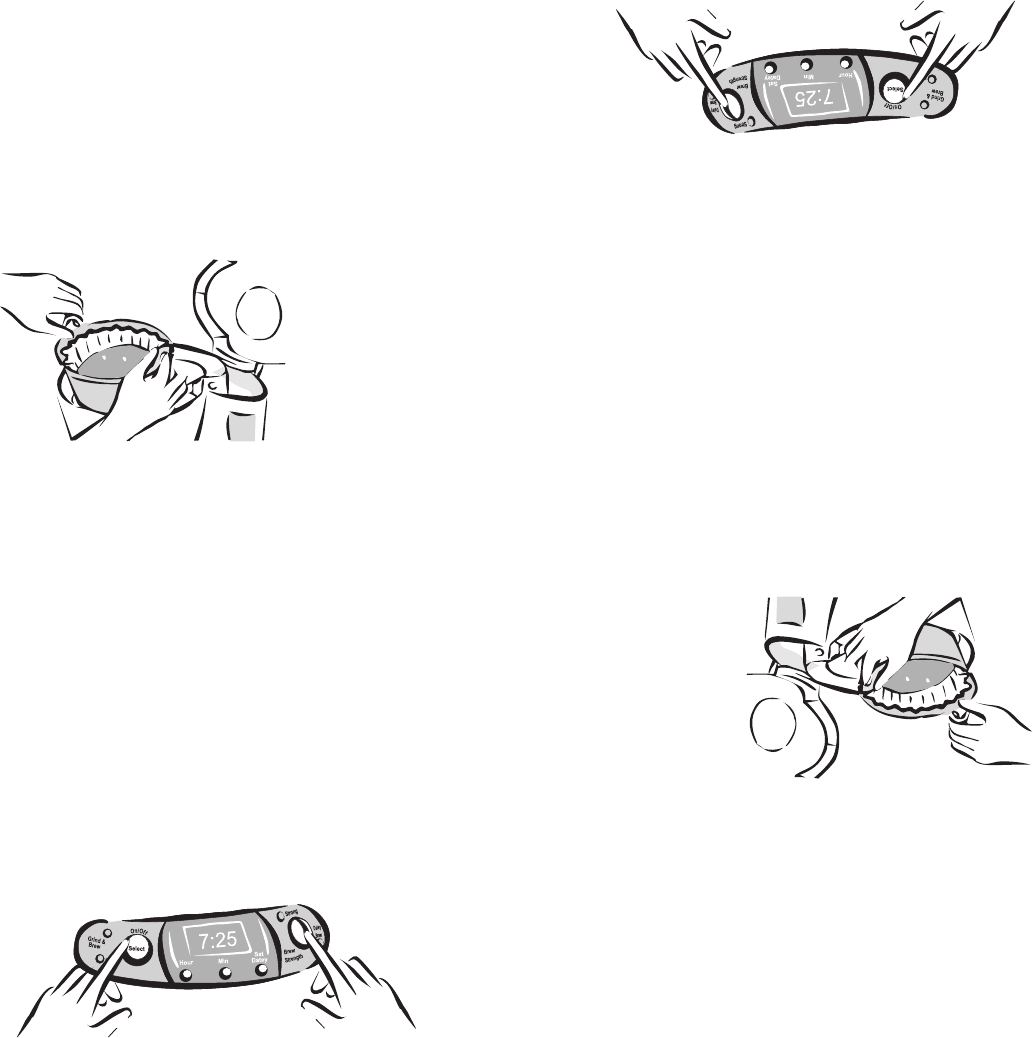
6. Lorsque vous avez fini de déguster le café, retirez l’ensemble de la chambre de
broyage, levez le porte-filtre et jetez le marc. Rincez le porte-filtre et remettez-le en
place. Voyez la figure 8.
Figure 8
REMARQUE: La plaque chauffante s’éteint à l’ouverture du couvercle de la cafetière.
7. Pour infuser plus de café, mettez la cafetière hors tension en appuyant sur SELECT
jusqu’à ce que tous les témoins soient éteints. Répétez les directives de 1 à 6.
8. N’oubliez pas de mettre la cafetière hors tension quand elle a fini de servir. Pour ceci
appuyez sur le bouton SELECT jusqu’à ce que tous les témoins soient éteints.
Infusion différée, avec mouture de café
1. Réglez l’heure à laquelle vous désirez que l’infusion débute (voyez en page 7).
2. Observez les instructions des paragraphes de 1 à 4 sous «Infusion immédiate, avec
mouture de café», en page 10.
3. Appuyez sur le bouton DELAY BREW (infusion différée) jusqu’à ce qu’il clignote.
Appuyez deux fois sur SELECT, le témoin BREW ONLY (infusion seulement)
s’allumera et le témoin DELAY BREW restera allumé, mais sans clignoter. La
cafetière est ainsi réglée pour infuser à heure choisie. Voyez la figure 9. Choisissez
alors la force voulue du café.
Figure 9
11
5. Press the SELECT button twice to set the coffeemaker to BREW ONLY. The
BREW ONLY light will turn on to signal that the coffeemaker is brewing. The
audible Ready Signal will beep three times when the brew cycle is complete. The
coffeemaker will automatically turn off after two hours. The BREW ONLY light
will remain on during this time.
NOTE: For your safety, if the lid is opened during the grind or brew cycle, the
coffeemaker will turn itself off. If this happens, you must restart the grind cycle by
pressing the SELECT button once or restart the brew cycle by pressing the SELECT
button twice.
6. Once you are done enjoying your coffee, discard the used grounds by removing the
grinding chamber assembly and lifting out the filter basket. Rinse the filter basket
and replace it. See Figure 8.
Figure 8
NOTE: When you open the coffeemaker lid, the warming plate will turn off.
7. To make another pot of coffee, turn the coffeemaker off by pressing the SELECT
button until all operating lights are off. Repeat steps 1 through 6.
8. Be sure to turn your coffeemaker off when no longer using it. Simply press the
SELECT button until all operating lights are off.
Brewing Coffee Later:
Using Pre-Ground Coffee
1. Set the DELAY BREW timer (see page 7).
2. Follow Steps 1 through 4 in the “Brewing Coffee Now: Using Pre-Ground Coffee”
section on page 10.
3. Press the DELAY BREW button until it is flashing. Press the SELECT button twice
until the BREW ONLY light turns on and the DELAY BREW light remains on but
stops flashing. The coffeemaker is now set to automatically brew coffee at the pre-
set time. See Figure 9. Yo may select the brew strength at this time.
Figure 9


