19
Models 340, 341, 342 Operating Procedures
071017
Disassembly
MAKE SURE CONTROL SWITCH IS IN THE
“OFF” POSITION. Failure to do so may cause injury
from electrocution or hazardous moving parts .
Step 1
Remove the torque arm, handscrews, freezer door,
torque rotor, beater assembly, scraper blades, and the
drive shaft from the freezing cylinder. Take these parts
to the sink for cleaning.
Step 2
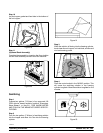
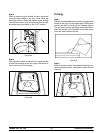
Remove the front drip tray and splash shield and take
them to the sink for cleaning.
Figure 39
Brush Cleaning
Step 1
Prepare a sink with an approved cleaning solution (Ex-
amples: Stera--SheenR or Kay-5R). USE WARM
W ATER AND FOLLOW THE MANUFACTURER’S
SPECIFICATIONS.
If an approved cleaner other than Stera--SheenR or
Kay-5R is used, dilute according to label instructions.
IMPORTANT: Follow label directions, as too
STRONG of a solution can cause parts damage, while
too MILD of a solution will not provide adequate
cleaning. Make sure all brushes provided with the
freezer are available for brush cleaning.
Step 2
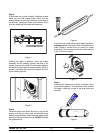
Remove the o-ring and seal from the drive shaft.
Note: To remove o-rings, use a single service towel to
grasp the o-ring. Apply pressure in an upward direction
until the o-ring pops out of its groove. With the other
hand, push the top of the o-ring forward and it will roll
out of the groove and can be easily removed.
If there is more than one o-ring to be removed, always
remove the rear o-ring first. This will allow the o-ring to
slide over the forward rings without falling into the open
grooves.
Step 3
Remove the restrictor cap, draw valve handle, draw
valve pin, draw valve, front bearing, ice buster , and
gasket from the freezer door . Remove the two o-rings
from the draw valve. Remove the o-ring and guide
bearing from the torque rotor.
Step 4
Thoroughly brush clean all disassembled parts in the
cleaning solution, making sure all lubricant and mix film
is removed. Place all the cleaned parts on a clean dry
surfacetoairdry.
Step 5
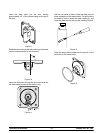
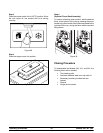
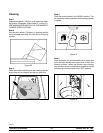
Return to the freezer with a small amount of cleaning
solution. With the black bristle brush, brush clean the
rear shell bearing(s) at the back of the freezing
cylinder(s).
Figure 40
Step 6
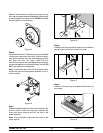
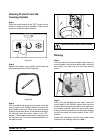
Remove the rear drip pan.
Note: If the drip pan is filled with an excessive amount
of mix, it is an indication that the drive shaft o-ring, seal
or both should be replaced or properly lubricated.
Step 7
Wipe clean all exterior surfaces of the freezer.


