


17
Model 430 Torque Operating Procedures
090114
Cleaning
Step 1
Prepare a pail of an approved 100 PPM cleaning
solution (examples: 2--1/2 gal. [9.5 liters] of Kay--5R
or 2 gal. [7.6 liters] of Stera--SheenR). USE WARM
W ATER AND FOLLOW THE MANUFACTURER’S
SPECIFICATIONS.
Step 2
Pour the cleaning solution into the hopper and allow it
to flow into the freezing cylinder.
Step 3
While the solution is flowing into the freezing cylinder,
brush--clean the mix hopper and mix inlet hole.
Step 4
Place the power switch in the “WASH” position. This
will agitate the cleaning solution in the freezing
cylinder.
Step 5
Place an empty pail beneath the door spout and move
the draw handle to the right. Draw off all the cleaning
solution. When the solution stops flowing from the door
spout, move the draw handle to the left, and place the
power switch in the “OFF” position.
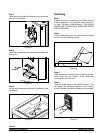
Disassembly
Step 1
BE SURE THE CONTROL SWITCH IS IN THE “OFF”
POSIT ION.
Step 2
Remove the handscrews, freezer door, beater
assembly, torque rotor, scraper blade and drive shaft
from the freezing cylinder. Take these parts to the sink
for cleaning.
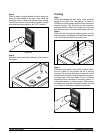
Step 3
Remove the front drip tray and the splash shield. Take
these parts to the sink for cleaning.
Step 4
Remove the rear drip pan from the front panel.
Note: If the drip pan is filled with an excessive amount
of mix, it is an indication the drive shaft seal should be
replaced or properly lubricated.
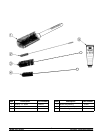
Brush Cleaning
Step 1
Prepare a sink with a cleaning solution (examples:
Kay--5R or Stera--SheenR). USE WARM WATER
AND FOLLOW THE MANUFACTURER’S SPECIFI-
CATIONS. (If another approved cleaner is used, dilute
according to label instructions. IMPORTANT: Follow
the label directions. Too STRONG of a solution can
cause parts damage, while too MILD of a solution will
not provide adequate cleaning.) Make sure all brushes
provided with the freezer are available for brush
cleaning.
Step 2
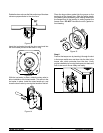
Remove the o--ring and seal from the drive shaft.
Remove the o--ring and the bearing from the torque
rotor.
Step 3
Remove the draw valve, ice buster, front bearing, and
gasket from the freezer door. Remove all o--rings.
Note: To remove the o--ring, use a s ingle s ervice
towel to grasp the o--ring. Apply pressure in an upward
direction until the o--ring pops out of its groove. With
the other hand, push the top of the o--ring forward until
it rolls out of the groove and can be removed easily.
Step 4
Thoroughly brush--clean all disassembled parts in the
cleaning solution, making sure all lubricant and mix film
is removed. Place all the cleaned parts on a clean, dry
surfacetoairdry.
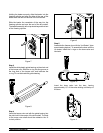
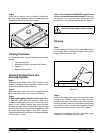
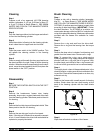
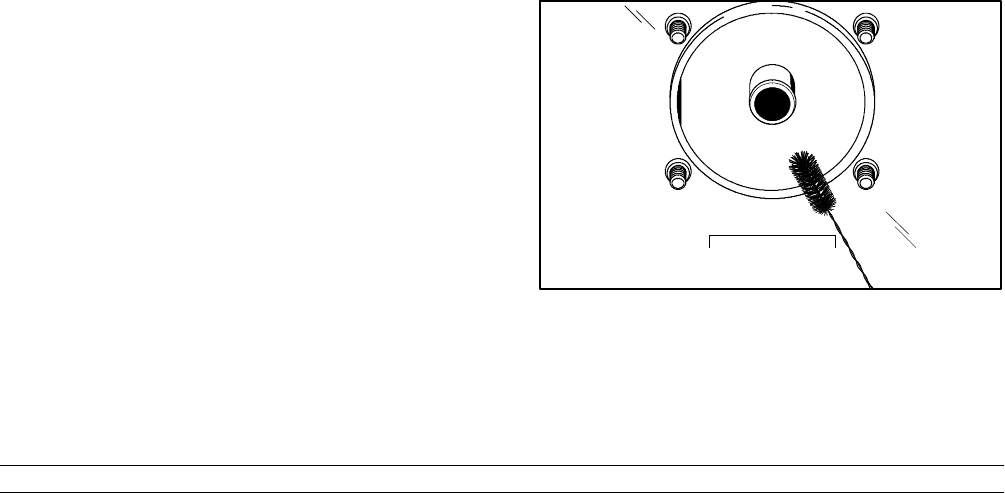
Step 5
Return to the freezer with a small amount of cleaning
solution. Brush--clean the rear shell bearing at the
back o f the freezing cylinder with the black b ristle
brush.
Figure 28
Step 6
Wipe clean all exterior surfaces of the freezer.