


Page 6
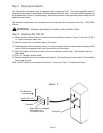
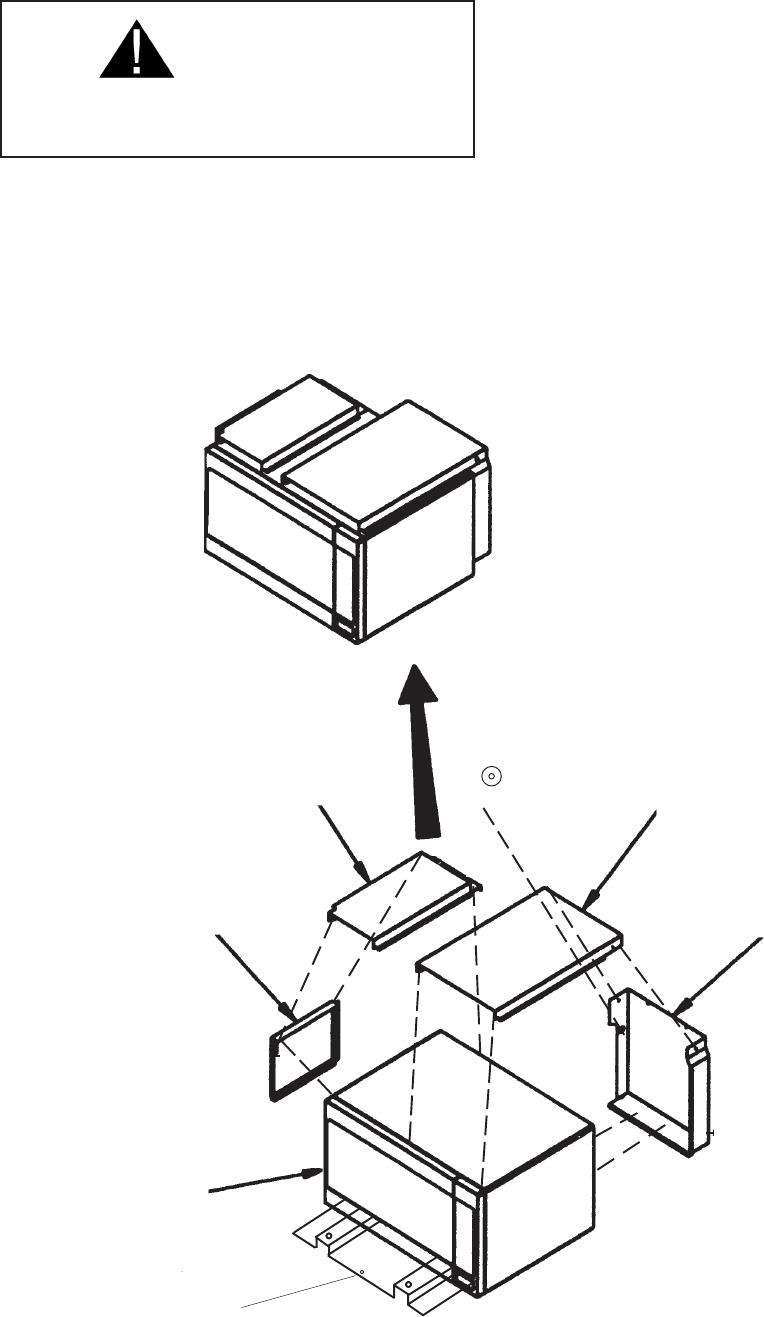
Step 5: Installing The Ducts
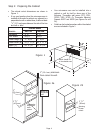
Figure 4
Microwave
Oven
Top
Intake
Duct
Rear
Intake
Duct
Outer Case Screw
Side
Duct
Upper
Exhaust
Duct
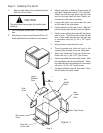
1. Remove and discard the protective plastic
film from the 4 ducts.
CAUTION
The ducts have sharp edges. Be careful when
handling.
Base Pan
(center hole)
Grommet
2. Set microwave upside down in stable loca-
tion.
3. Use pliers to remove and discard all four (4)
black plastic feet from bottom of microwave.
4. Attach base pan to bottom of microwave at
leg holes. Fasten with two (2) 7/16" lag bolts.
Install one bolt through front right leg hole
and one through back left hole. Return mi-
crowave to right-side-up position.
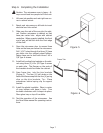
2. Loosen the outer case screw near the vent
on left side of the microwave.
3. Position side duct on left side of oven. Slide duct
under loosened outer case duct screw and tighten.
4. Position upper exhaust duct on top left side (hinge
side) of oven. The left side will overlap the side
duct. Fasten upper exhaust duct and side duct
to microwave using two (2) #8 x 3/8" Type B
screws.
5. Wrap grommet around electrical cord.
6. Thread grommet and electrical cord in the
receiving hole provided in the rear intake duct.
7. Attach rear intake duct to the rear of the oven.
Fasten with one (1) #8 x 3/8" Type B screw.
6. Position top intake duct on top side of oven. Slide
the back edges under the rear intake duct. Fasten
top intake duct and rear intake duct to microwave
using four (4) #8 x 3/8" Type B screws.
7. Use tape provided to cover all duct seams. Verify
that all seams are tightly sealed.