


13
7.Débrancher le four et le laisser refroidir intégralement avant de procéder au
nettoyage. Veuillez consulter les Consignes d’entretien par l’utilisateur.
Débrancher le four lorsqu’il ne sert pas.
REMARQUE : Pour modifier le degré de grillage en mode gril, il est nécessaire de
reprendre la séquence de programmation au point de départ. Appuyer sur le
bouton d’arrêt ‘Stop’. La température par défaut du mode gril ‘Broil’
apparaît dans la fenêtre d’affichage. Sélectionner le temps de cuisson
souhaité, puis appuyer sur le bouton de marche ‘Start’ pour que le
processus de grillage reprenne.
REMARQUE : Toujours utiliser la plaque à griller et la plaque de
cuisson/lèchefrite en mode gril ‘Broil’.
Conseils de grillage
• Le Four/Gril et grille-pain à convection ne peut griller les aliments que
lorsqu’un temps de cuisson a été sélectionné. Si vous ne sélectionnez pas le
temps de cuisson et que vous appuyez sur le bouton de marche ‘Start’, le
Four/Gril et grille-pain à convection émet un bip sonore pour indiquer que le
temps de cuisson n’a pas été sélectionné.
•Retourner les aliments à mi-cuisson durant le programme de grillage.
•Toujours utiliser la plaque à griller et la plaque de cuisson/lèchefrite en mode
gril ‘Broil’.
Programmation du brunissage des aliments ‘Top Brown’
Pour faire brunir les aliments, suivre les consignes de grillage du pain décrites ci-
dessus en plaçant toutefois les aliments à l’intérieur du plat de cuisson et sur la
grille métallique.
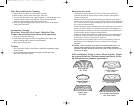
Conseils de brunissage
• Vérifier la cuisson des aliments afin d’éviter qu’ils brunissent trop.
•Vous pouvez faire brunir la croûte des baguels (côté coupé vers le haut,
les muffins anglais, ou encore du fromage fondu sur des sandwiches ou
des ragoûts.
Programmation du mode gril ‘Broil’ (suite)
Programming Fan Bake and Bake Functions
1. Plug unit into a 120 V outlet. Close the Glass Door.
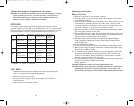
2. Press the BAKE or FAN BAKE button to select desired program.
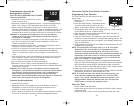
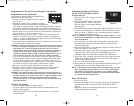
3. The default temperature for FAN BAKE and BAKE functions is 300˚F
(This will appear on the Display Window). To change the
temperature for Fan Bake and Bake, press the ᭡ Up or
᭢
Down
arrow to select the desired temperature. The temperature will go
up or down by 25˚F at a time. (See Figure 4.)
4. To enter the cooking time, press the TIME/TEMP button. The
default cooking time of 1:00 (1 hour) will appear in the Display
Window. Set the cooking time by pressing the ᭡ Up or
᭢
Down
arrow to reach the required amount of time needed. To advance
the numbers more quickly, press the ᭡ Up or
᭢
Down arrow
continuously and the numbers will advance in 5 minute intervals.
5
.
To use the Fan Bake or Bake program, select the desired temperature
and press START. The Operation Light will be on and the letter “P” will
flash in the Display Window. Once the Convection Toaster Oven Broiler
has reached its pre-selected temperature, it will beep and the letter “P”
will stop flashing in the Display Window.
6. Open the Glass Door and place your food in the Convection Toaster
Oven Broiler. Press START. The Timer will begin to count down and
the colons will flash. The Convection Toaster Oven Broiler will
maintain the preheat temperature for up to 30 minutes if the
Glass Door has not been opened. After 30 minutes the Oven will
shut off automatically.
7. When the Timer has counted down to zero (0), the Convection
Toaster Oven Broiler will beep and the Operation Light will flash
continuously to indicate the program is completed. Open the Glass
Door and press STOP. The Operation Light will shut off. Use oven
mitts to remove hot pan, Wire Rack and food. Close the Glass
Door. Press STOP again to return to the CLOCK function.
8. Unplug Oven and allow to cool completely before cleaning. See
User Maintenance Instructions. Unplug when not in use.
NOTE: To change cooking time or temperature during the preheat
process or baking process, you must start the programming
sequence over. Press the STOP button. The default Bake or Fan
Bake temperature will appear in the Display Window. Change
time or temperature and press the START button to resume the
preheating or baking process.
11
Figure 4
RH_RHTOV211CAN_IB_13-5-05 5/13/05 5:42 PM Page 23