


1115WC, 1175WC 15
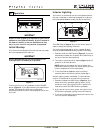
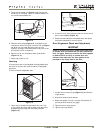
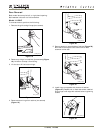
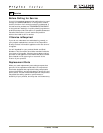
4. Clean the condenser coil
(Figure 13, 2)
using a soft
brush with a “combing” action or vacuum cleaner. Do
not touch the condenser coil.
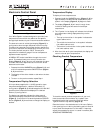
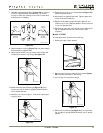
Figure 14
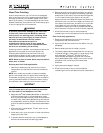
5. Place the hook-hinge
(Figure 14, 1)
located on the
rear bottom side of the grille onto the front lip
(Figure
14, 2)
of the unit base. Swing the grille up into
position, and align the screw holes on the grille to the
grille screw hole on the cabinet.
6. Secure, but do not overtighten both grille screws
(Figure 14, 3)
.
7. Reconnect power to unit.
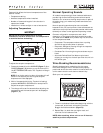
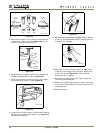
Leveling
It is important that units equipped with adjustable feet
are level, for proper door and ice maker (if equipped)
operation.
To level units with adjustable feet:
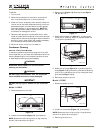
Figure 15
1. Use a level to check the levelness of the unit from
front to back and from side to side. Level should be
placed along top edge and side edge as shown
(Figure 15).
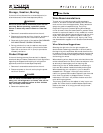
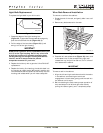
Figure 16
2. If the unit is not level, adjust the feet on the corners of
the unit as necessary
(Figure 16)
.
3. Check the levelness after each adjustment and repeat
the previous steps until the unit is level.
Door Alignment Check and Adjustment
IMPORTANTIMPORTANT
Properly aligned, the door’s gasket should be firmly
in contact with the cabinet all the way around the
door (no gaps). Carefully examine the door’s gasket
to assure that it is firmly in contact with the
cabinet. Also make sure the door gasket is not
pinched on the hinge side of the door.
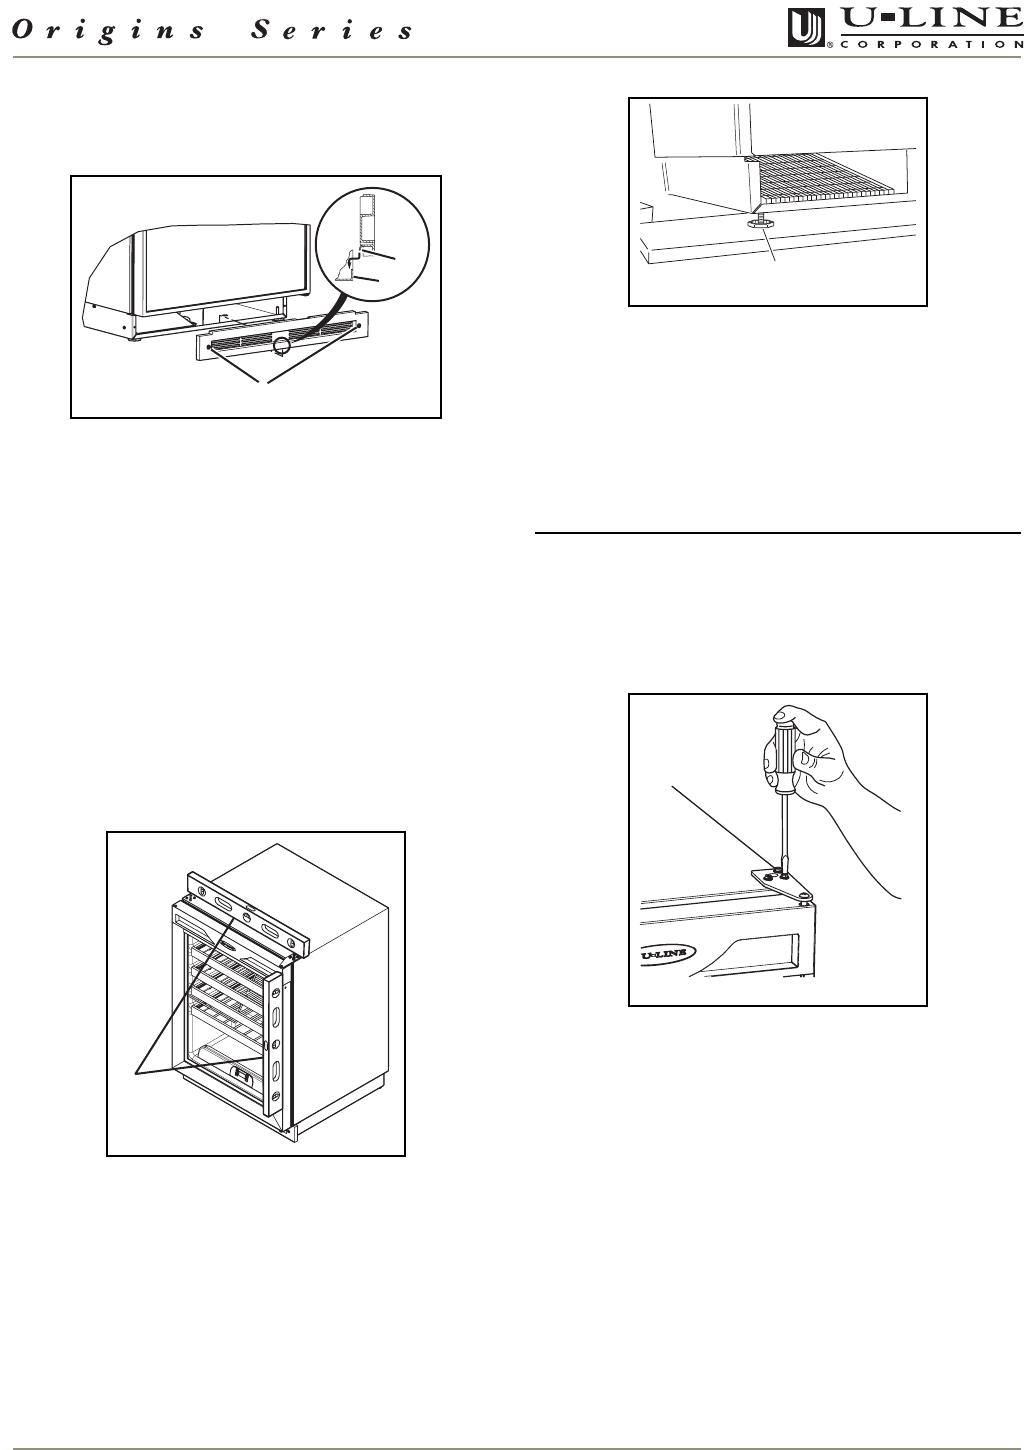
Figure 17
1. Loosen (do not remove) top (Figure 17) and bottom
hinge screws.
2. Align door squarely with cabinet.
3. Make sure gasket is firmly in contact with cabinet all
the way around the door (no gaps).
4. Tighten bottom hinge screws.
5. Tighten top hinge screws.
2
1
ULIN_0159_A
3
ULIN_0183_A
1
1
ULIN_0042_A
ULIN_0143_A
ULIN_016357_30088.fm Page 15 Tuesday, March 14, 2006 2:17 PM