1115WC, 1175WC 9
Factors which affect the internal temperatures of the
cabinet include:
• Temperature setting.
• Ambient temperature where installed.
• Number of times and length of time the door is
opened and closed.
• Installation in direct sunlight or near a heat source.
Adjusting Temperature
IMPORTANTIMPORTANT
Adjust the set-point temperature in single
increments, and wait 24 hours for the temperature
to stabilize before rechecking.
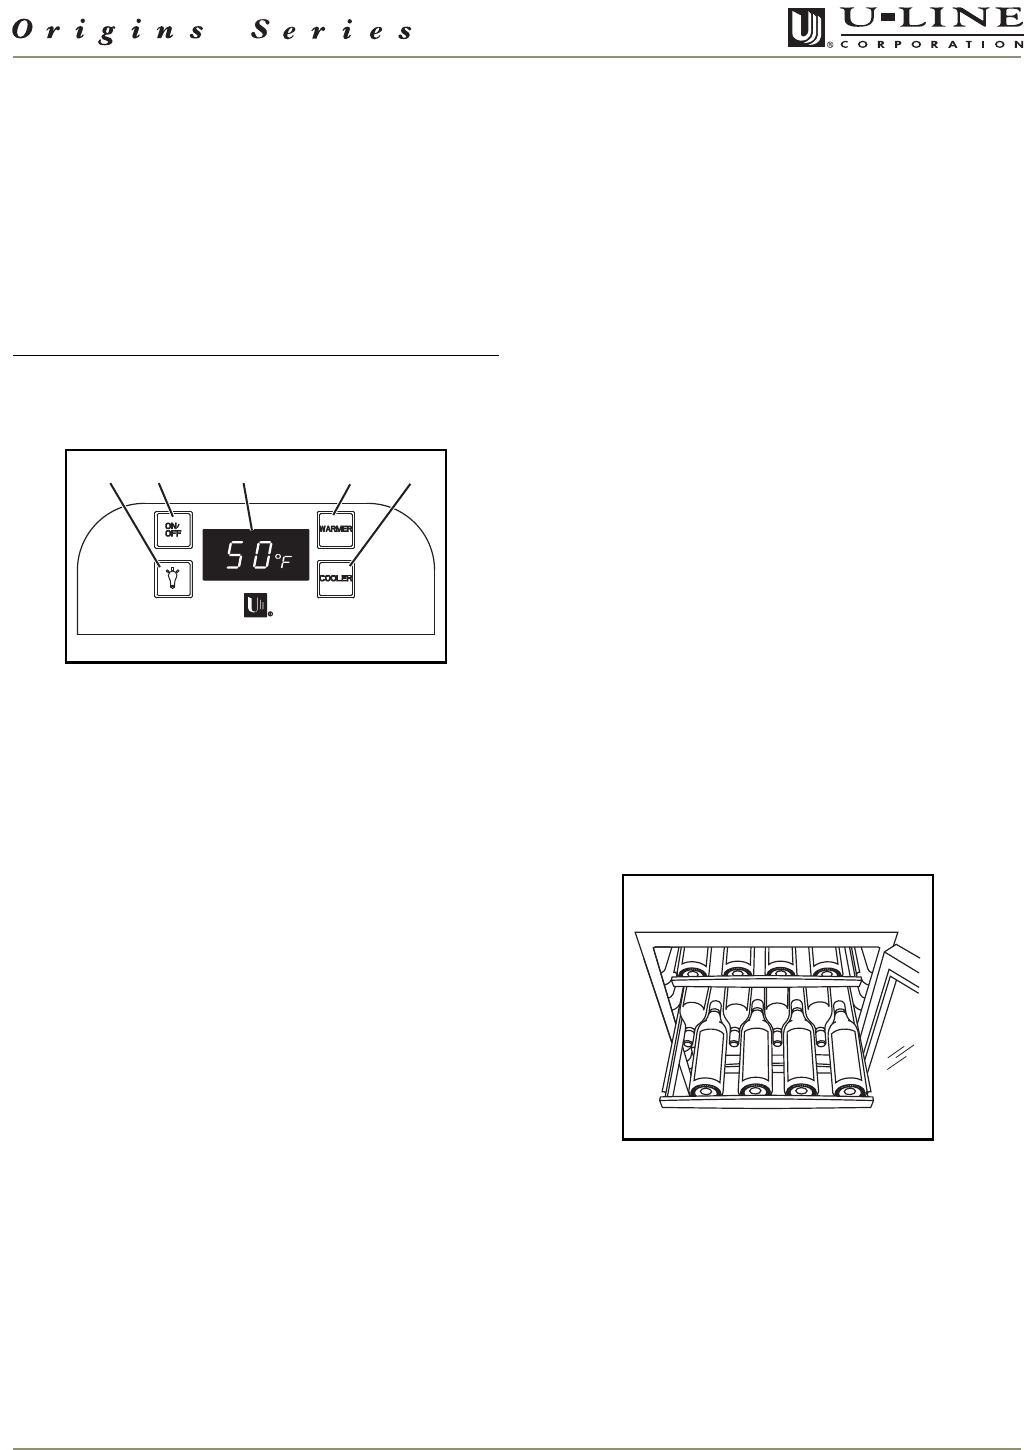
Figure 7
To adjust the set-point temperature:
1. Press and release either the WARMER (Figure 7, 4) or
COOLER (Figure 7, 5) button to put the controller in
the SET TEMPERATURE mode. The °F symbol will begin
to flash.
NOTE: If no further action is taken, this mode will self
cancel in five seconds, and the original set-point
temperature will be displayed.
2. Within five seconds (while the °F symbol is flashing),
press the WARMER or COOLER button as required to
adjust the set-point temperature.
3. The change will be set five seconds after adjusting the
temperature and the new set-point will be displayed
(Figure 7, 3)
.
Normal Operating Sounds
All models incorporate rigid foam insulated cabinets to
provide high thermal efficiency and maximum sound
reduction for its internal working components. In spite of
this technology, your model may make sounds that are
unfamiliar.
Normal operating sounds may be more noticeable
because of the unit’s environment. Hard surfaces such as
cabinets, wood/vinyl/tiled floors and paneled walls have a
tendency to reflect normal appliance operating noises.
Common refrigeration components, and a brief
description of the normal operating sounds they make,
are listed below. NOTE: Your product may not contain all
of the components listed.
• Compressor: The compressor makes a hum or pulsing
sound that may be heard when it operates.
• Evaporator: Refrigerant flowing through an evaporator
may sound like boiling liquid.
• Condenser Fan: Air moving through a condenser may be
heard.
• Automatic Defrost/Drain Pan: Water may be heard
dripping or running into the drain pan when the unit is in
the defrost cycle.
Wine Stocking Recommendations
Specially designed wine racks allow for the proper
horizontal storage of wine. The bottles are properly
positioned so that the wine remains in contact with the
cork to assure that the cork does not become dry.
Stock your unit as follows:
Figure 8
1. The wine racks should be stocked beginning with the
lowest rack, at the back, and working forward.
Stagger the bottles as shown (Figure 8).
2. Repeat Step 1 to stock the next higher rack, and
continue until all racks are filled.
NOTE: After stocking, allow unit to run 24 hours to
stabilize product temperatures.
54321
ULIN_0181_A
ULIN_0019_A
ULIN_016357_30088.fm Page 9 Tuesday, March 14, 2006 2:17 PM


