


02/2005 11 www.U-LineService.com
™
2015WC/2015WCOL Wine Captain
®
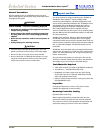
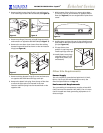
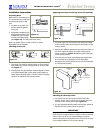
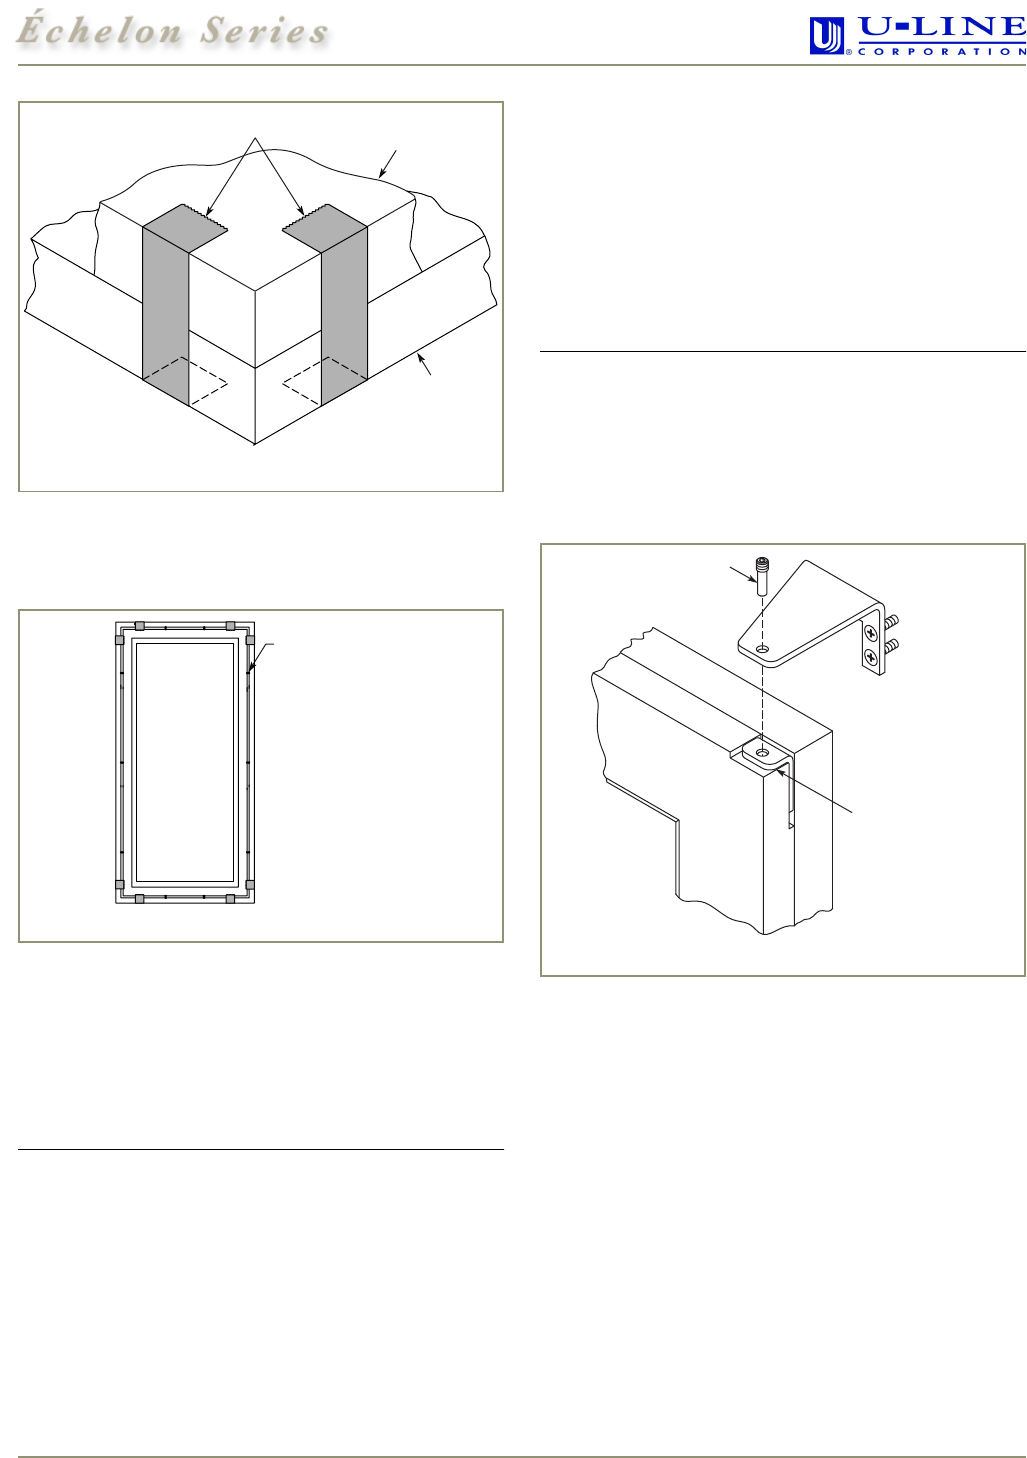
3. Secure the front of the door to the back of the overlay
frame using tape on all four corners, as shown in
Figure 20
. Make sure all four edges are aligned.
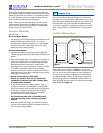
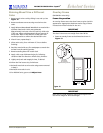
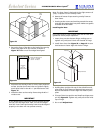
4. Place door and overlay frame on a flat, clean protective
surface. Use the door frame holes as a guide to lightly
punch pilot holes for the #6 x 1" pan-head screws. See
Figure 21
.
5. Attach the door to the overlay frame using the #6 x 1"
wood screws.
IMPORTANT
If you decide to drill pilot holes, remove the door and do
not use a drill bit larger than 7/64". Do not drill deeper
than 3/8". Door frame and overlay frame must be aligned
properly or the door will not operate correctly.
Note: The door frame is designed with a slight amount of
“play” to square it to the overlay frame.
6. Remove all traces of tape securing overlay frame to
door frame.
7. Starting at the corners and working toward the center,
push the door gasket back into place. Make sure gasket
is seated on all four sides.
Installing the Door
IMPORTANT
Pivot posts must be clean. Closers must also be clean and
greased to ensure proper operation.
1. Insert pivot post into bottom hinge, making sure to
tighten only until post is level with outside of hinge.
2. Install door closer. See Figure 26 on Page 12. Be sure
that bosses on closers align with holes in hinge.
3. Holding door upright with top of door tilted forward,
place hole of pivot plate onto bottom hinge screw pin.
Be sure that bosses on closers align with holes in pivot
plate.
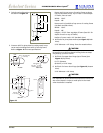
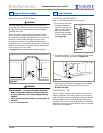
4. Tilt top of door into position and install top hinge screw
pin. See
Figure 22
. Tighten only until post is level with
top of hinge.
5. Go on to
5 Adjust Door
.
Door
Frame
Overlay
Frame
Tape
Figure 20
Rear View
of
Door and
Overlay Frame
Punch Pilot Holes
for use
with #
6 x 1" Pan-head
Screws
–
10 Places
Figure 21
Top Pivot Plate
Pivot Post
Figure 22