


2175BEVS/2175BEVOL Beverage Center
www.U-LineService.com 12 01/2007
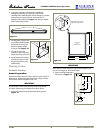
7. Starting at the corners and working toward the center,
push the door gasket back into place. Make sure gasket
is seated on all four sides.
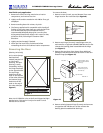
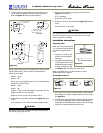
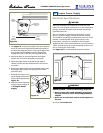
Installing the Door
IMPORTANT
Pivot posts must be clean. Closers must also be clean and
greased to ensure proper operation.
1. Insert pivot post into bottom hinge, making sure to
tighten only until post is level with outside of hinge.
2. Install door closer. See Figure 26 on Page 13. Be sure
that bosses on closers align with holes in hinge.
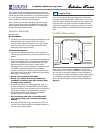
3. Holding door upright with top of door tilted forward,
place hole of pivot plate onto bottom hinge screw pin.
Be sure that bosses on closers align with holes in pivot
plate.
4. Tilt top of door into position and install top hinge screw
pin. See
Figure 22
. Tighten only until post is level with
top of hinge.
5. Go on to
5 Adjust Door
.
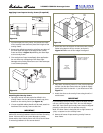
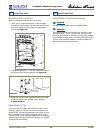
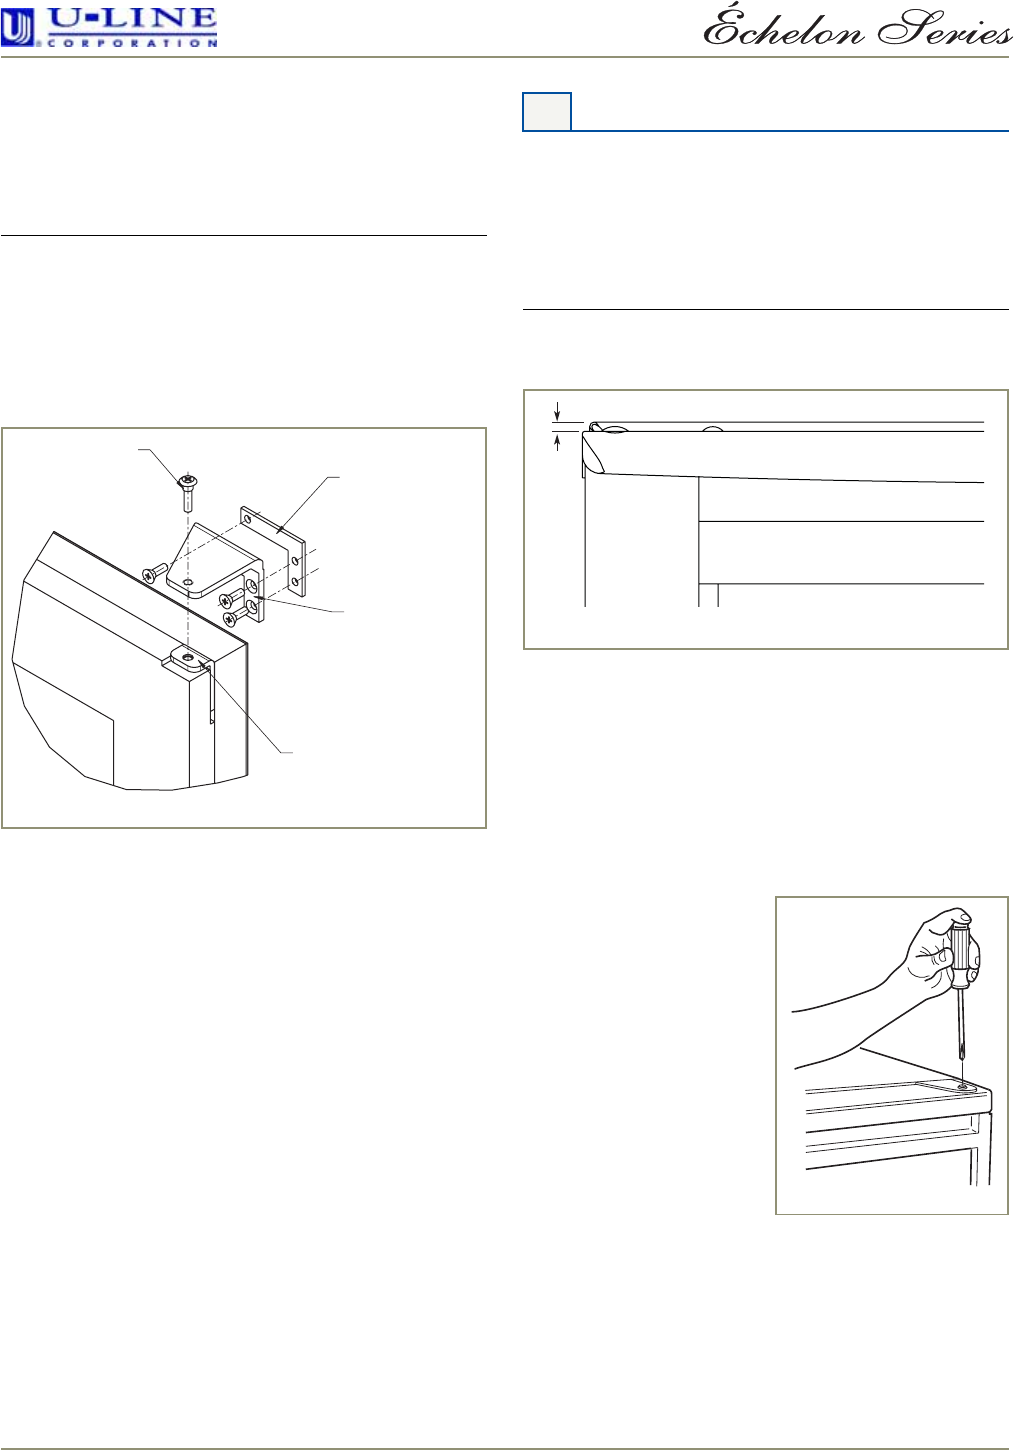
Checking Door Alignment
The unit’s door is aligned at the factory before shipment.
However, its alignment could have been disturbed during
shipment or during overlay frame installation.
IMPORTANT
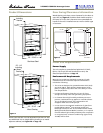
Properly aligned, the door should be 1/8" below the top of
the unit’s cabinet, NOT flush with the top (see
Figure 23
).
1. Compare the top edge of the door to the top edge of
the cabinet.
2. If the door edge is 1/8" below and parallel to the top of
the cabinet, go on to
6 Prepare Power Supply
. If it is
not, note whether the side opposite the hinge needs to
be moved UP or DOWN, and use the following
procedure.
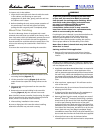
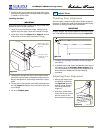
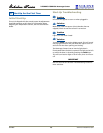
Adjusting Door Alignment
1. Remove top hinge screw
pin (Phillips screwdriver,
see Figure 24). Remove
door by tilting forward
and lifting off bottom
hinge pin.
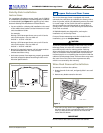
2. With door upside-down,
loosen but do not remove
the two screws on the
door’s bottom hinge plate.
Pivot Post
Backing plate for hinge
must be in place behind
each hinge
Flush mount screws
in bracket so you can
see head only
Top Pivot Plate
Figure 22
5 Adjust Door
1/8"
Figure 23
ULIN_0133_A
Figure 24